
Running PeerTube In Coolify
A few months ago, I moved my PeerTube instance over to Coolify, so that I could shutdown the Linux instance it was running on. I had a PeerTube instance for a little over a year, although I hardly posted anything on there and it’s never seen much traffic. I did want to keep it around though, as I had a few video embeds scattered around the internet. It just didn’t need to be on it’s own server.
This post is not about how I ported this instance over to Coolify. It’s been a few months, and several hours of trial and error to get that working. But I had been asked how one could setup their own PeerTube instance in Coolify, and I wanted a documented approach for how one could do so, should there be a need to spin up a new instance from scratch. PeerTube is not one of the builtin services that Coolify offers, at least at the time of this post, so a manual process to setting this up is required.
A few notes about the PeerTube instance you will have at the end of this process:
- The database and videos will be stored on the host’s file system. This should keep them persistent over container redeployments but will mean you’ll need to make sure the host’s file system is backed up somehow. Most VPS’s have a backup option, and PeerTube does offer a way to upload videos to an object store, although I’m not sure how to set that up.
- Email sending will be disabled. This works for me as I’m hosting these videos for myself, and I didn’t want to go through the trouble of deploying Postfix or paying for a hosted SMTP.
Note also that this is not the approach I took to setup my instance, so some things may not be correct or may require further efforts to get working properly. Consider this as more of a “getting starting” guide, rather a comprehensive go-to-production process.
Prerequisite
You will need:
- Coolify.
- A suitable Linux host managed by Coolify that meets PeerTube’s minimum specs. It can be the same host that’s running Coolify if necessary, but a separate one is probably worth considering, just so that it doesn’t interfere with Coolify itself.
- A domain name to use, for example “peertube-demo.lmika.xyz”.
I’d recommend using Caddy as a Coolify proxy so as to get automatic TLS certificates.
Docker Compose
We’ll be using a modified version of PeerTube’s Docker Compose file, with the .env file embedded and the Nginx deployments removed. A copy of the file is provided below:
x-env: &env
  environment:
    # Database / Postgres service configuration
    POSTGRES_USER: peertube
    POSTGRES_PASSWORD: <database-password>
    POSTGRES_DB: peertube
    PEERTUBE_DB_USERNAME: peertube
    PEERTUBE_DB_PASSWORD: <database-password>
    PEERTUBE_DB_SSL: false
    PEERTUBE_DB_HOSTNAME: postgres

    # PeerTube server configuration
    PEERTUBE_WEBSERVER_HOSTNAME: <peertube-domain>
    PEERTUBE_WEBSERVER_HTTPS: true
    PEERTUBE_WEBSERVER_PORT: 443
    # If you need more than one IP as trust_proxy
    # pass them as a comma separated array:
    PEERTUBE_TRUST_PROXY: '["127.0.0.1", "loopback", "172.18.0.0/16"]'

    PEERTUBE_OBJECT_STORAGE_UPLOAD_ACL_PUBLIC: "public-read"
    PEERTUBE_OBJECT_STORAGE_UPLOAD_ACL_PRIVATE: "private"

    # Generate one using `openssl rand -hex 32`
    PEERTUBE_SECRET: <random-string>

    #PEERTUBE_LOG_LEVEL=info

    # /!\ Prefer to use the PeerTube admin interface to set the following configurations /!\
    #PEERTUBE_SIGNUP_ENABLED=true
    #PEERTUBE_TRANSCODING_ENABLED=true
    #PEERTUBE_CONTACT_FORM_ENABLED=true

    # E-mail configuration
    # If you use a Custom SMTP server
    #PEERTUBE_SMTP_USERNAME:
    #PEERTUBE_SMTP_PASSWORD:
    # Default to Postfix service name "postfix" in docker-compose.yml
    # May be the hostname of your Custom SMTP server
    PEERTUBE_SMTP_HOSTNAME: postfix
    PEERTUBE_SMTP_PORT: 25
    PEERTUBE_SMTP_FROM: noreply@<peertube-domain>
    PEERTUBE_SMTP_TLS: false
    PEERTUBE_SMTP_DISABLE_STARTTLS: false
    PEERTUBE_ADMIN_EMAIL: <peertube-admin-address>

services:
  peertube:
    image: chocobozzz/peertube:production-bookworm
    <<: *env
    ports:
     - "1935:1935"
     - "9000"
    volumes:
      - ./docker-volume/data:/data
    depends_on:
      - postgres
      - redis
      # - postfix
    restart: "always"

  postgres:
    image: postgres:13-alpine
    <<: *env
    volumes:
      - ./docker-volume/db:/var/lib/postgresql/data
    restart: "always"

  redis:
    image: redis:6-alpine
    volumes:
      - ./docker-volume/redis:/data
    restart: "always"

  # Uncomment if you want to use postfix (I don't so I left it disabled)
  # postfix:
  #   image: mwader/postfix-relay
  #   <<: *env
  #   volumes:
  #     - ./docker-volume/opendkim/keys:/etc/opendkim/keys
  #   restart: "always"
Make a copy of this file in a text editor and replace the following placeholders:
<database-password>: Choose a suitable, preferably random, password to use for the database.<peertube-domain>: Your domain of choice, e.g.peertube-demo.lmika.xyz. This should be without the “https://”<random-string>: Generate a random string by runningopenssl rand -hex 32and use that here<peertube-admin-address>: This is unused but should be set to avoid server errors. Set it to something suitable, such asadmin@peertube.example.com.
Deploying The Service
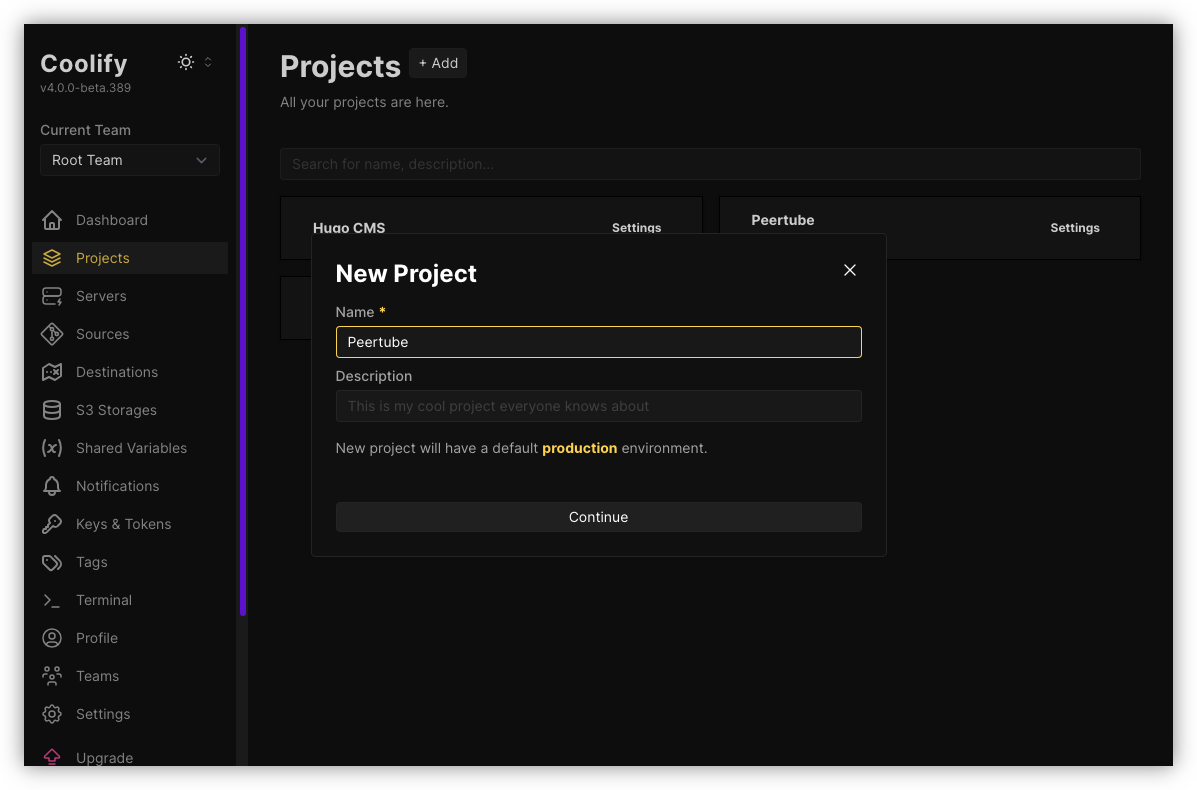
Log into Coolify, go to “Projects”, and click “Add”. Give your project a name then click “Continue”.
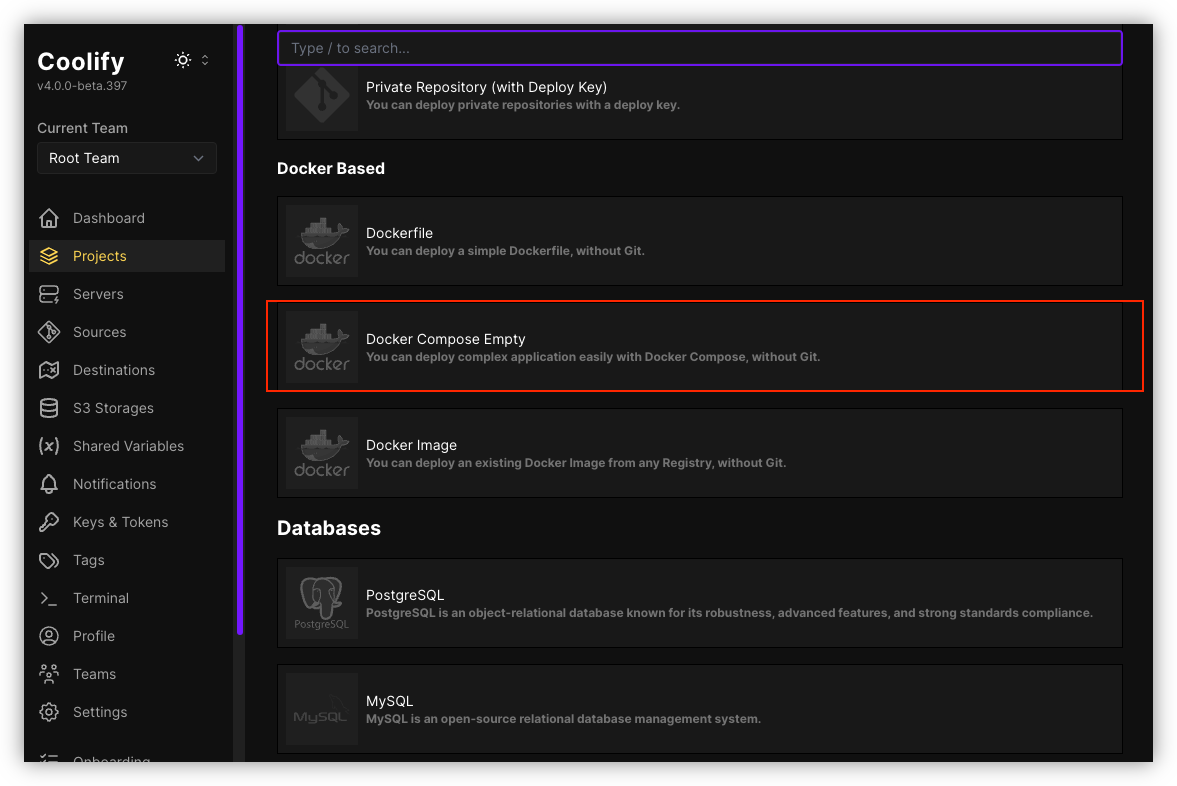
Within the project, add a new resource. The resource you’d want to choose is “Docker Compose Empty”.
Select the server you want to deploy PeerTube to, then copy and paste the compose file (make sure the placeholders are set).

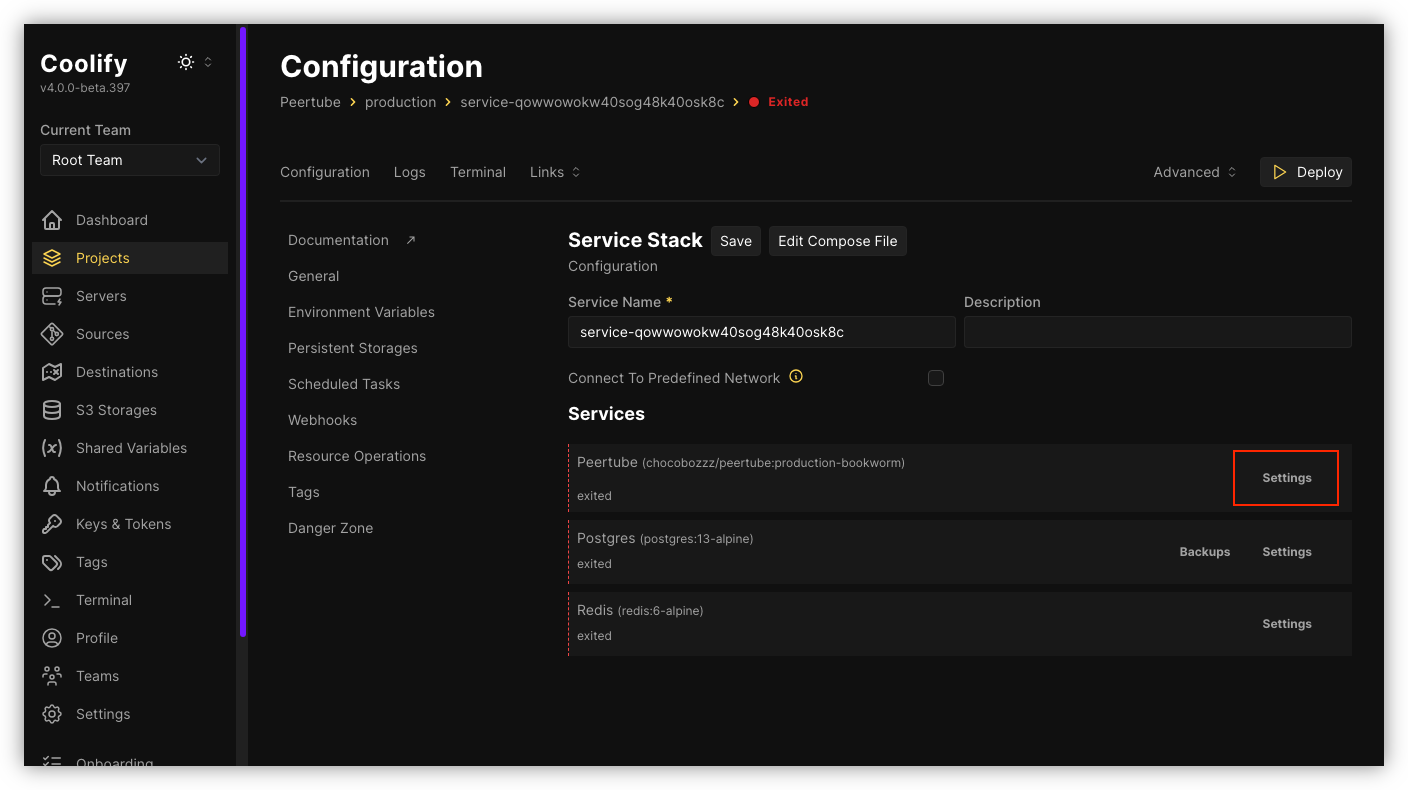
Before deploying, we’ll need to setup the proxy. In the Services list, locate the “PeerTube” one and click “Settings”.
In the “Domains” text field, enter https://<peertube-domain>:9000 (the port number is used by Coolify to map the service to the proxy, but the service will be listening on port 443).
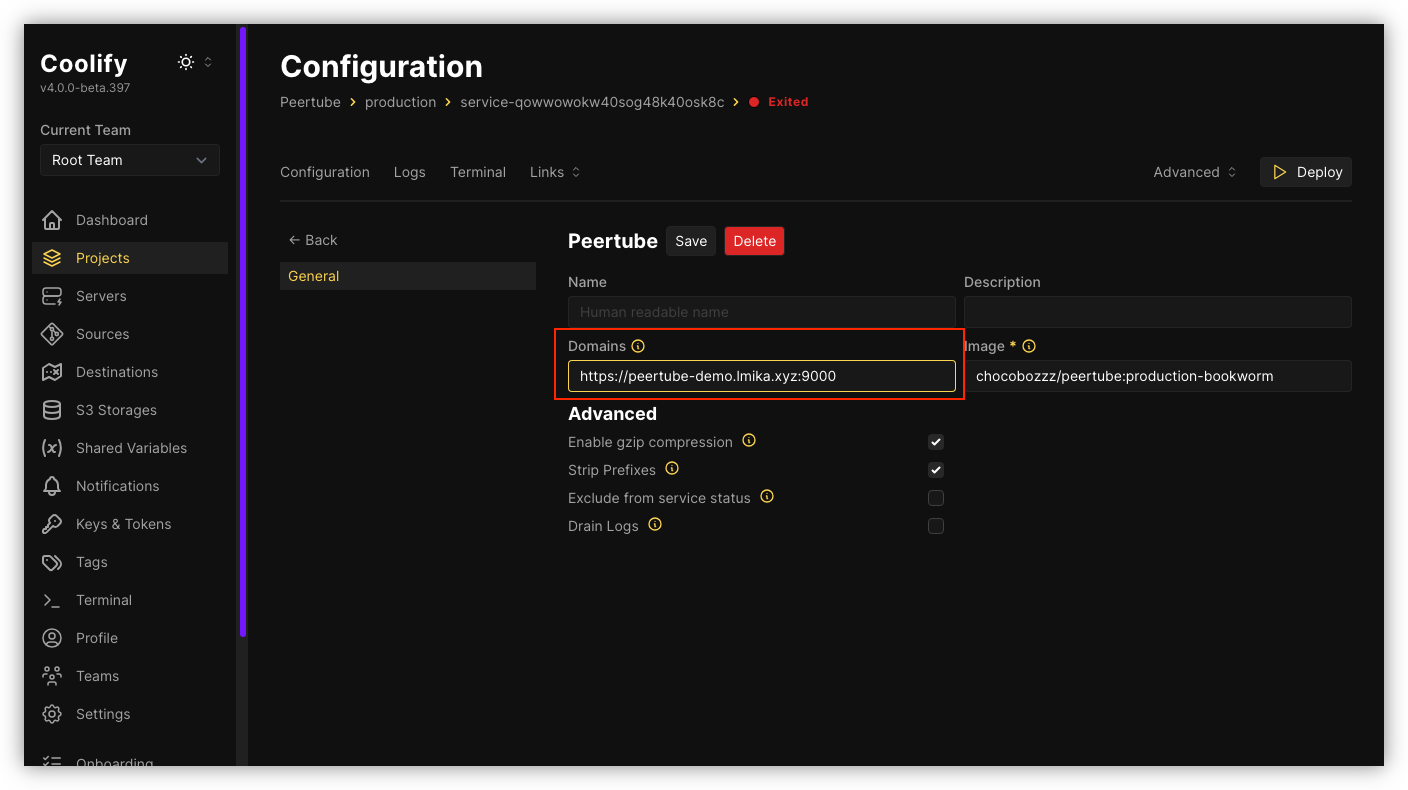
Click “Save”, then click “Back” to go back to the list of services, then click “Deploy”. Wait for the containers to be provisioned, then try visiting https://<peertube-domain>/ to see if it deployed successfully.
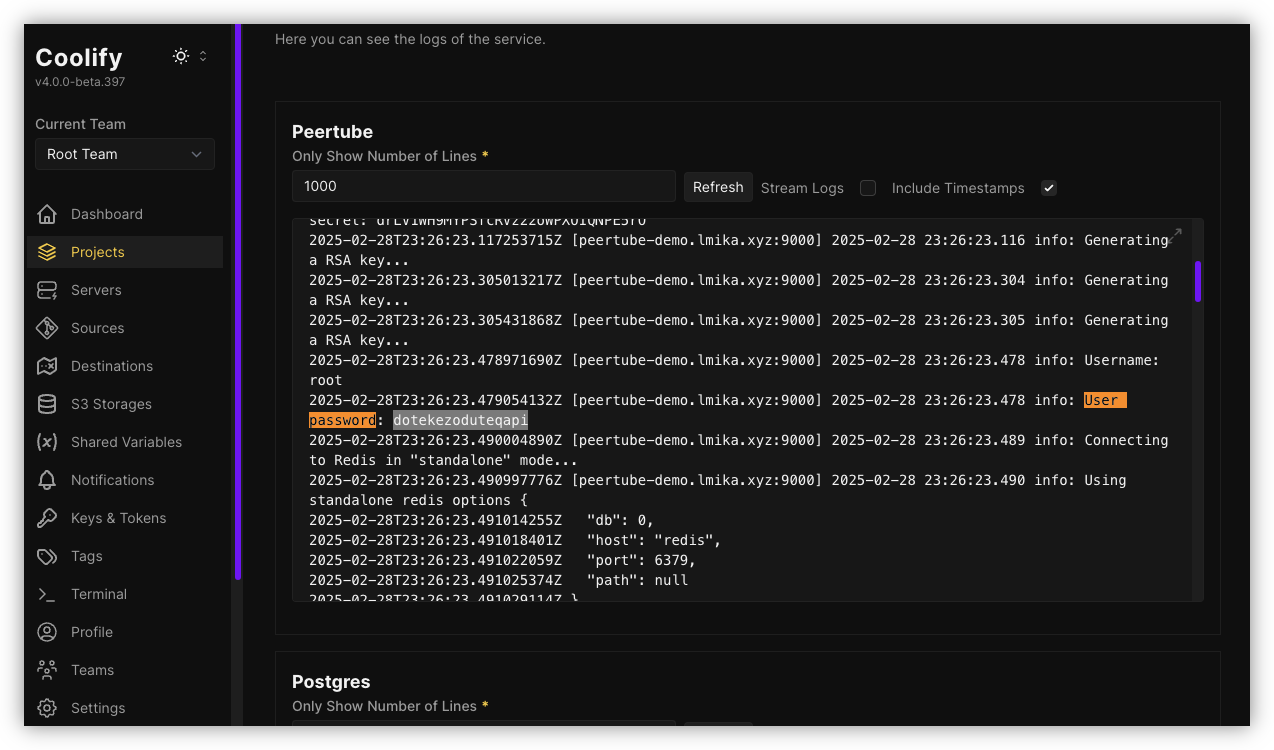
The last thing you’ll need to do is get the generated password for the root user. You can do that by clicking the “Logs” tab, getting the recent log messages from the “PeerTube” container, and doing a find-in-page search for “User password”.
Alternatively, you can set the password yourself by going to the Terminal, connecting to the PeerTube container, and typing in the following:
npm run reset-password -- -u root

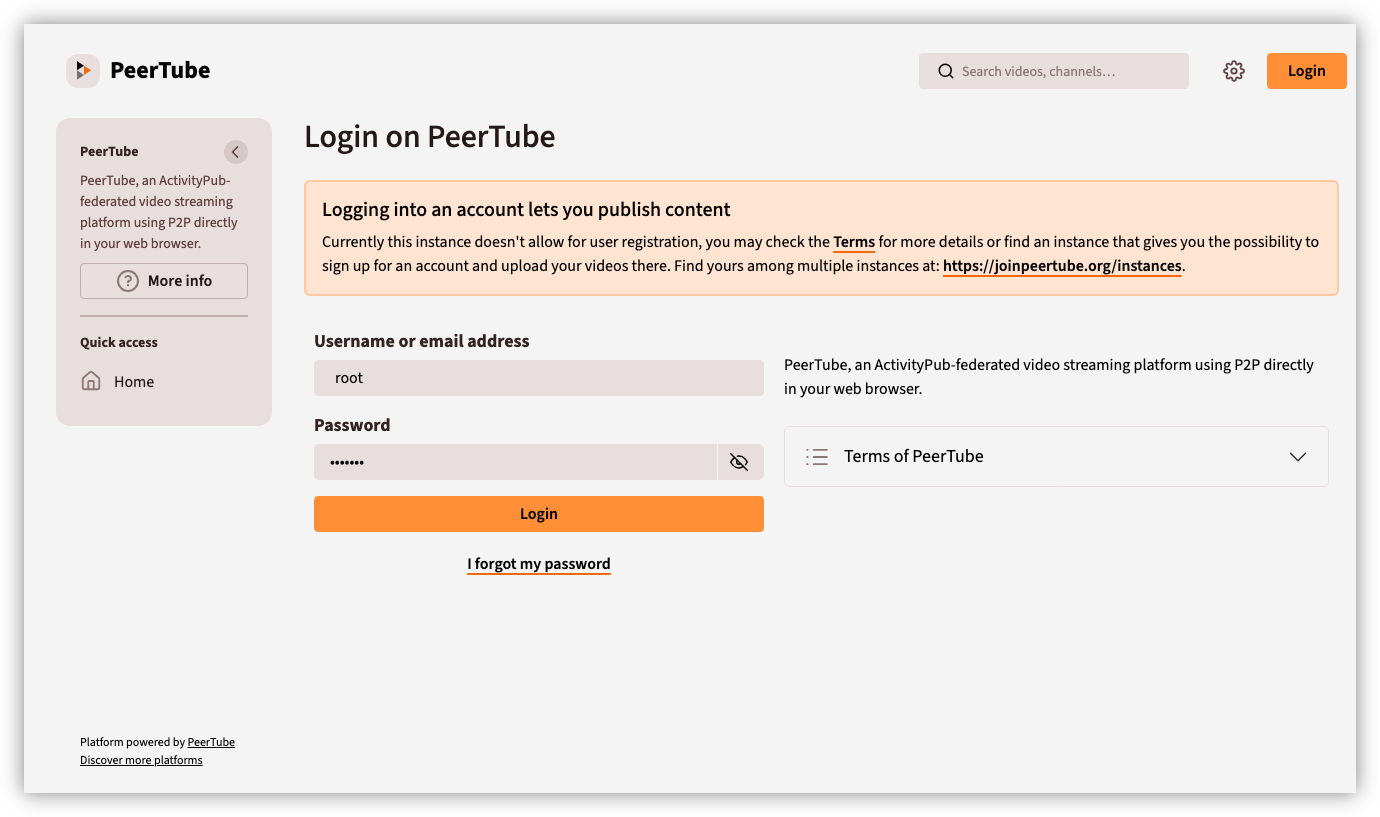
You then should be able to login into the frontend as “root” and continue setting up your instance from there.
At this point, you should have a functioning PeerTube instance. The rest of the setup you can do from the web interface.
You’ll need to perform additional steps to get email working; and you’ll need to make additional changes if you want to host your videos in an object store, and potentially use some of the advanced features like uploading via Torrent or publishing a live. I’ve not done any of these myself, but information on how to do this should be findable within PeerTube’s documentation page. The Docker Compose file should be editable from within Coolify; the trick is finding out which environment variables you’ll need to set (and just beware that Docker compose “normalises” the YAML file so you may need to adjust environment variables in both the x-env and the service environments section). But hopefully this should be enough if all you want to do is host videos on your own infrastructure.