The author reflects on a flexible timestamp input feature they developed, recognizing its limited applicability and the challenge of making it user-friendly while contemplating its potential value in user-focused systems. Continue
reading →
I was asked to make a couple of diagrams for the purpose of showcasing a database design. These diagrams were mainly used to show the relationship between entities, so I chose to use TLDraw for this. But there was a need to add some example rows, which TLDraw does not make easy. Furthermore, there was a bit of a push to get this done quickly, as these were to be shown to various stakeholders the next day.
Blogger reflects on their personal preferences and habits related to blogging and outdoor activities while questioning their archetype. Continue
reading →
Troubleshooting SSH issues with a private key revealed that an outdated client and a missing trailing newline caused connection problems in a CI/CD workflow. Continue
reading →
Group DMs in Slack can lead to disorganized conversations that would be better suited for temporary channels that allow users to engage more selectively. Continue
reading →
Work has begun on the game’s meta elements, focusing on essential mechanics like menu screens, despite the unexciting and obligatory nature of the tasks involved. Also some details on how to define custom classes in GDScript. Continue
reading →
Using Cobra for CLI apps is more efficient and organized when each command is wrapped in its own function, improving clarity and maintainability compared to the documented approach. Continue
reading →
Exploring the idea of a guard statement in Go reveals significant challenges and limitations compared to its implementation in Swift. Spoilers: it probably wouldn’t work. Continue
reading →
A few updates of some other projects I worked on recently.
Webtools saw some love as I needed some tooling made to make the icon easy to include in the Well Read Flutter project itself. Android expects the logo of a specific size, so I “commissioned” an Android Icon Resizer, which will take one or more PNG files, resize them to what Android expects, and prepare them in a ZIP that could be extracted at the route of the res/mipmap directory. It will also produce a small preview of the icon, rendering it in a circle so you can see how it looks on the device. It’s background savvy, layering the icon over the PNG with “background” in the filename.
My current craving of vibe-coding various tools I need to do my job continues, with an attempt to build a REST/gRPC test client.
This is motivated by my distaste with all the other clients I’ve tried. There’ve been a few, and I’ve been unhappy with each one. For one thing, they seem more heavyweight than my needs. I don’t know if this is just how they’re implemented, or it’s because the realm of HTTP request testing is complicated (It’s probably a bit of both).
Some more work on Weiro. Much of it is pretty mundane, mainly to get it to feature parity with other CMS’s out there. Yes, I know the existence of those other CMS’s make the entire project pointless. Doubly so when you consider that much of what I’m going to talk about was largely done by coding agents. It made me wonder whether it was worth writing this update at all. Well, it’s drafted up already so I may as well finish it off. At least one thing will get finished.
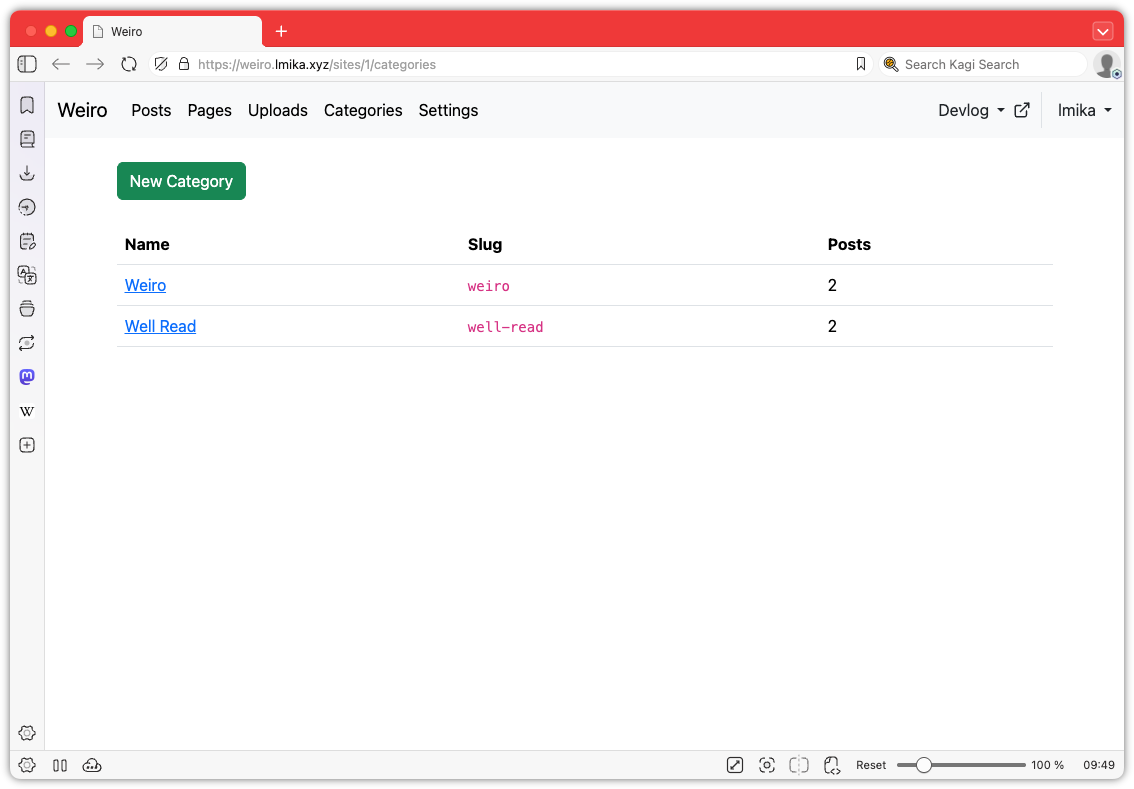
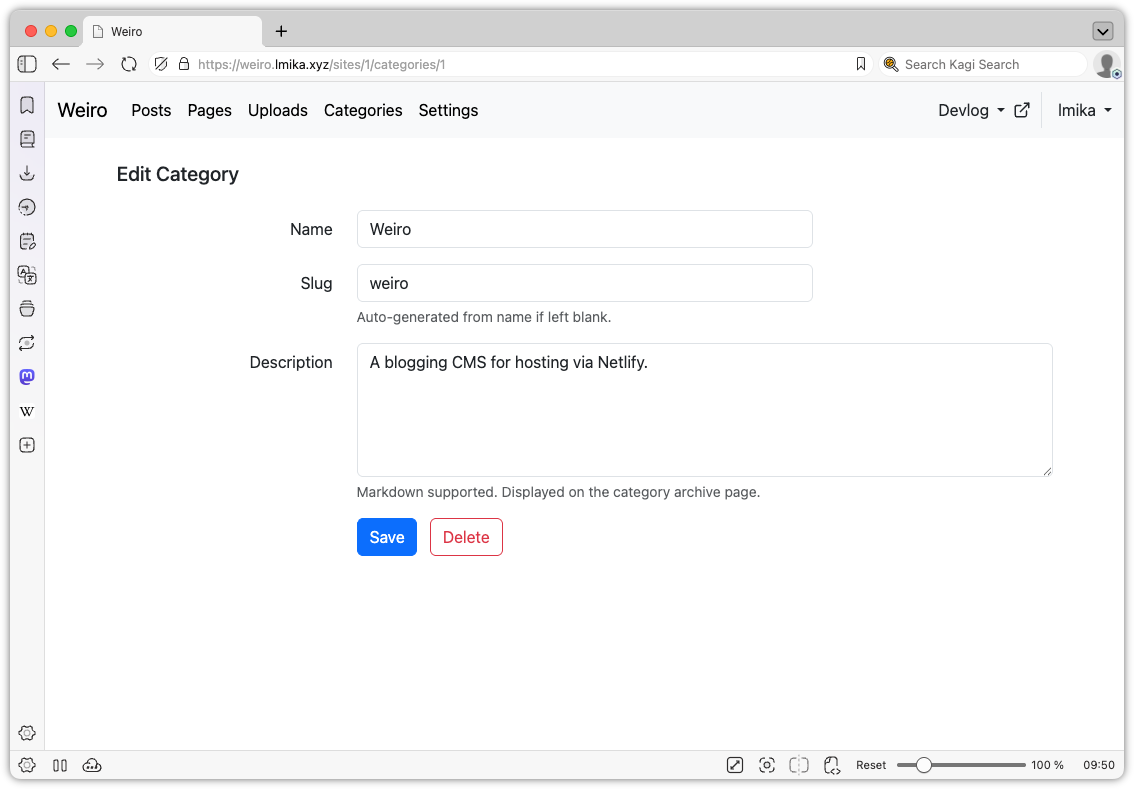
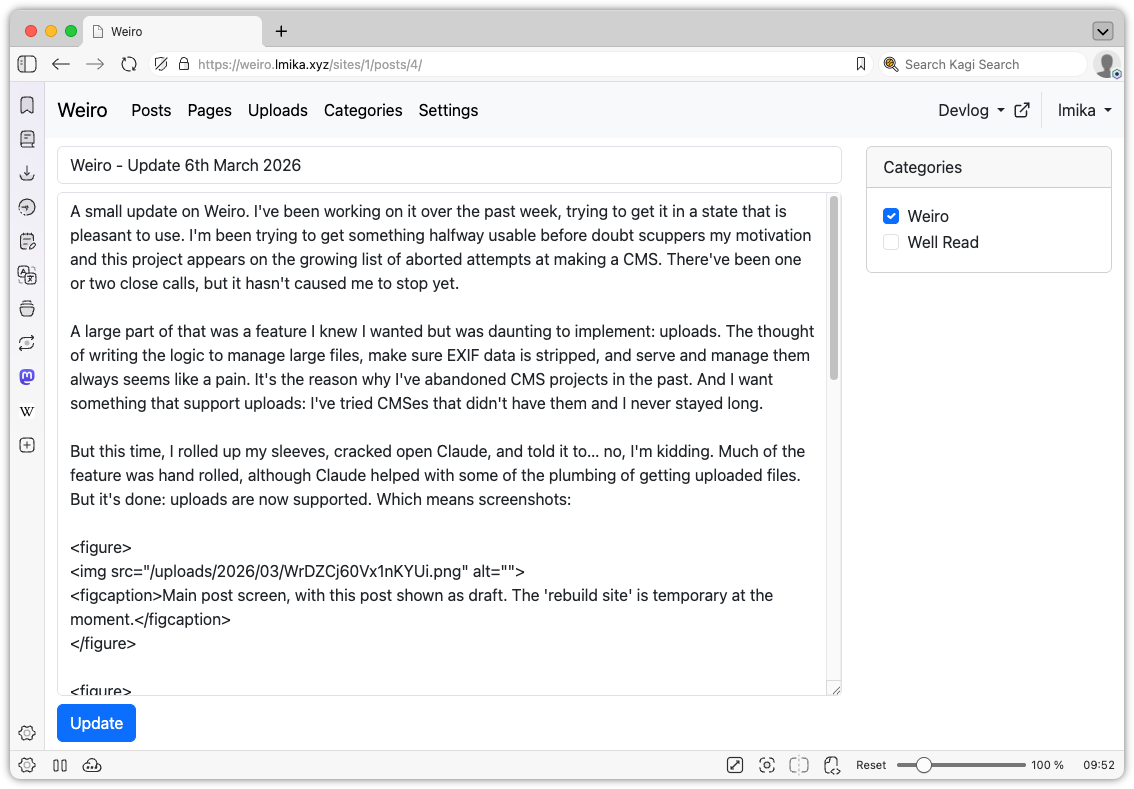
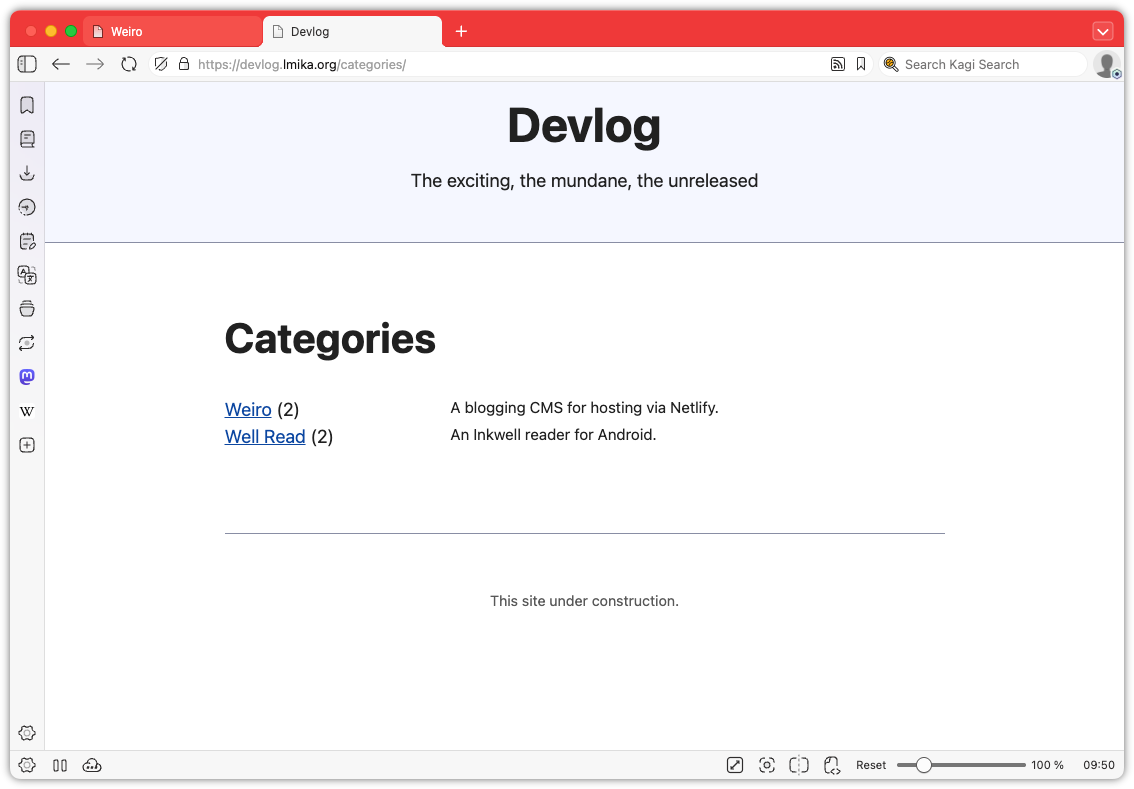
Okay, enough wallowing in my self-doubt. What was added? Well, categories are now a thing. These can be defined in a new categories section and consist of a label, a slug, and a description. Going to /categories/<slug> will list all the posts with that category. Posts can be in zero or more categories, which can be selected from the edit post screen. Pretty simple stuff.
The Categories section, where the user can manage categories.Editing a category.Selecting categories from within the edit post screen.The categories page as it appears on the published site.The single category page.
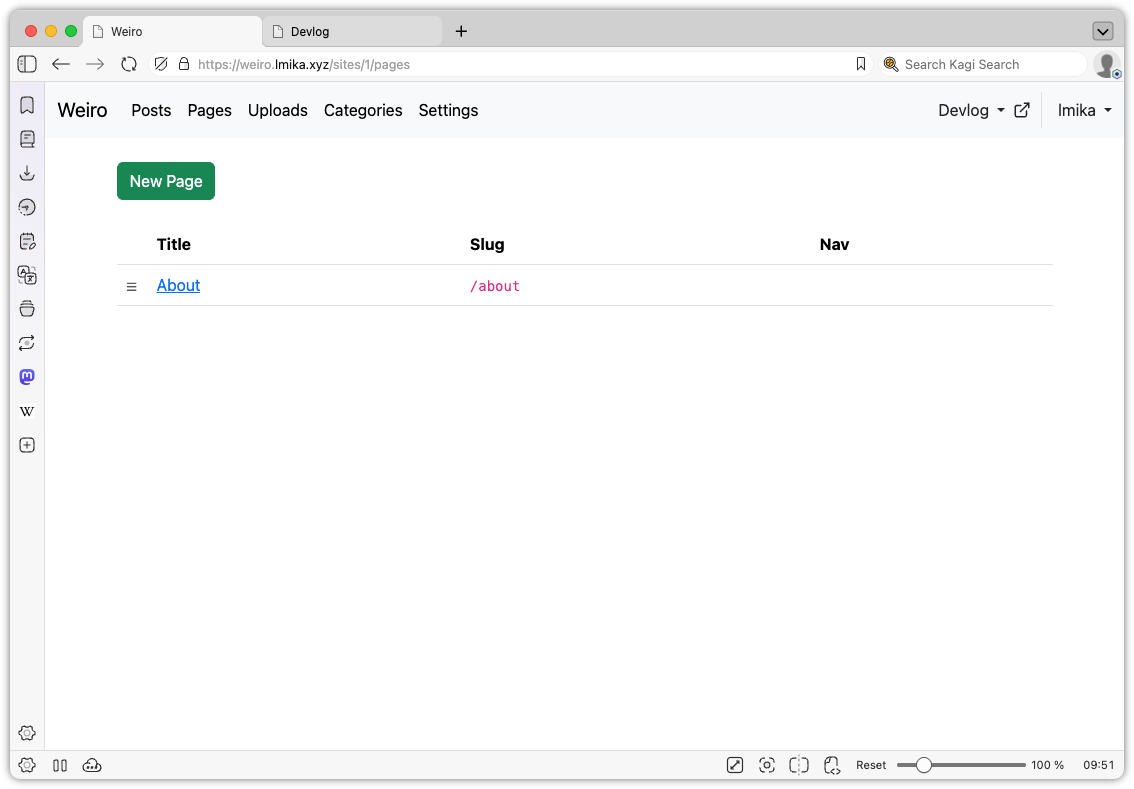
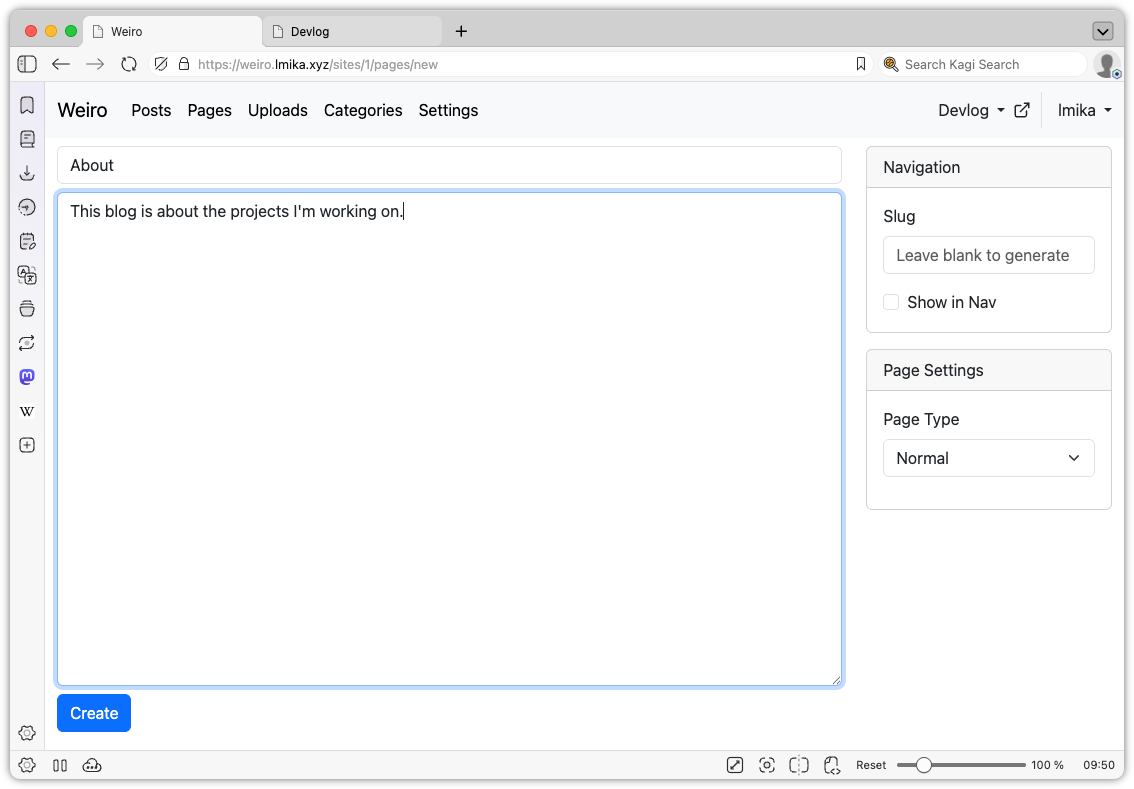
Another small thing added was pages. This allows the user to define “slash” pages, with the option of appearing in the nav bar, and can also be used to replace the home page, by setting the slug to / (the posts are still available at /posts). I do need to spend some more time figuring out how to organise the nav bar as I would also like to include things like redirects. I thinking of making that an extension of the pages model, but I’m not sure.
List of pages of a site.Editing a page. There’s only a single page type at the moment.
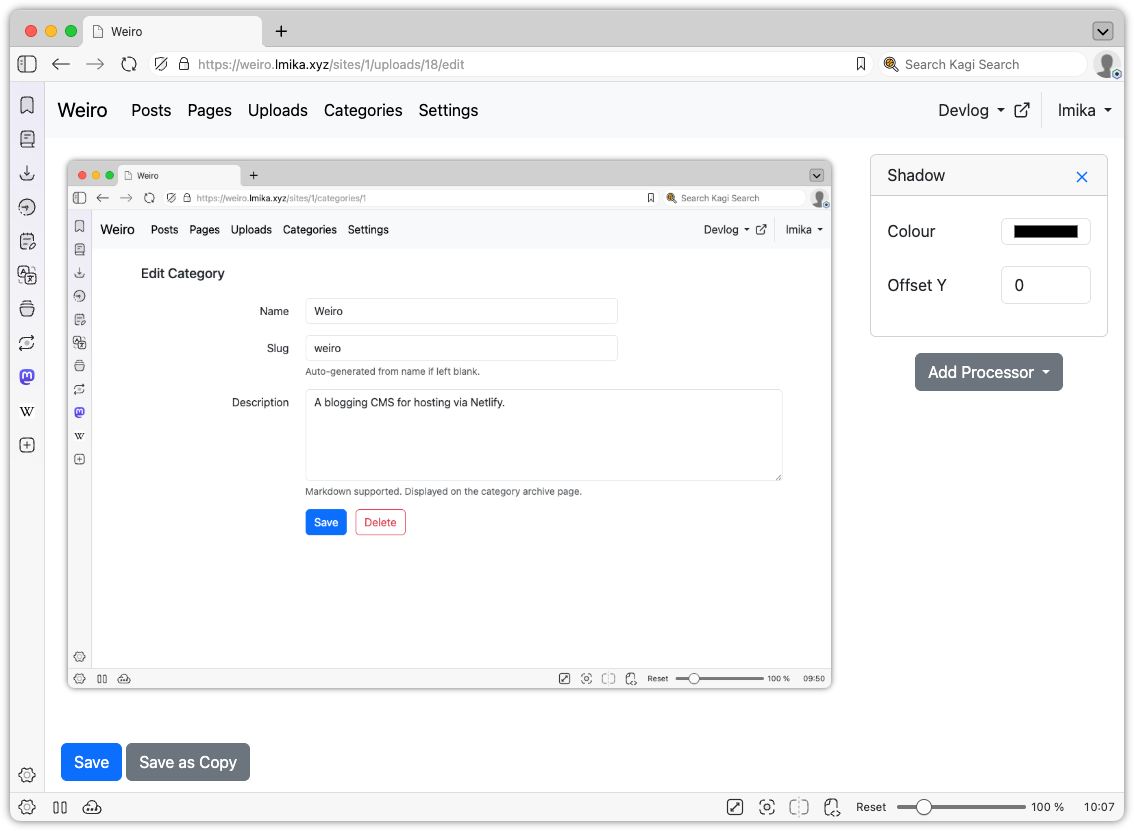
Those two features were mainly done with the help of Claude Code, but I did build some stuff manually. The largest addition was the ability to do some edits on uploaded images. I’ve never been a fan of how Apple produces the shadows around windows: the margins are just too large. So I added a way to do this within Weiro itself.
The edit upload feature.
It’s pretty simple. Just imagine the filter section from any image editor, then remove all the other features of that editor. Yeah, it’s that simple. There’s no cropping, rotating, or anything else of that nature: just a bunch of “processors” that you can add to the image, with the sole one being a drop shadow.
This is actually done server side using a simple file-based approach. When opening an image upload to edit, you spawn a session. Each session has a JSON file maintaining the processors, plus a series of cached image files of all the intermediate steps along the processing chain. When a new processor is added, a hash is computed with the processor’s properties, and if they change, the cached image will be regenerated. The processor includes the hash of the previous step too, so that if processors further up the chain are modified or remove, they will force a recompute of subsequent images. The user is then served the last image in the chain.
This differs from the image processor in Blogging Tools, which performed the transformations within the browser itself. The motivation there was to avoid the need of a slow upload of the image, but it came with the performance cost associated with doing the processing within the browser itself. WASM might be fast, but it’s not that fast[^fast]. Since the upload in Weiro is already uploaded, I figured it would be quicker to just do the image processing server side. My hope is that the computing power the server has access to would offset the time it takes to download the image. So far this seems to be the case.
Finally, I did some minor work around the UI, adding a site chooser and a much needed way to open the published site from the admin section.
So this project is still coming along, surprisingly. It’s probably the furthest I’ve got in a blogging CMS that I actually want to use. I do have a large list of things I want to add to it, and I certainly need to do something with the design of the actual site. It’s all a question of whether I’m interested in spending time on it.
[^fast]: Although to be fair, I think the slow down comes from encoding the processed image as a data URI and setting it as the source of an img tag.
After nearly a decade of daily use, new ear padding was successfully replaced on Sennheiser HD 280 Pro headphones, despite challenges during the process. Continue
reading →
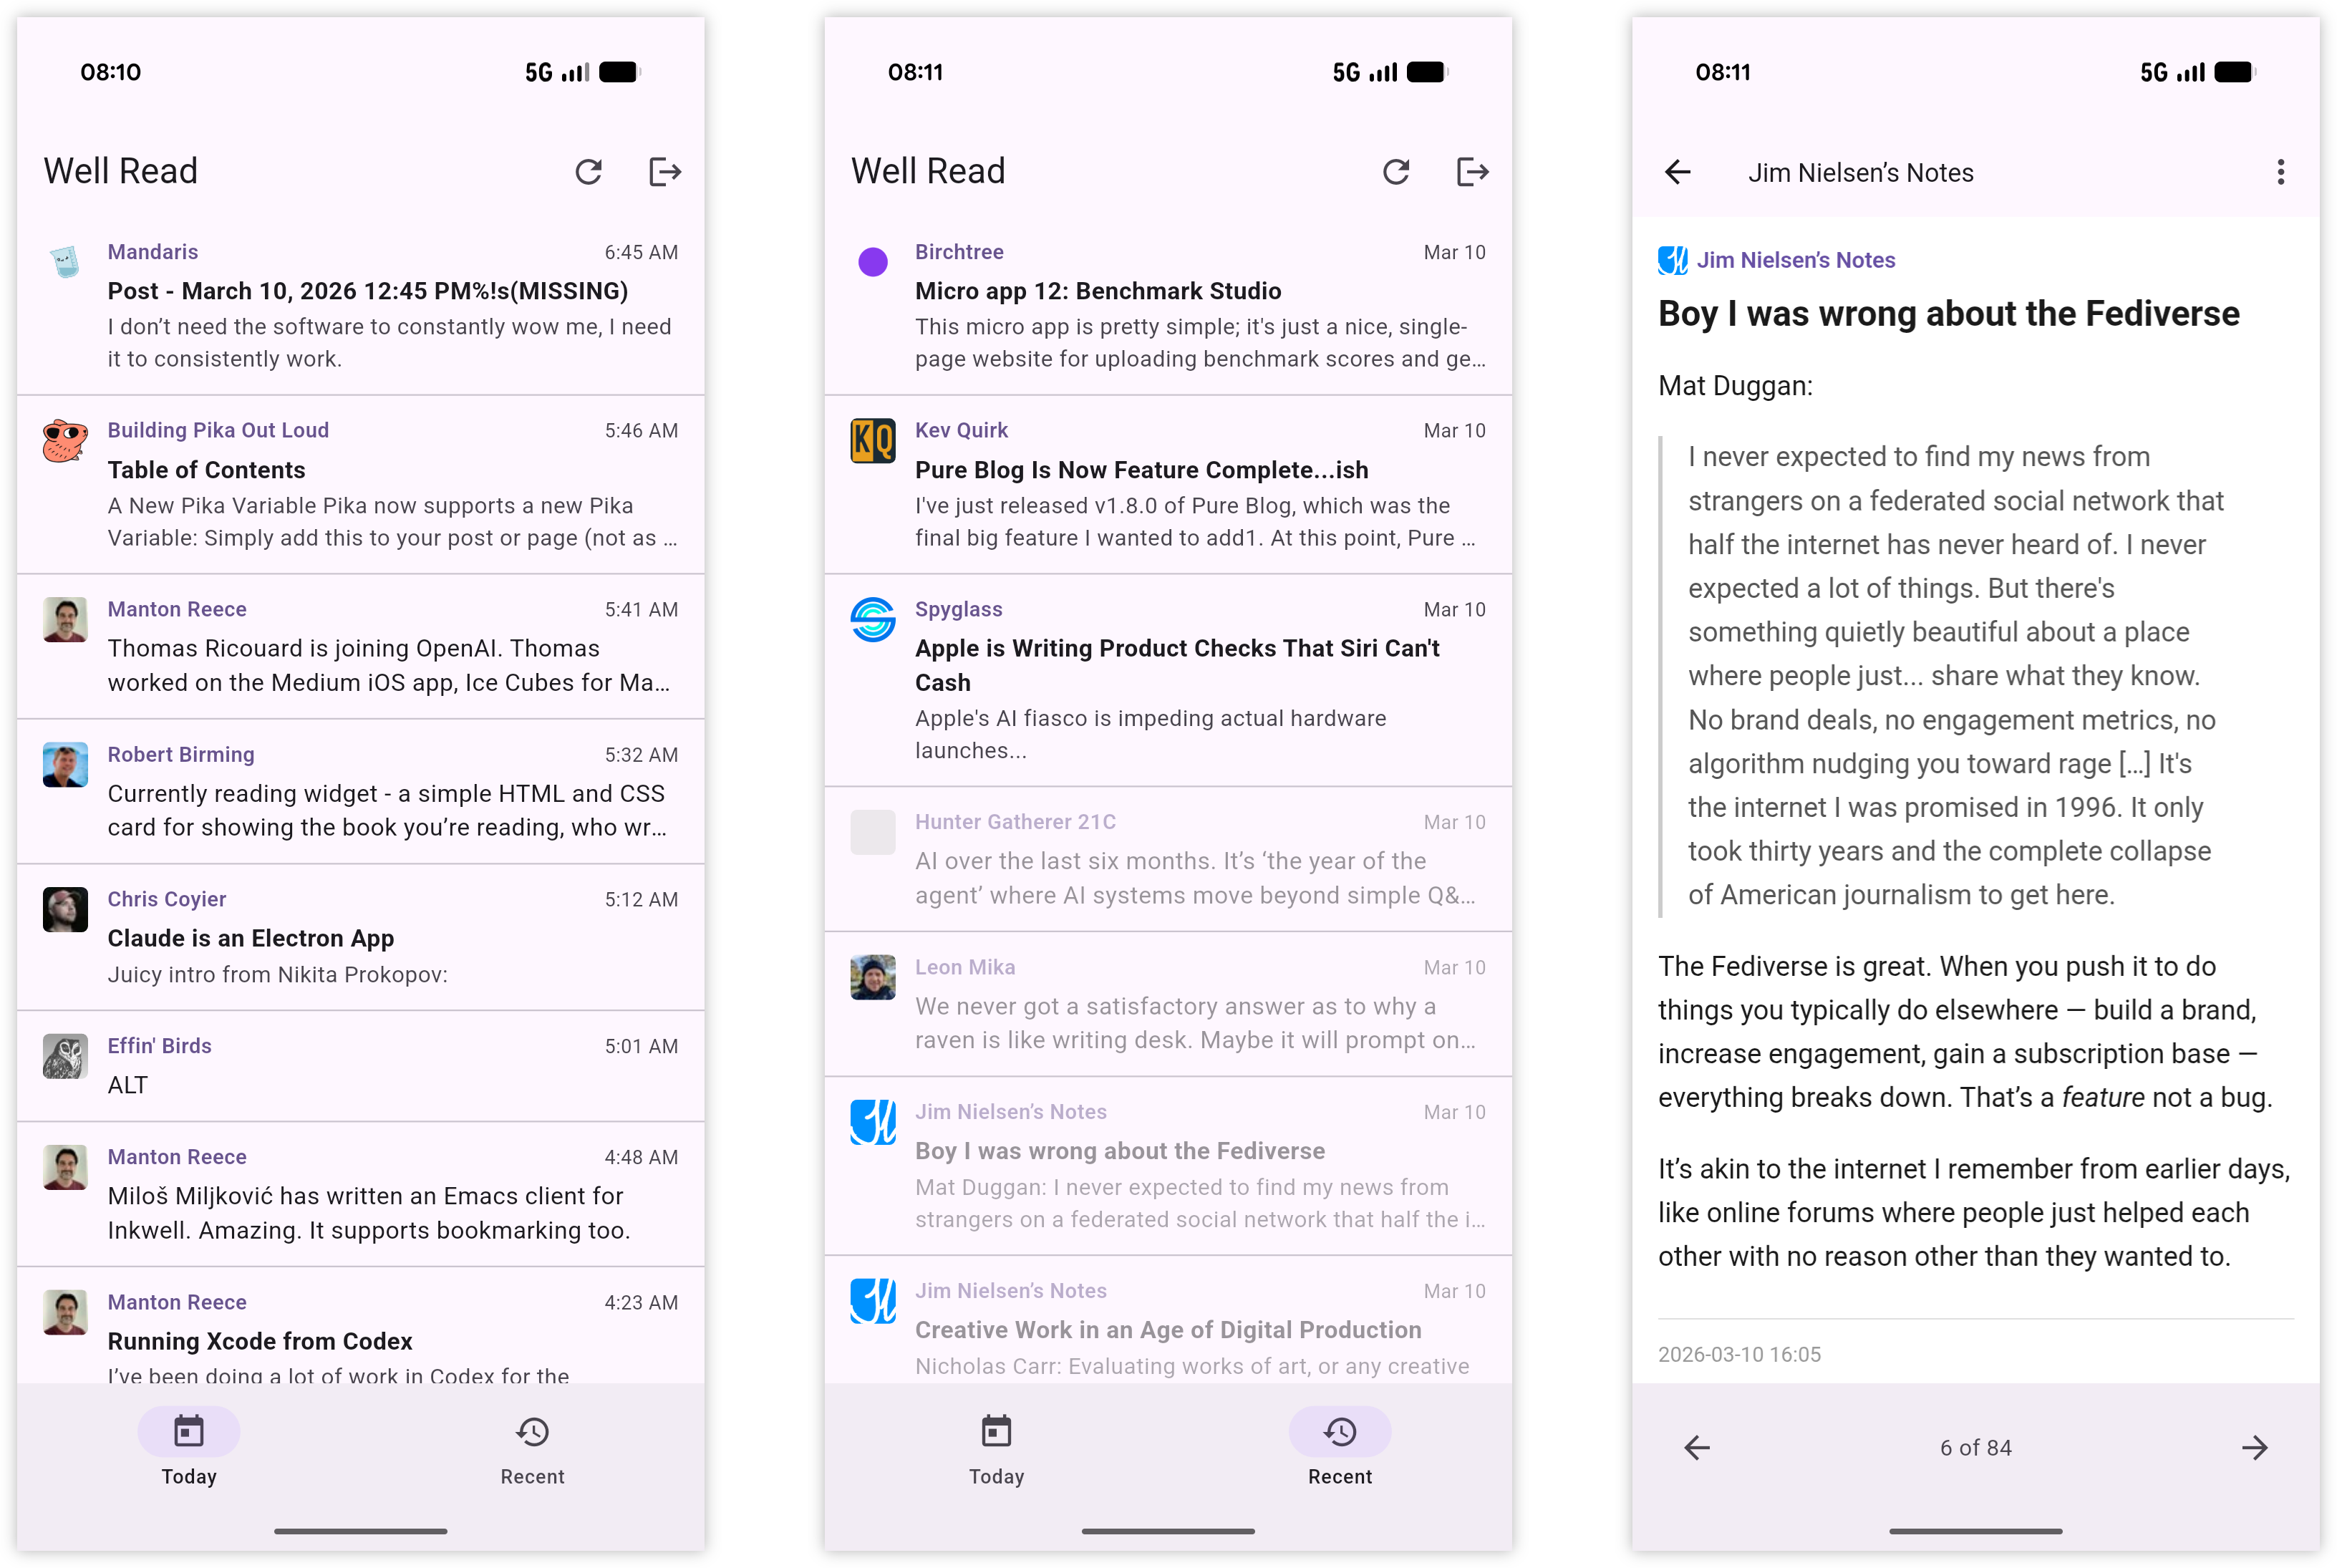
It’s been a week since I learnt about Inkwell’s API and got an agent to start work on an RSS reader. Since then, Well Read has been in a state of flux, as I ask for agents to make changes to the interaction and layout. I think I’ve got it in a pretty good state now, certainly in a state that works well for me.
The earliest screenshots of Well Read, taken on 11 March 2026
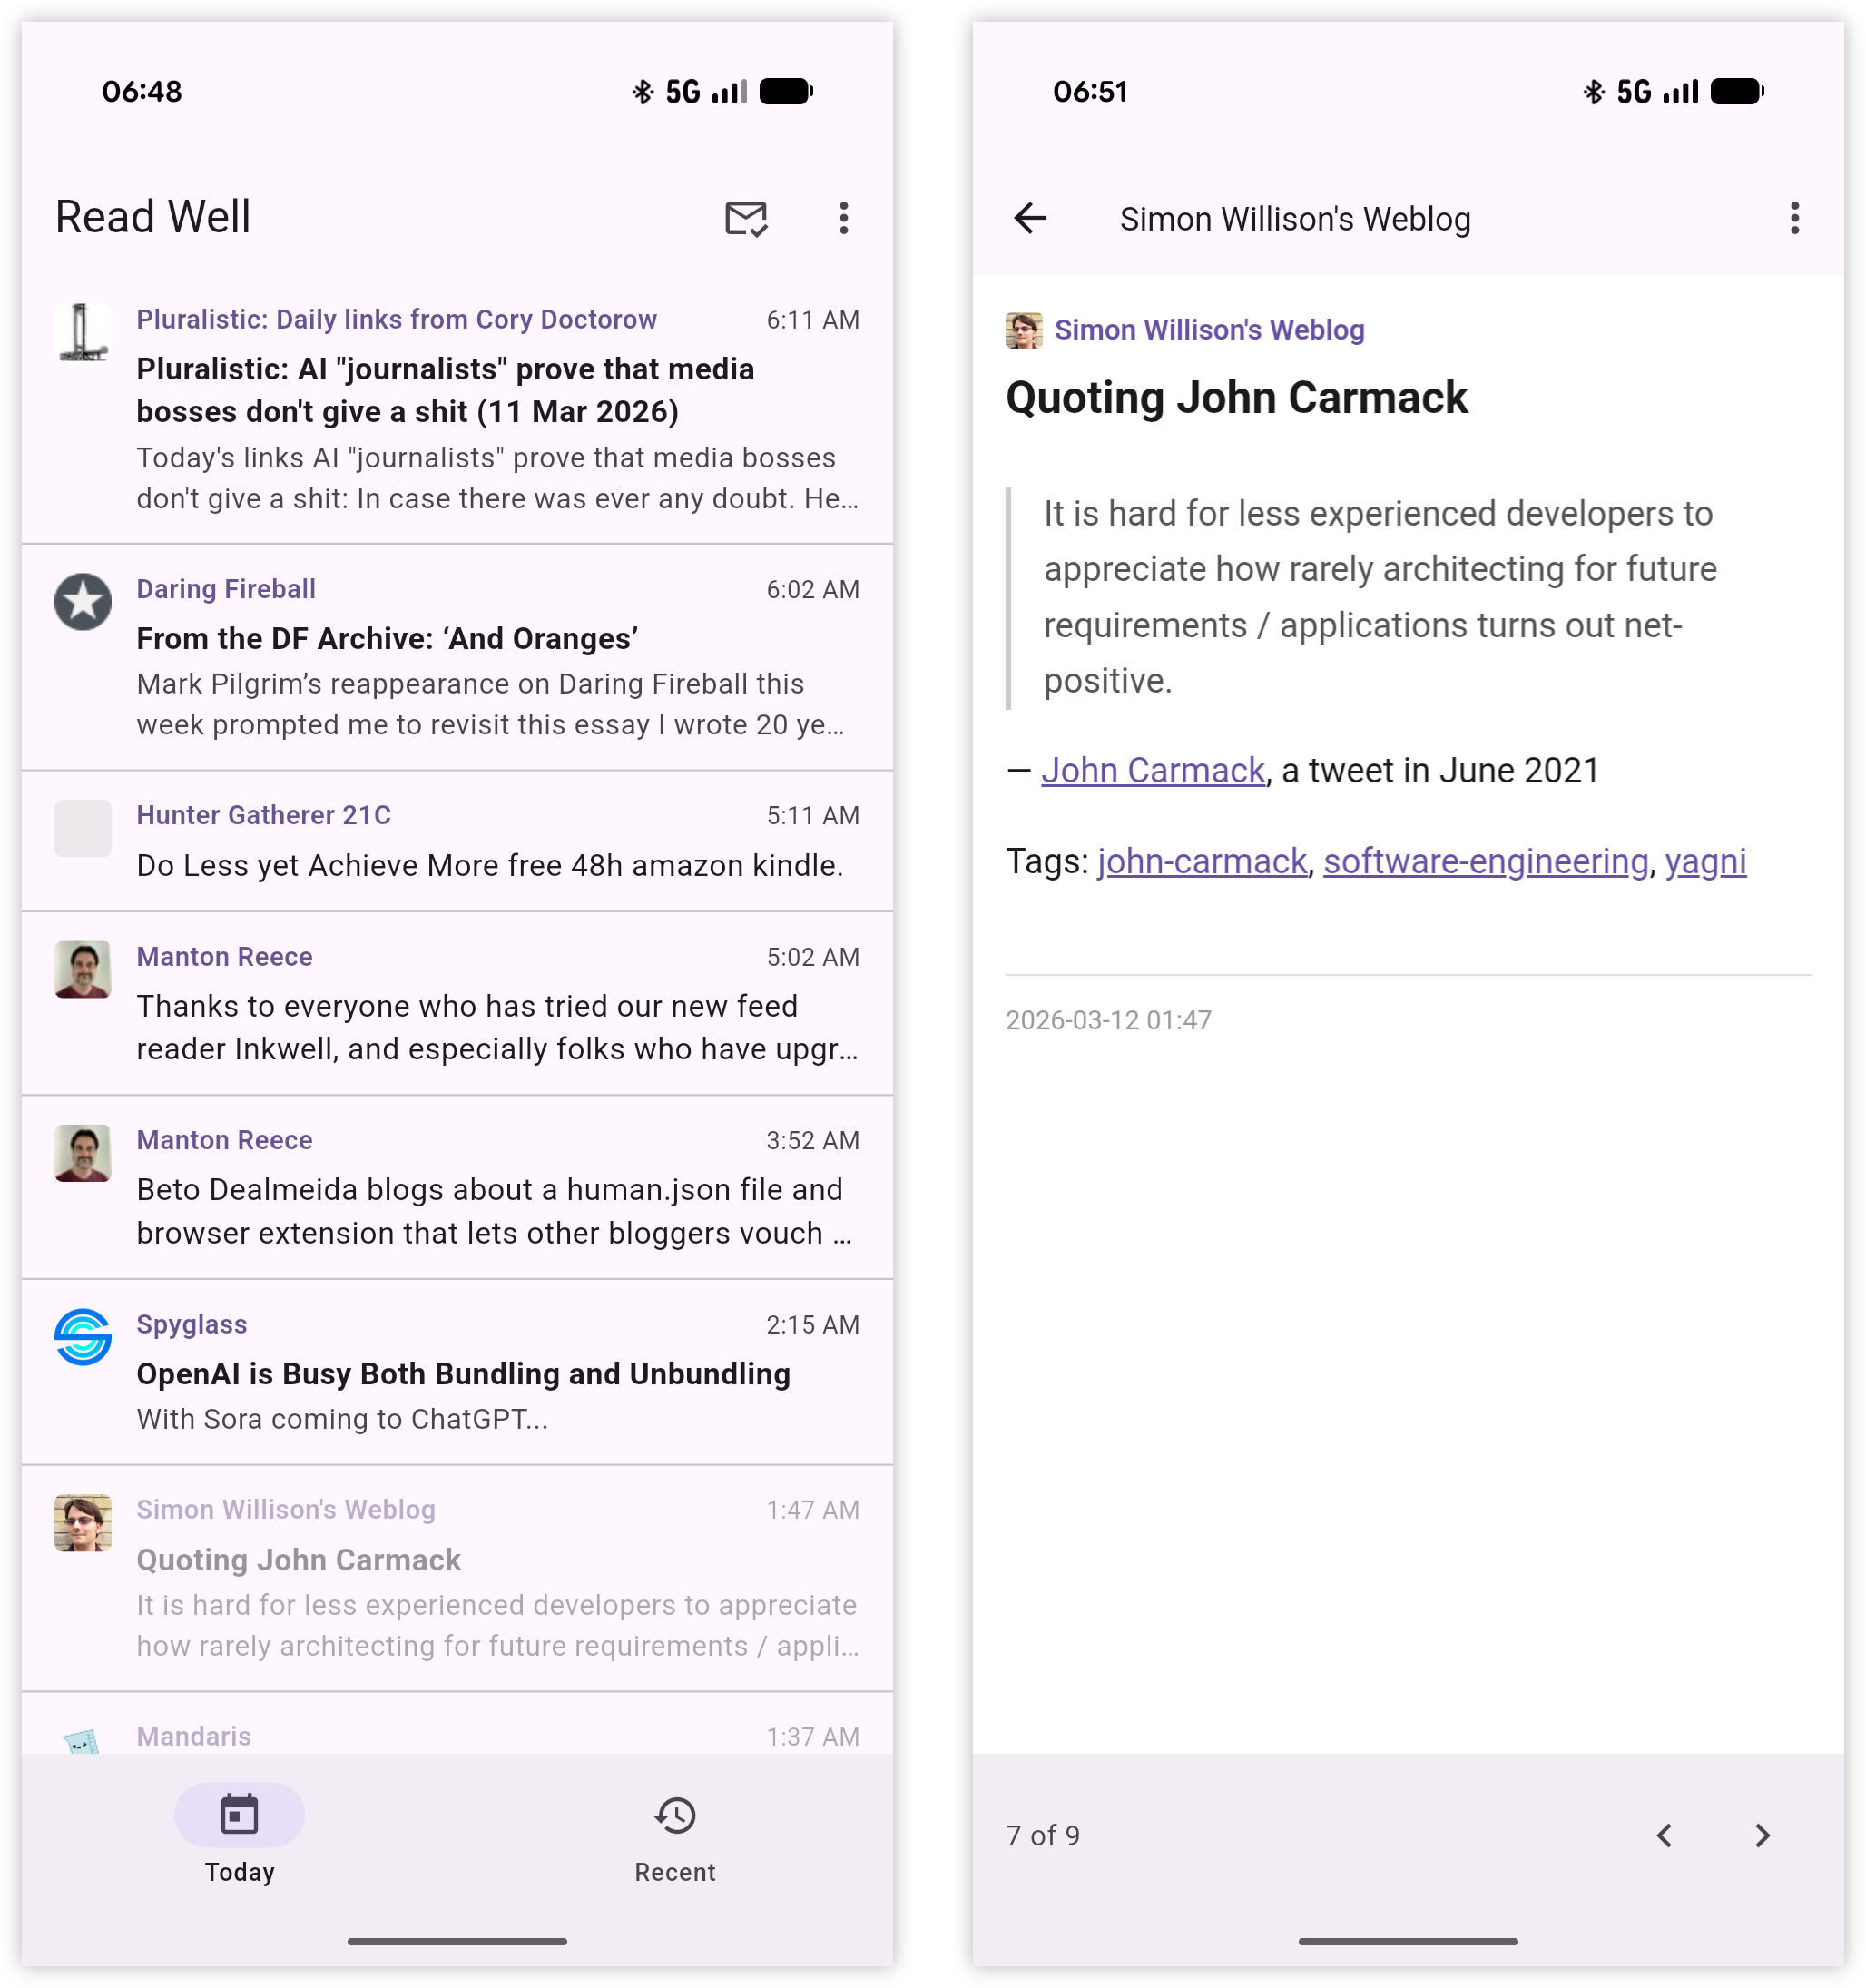
The Today and Recent tabs still retain their original behaviour, although the idea of using 6:00 pm of the previous evening as the cutoff for “todays’ posts” was a good one. Being where I’m located in the world, many people I follow publish posts while I’m asleep. I recently added a tab for bookmarks which uses Micro.blog’s bookmarking feature. Any post can be added as a bookmark, and since there’s no real way to get to a post once it drops out of the Recent tab (well, apart from opening it up in Inkwell proper), I have in mind this feature to act as a place to stash posts for later. So I tried making bookmarks as easy to add as possible. Sliding aside the item in the feed list will reveal a bookmark action, as will the overflow menu in the feed viewer.
When Manton mentioned that Inkwell has an API, I… um… may have vibe-coded an Android client.
It’s called “Well Read”, which is not a great name but better than “Inkwell Client” which was the working title. Much like Inkwell, it follows the river approach to RSS. There’s a Today tab and Recent tab, each showing a portion of the entries in reverse chronological order. Today shows all the posts from today, plus the last 6 hours of yesterday. The motivation here is that this will be the tab you’ll be spending your time, with posts aging out to recent over time. There’s no Fading tab: all posts older than about half a week fall out of the app. And I’m not sure if I’m going to add one. There’s only a few feeds that I want to catch up on if I miss their post, and since I’m using NetNewsWire and Inkwell, I’m pretty sure I’ll catch them later.
A small update on Weiro. I’ve been working on it over the past week, trying to get it in a state that is pleasant to use. I’m been trying to get something halfway usable before doubt scuppers my motivation and this project appears on the growing list of aborted attempts at making a CMS. There’ve been one or two close calls, but it hasn’t caused me to stop yet.
A large part of that was a feature I knew I wanted but was daunting to implement: uploads. The thought of writing the logic to manage large files, make sure EXIF data is stripped, and serve and manage them always seems like a pain. It’s the reason why I’ve abandoned CMS projects in the past. And I want something that support uploads: I’ve tried CMSes that didn’t have them and I never stayed long.
One of the fun aspects of these new code agents is seeing what they’re capable of producing just form the prompt, so called “vibe-coding.” There are some that are definitely all in on the concept: I’m thinking of Steve Yeggie and his Gas Town work. As for myself, I still prefer to be a bit more hands on. But it’s still amusing to see what these agents are capable of just from the prompt.
Oof! Everyone’s building blogging CMS’s now, apparently.
Since starting work on this project, I saw one other announce their own CMS that was vibe-coded with Claude. No shame in that: making something that works for you is part of the joy of participating in the Indie-web. I did take a brief look at it, and dismissed it because it was written in PHP. Yes, I am a snooty developer that looks down on those using PHP (it’s just so annoying to deploy; although credit to this person, they did prepare a Docker container).
This is the inaugural post of Devlog, where I'm planning to write on what I'm working on. This post was created using Weiro, a new blogging CMS I've been working on. This post is little more than a test to see if the deployed version of Weiro is working. I'll post more about Weiro in later posts. For now, I just want to make sure this is being published correctly.