Made This
-
Apparently I’m more than happy to discuss work in progress, yet when it comes to talking about something I’ve finished, I freeze up. 🤷 ↩︎
I also decided to put the documentation “on-board”, as opposed to putting it on the web. Yes, it breaks from what was typical during the 8-bit gaming period, but I’ve got the space, and it makes adding illustrations easier.
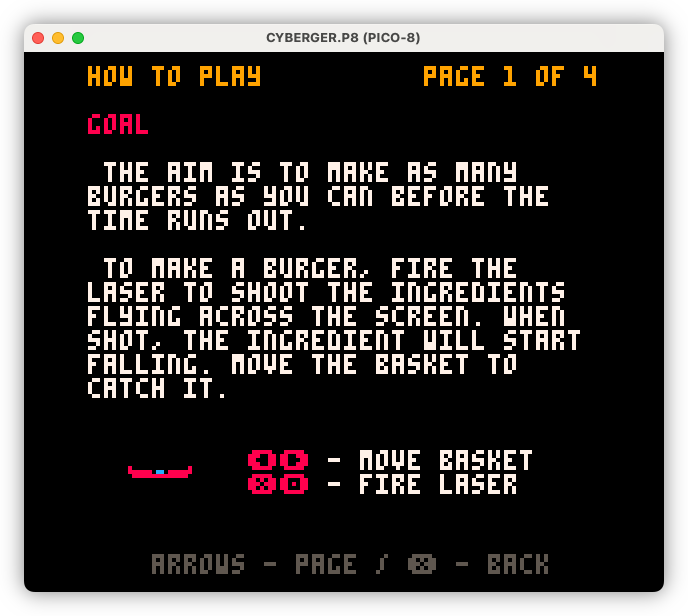
Also forces me to keep it brief, which is no bad thing.
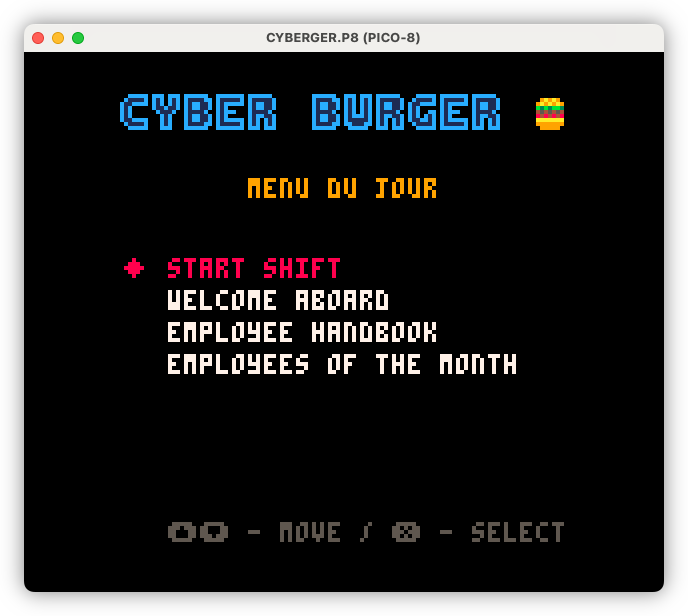
Building out the meta elements of Cyber Burger, including the “menu du jour” a.k.a. the main menu. I’ve used food-service terms for the menu items to maintain the theme, but there is a button to switch them over to more conventional names should it be too unclear.
Playing around with some possible UI design choices for that Android RSS Feed Reader. I think I will go with Flutter for this, seeing that I generally like the framework and it has decent (although not perfect) support for native Material styling.
Started looking at the feed item view. This is what I have so far:
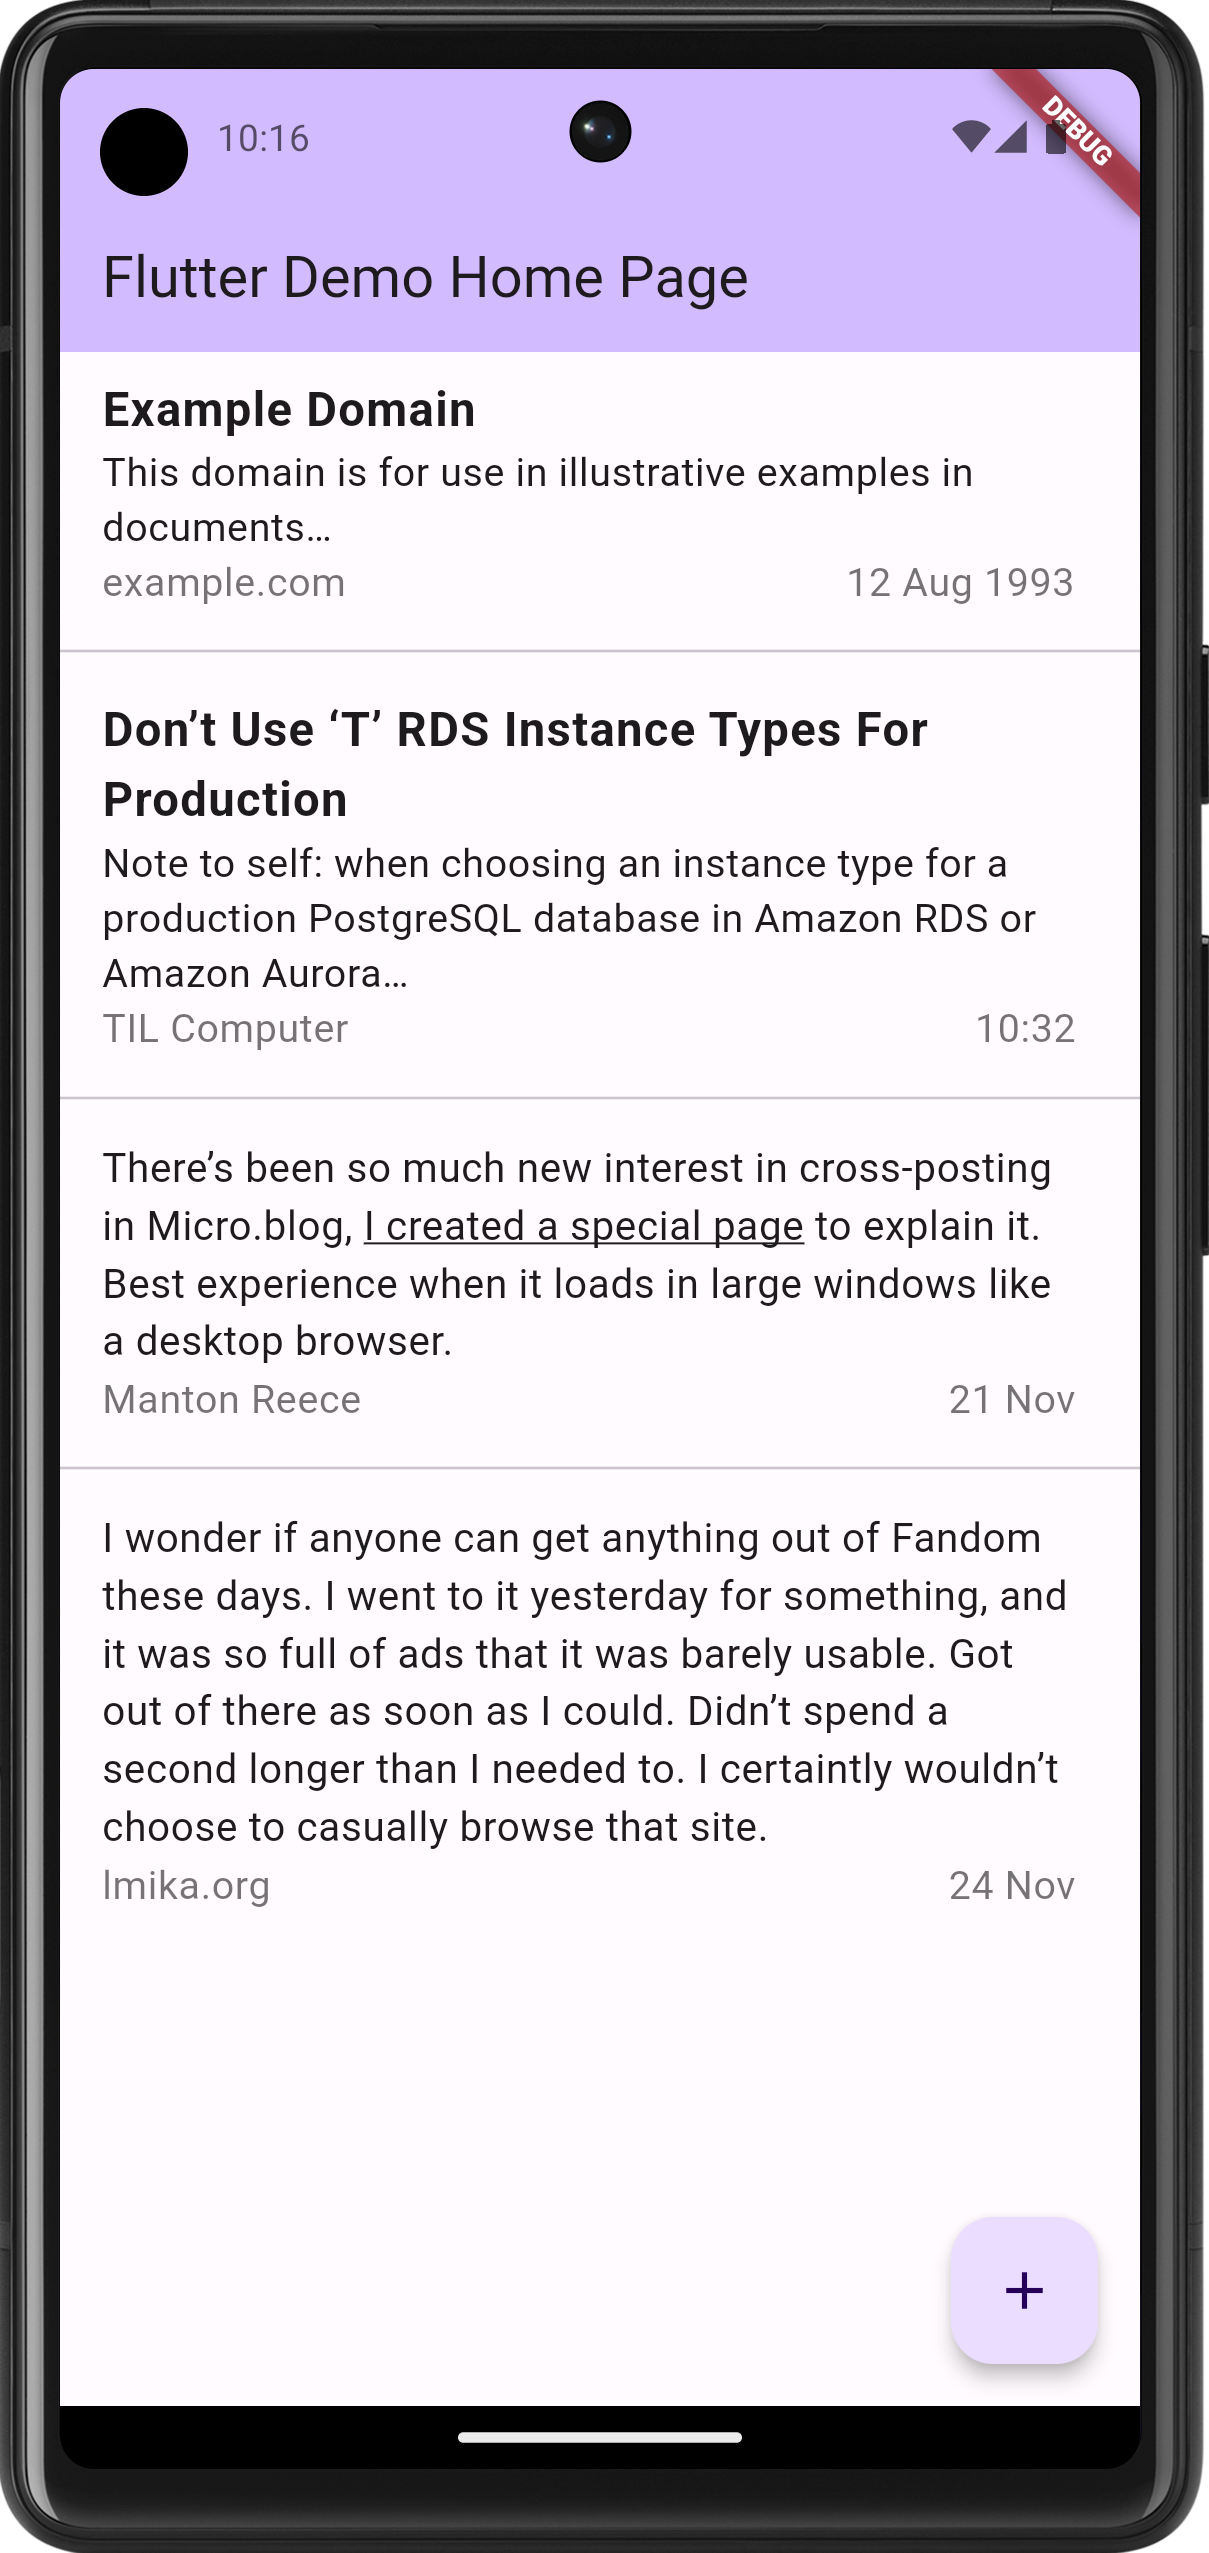
Note that this is little more than a static list view. The items comes from nowhere and tapping an item doesn’t actually do anything yet. I wanted to get the appearance right first, as how it feels is downstream from how it works.
The current plan is to show most of the body for items without titles, similar to what other social media apps would show. It occurred to me that in doing so, people wouldn’t see links or formatting in the original post, since they’ll be less likely to click through. So it might be necessary to bring this formatting to the front. Not all possible formatting, mind you: probably just strong, emphasis, and links. Everything else should result with an ellipsis, encouraging the user to open the actual item.
Anyway, still playing at the moment.
Photo Bucket Update: Exporting To Zip
Worked a little more on Photo Bucket this week. Added the ability to export the contents of an instance to a Zip file. This consist of both images and metadata.
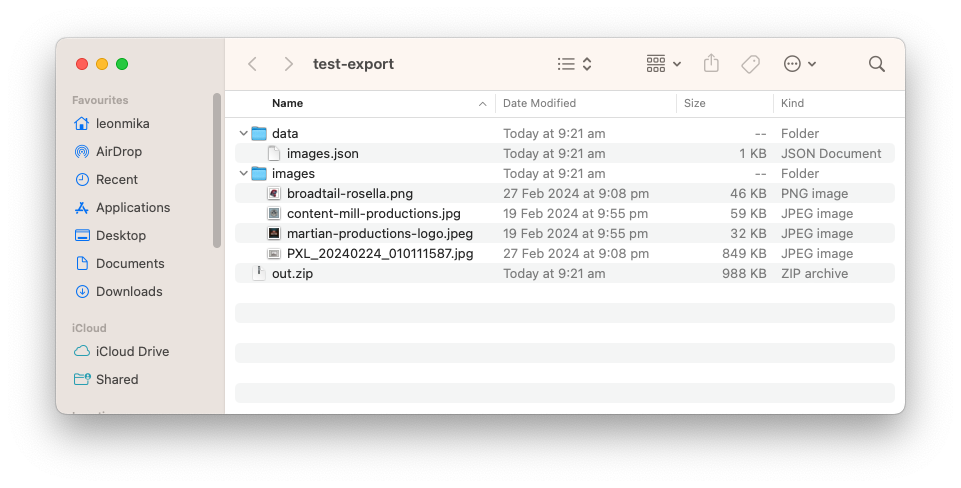
I’ve went with lines of JSON file for the image metadata. I considered a CSV file briefly, but for optional fields like captions and custom properties, I didn’t like the idea of a lot of empty columns. Better to go with a format that’s a little more flexible, even if it does mean more text per line.
As for the images, I’m hoping the export to consist of the “best quality” version. What that means will depend on the instance. The idea is to have three tiers of image quality managed by the store: “original”, “web”, and “thumbnail”. The “original” version is the untouched version uploaded to the store. The “web” version is re-encoded from the “original” and will be slightly compressed with image metadata tags stripped out. The “thumbnail” version will be a small, highly compressed version suitable for the thumbnail. There is to be a decision algorithm in place to get an image given the desired quality level. For example, if something needed the “best quality” version of an image, and the “original” image is not available, the service will default to the “web” version (the idea is that some of these tiers will be optional depending on the need of the instances).
This is all partially working at the moment, and I’m hoping to rework all this when I replace how stores and images relate to each other (This is what I’m starting on now, and why I built export now since this will be backwards incompatible). So for the moment the export simply consists of the “web” version.
I’ve got unit tests working for this as well. I’m trying a new approach for unit testing in this project. Instead of using mocks, the tests are actually running against a fully instantiated versions of the services. There exists a servicestest package which does all the setup (using temporary directories, etc) and tear down of these services. Each individual unit test gets the services from this package and will run tests against a particular one.
This does mean all the services are available and exercised within the tests, making them less like unit tests and more like integrations tests. But I think I prefer this approach. The fact that the dependent services are covered gives me greater confidence that they’re working. It also means I can move things around without changing mocks or touching the tests.
That’s not to say that I’m not trying to keep each service their own component as much as I can. I’m still trying to follow best practice of component design: passing dependencies in explicitly when the services are created, for example. But setting them all up as a whole in the tests means I can exercise them while they serve the component being tested. And the dependencies are explicit anyway (i.e. no interfaces) so it makes sense keeping it that way for the tests as well. And it’s just easier anyway. 🤷
Anyway, starting rework on images and stores now. Will talk more about this once it’s done.
Photo Bucket Update: More On Galleries
Spent a bit more time working on Photo Bucket this last week1, particularly around galleries. They’re progressing quite well. I’m made some strides in getting two big parts of the UI working now: adding and removing images to galleries, and re-ordering gallery items via drag and drop.
I’ll talk about re-ordering first. This was when I had to bite the bullet and start coding up some JavaScript. Usually I’d turn to Stimulus for this but I wanted to give HTML web components a try. And so far, they’ve been working quite well.
The gallery page is generated server-side into the following HTML:
<main>
  <pb-draggable-imageset href="/_admin/galleries/1/items" class="image-grid">
    <pb-draggable-image position="0" item-id="7">
      <a href="/_admin/photos/3">
        <img src="/_admin/img/web/3">
      </a>
    </pb-draggable-image>

    <pb-draggable-image position="1" item-id="4">
      <a href="/_admin/photos/4">
        <img src="/_admin/img/web/4">
      </a>
    </pb-draggable-image>

    <pb-draggable-image position="2" item-id="8">
      <a href="/_admin/photos/1">
        <img src="/_admin/img/web/1">
      </a>
    </pb-draggable-image>
  </pb-draggable-imageset>
</main>
Each <pb-draggable-image> node is a direct child of an <pb-draggable-imageset>. The idea is that the user can rearrange any of the <pb-draggable-image> elements within a single <pb-draggable-imageset> amongst themselves. Once the user has moved an image onto to another one, the image will signal its new position by firing a custom event. The containing <pb-draggable-imageset> element is listening to this event and will respond by actually repositioning the child element and sending a JSON message to the backend to perform the move in the database.
A lot of this was based on the MDN documentation for drag and drop and it follows the examples quite closely. I did find a few interesting things though. My first attempt at this was to put it onto the <pb-draggable-image> element, but I wasn’t able to get any drop events when I did. Moving the draggable attribute onto the <a> element seemed to work. I not quite sure why this is. Surely I can’t think of any reason as to why it wouldn’t work. It may had something else, such as how I was initialising the HTTP components.
Speaking of HTML components, there was a time where the custom component’s connectedCallback method was being called before the child <a> elements were present in the DOM. This was because I had the <script> tag in the the HTML head and configured to be evaluated during parsing. Moving it to the end of the body and loading it as a module fixed that issue. Also I found that moving elements around using element.before and element.after would actually call connectedCallback and disconnectedCallback each time, meaning that any event listeners registered within connectedCallback would need to be de-registered, otherwise events would be handled multiple times. This book-keeping was slightly annoying, but it worked.
Finally, there was moving the items with the database. I’m not sure how best to handle this, but I have that method that seems to work. What I’m doing is tracking the position of each “gallery item” using a position field. This field would be 1 for the first item, 2 for the next, and so on for each item in the gallery. The result of fetching items would just order using this field, so as long as they’re distinct, they don’t need to be a sequence incrementing by 1, but I wanted to keep this as much as possible.
The actual move involves two update queries. The first one will update the positions of all the items that are to shift left or right by one to “fill the gap”. The way it does this is that when an item is moved from position X to position Y, the value of position between X and Y would be changed by +1 if X > Y, or by –1 if Y > X. This is effectively the same as setting position X to X + 1, and so on, but done using one UPDATE statement. The second query just sets the position of item X to Y.
So that’s moving gallery items. I’m not sure how confident I am with this approach, but I’ve been testing this, both manually and by writing unit tests. It’s not quite perfect yet: I’m still finding bugs (I found some while coming up with these screencasts). Hopefully, I’ll be able to get to the bottom of them soon.
The second bit of work was to actually add and remove images in the gallery themselves. This, for the moment, is done using a “gallery picker” which is available in the image details. Clicking “Gallery” while viewing an image will show the list of galleries in the system, with toggles on the left. The galleries an image already belongs to is enabled, and the user can choose the galleries they want the image to be in by switching the toggles on and off. These translate to inserts and remove statements behind the scenes.
The toggles are essentially just HTML and CSS, and a bulk of the code was taken from this example, with some tweaks. They look good, but I think I may need to make them slightly smaller for mouse and keyboard.
I do see some downside with this interaction. First, it reverses the traditional idea of adding images to a gallery: instead of doing that, your selecting galleries for an image. I’m not sure if this would be confusing for others (it is modelled on how Google Photos works). Plus, there’s no real way to add images in bulk. Might be that I’ll need to add a way to select images from the “Photos” section and have a dialog like this to add or remove them all from a gallery. I think this would go far in solving both of these issues.
So that’s where things are. Not sure what I’ll work on next, but it may actually be import and export, and the only reason for this is that I screwed up the base model and will need to make some breaking changes to the DB schema. And I want to have a version of export that’s compatible with the original schema that I can deploy to the one and only production instance of Photo Bucket so that I can port the images and captions over to the new schema. More on this in the future, I’m sure.
Photo Bucket Galleries and Using the HTML Popover API
Spent a bit more on Photo Bucket this evening. Tonight I started working on galleries, which’ll work more or less like albums.
At the moment you can create a gallery and add a photo to it. Most of the work so far has been backend so the UI is pretty rough. Eventually you’ll be able to do things like rearrange photos within galleries, but for the moment they’ll just be added to the end.
I did need to add some modals to the UI, such as the New Gallery model that’s shown for the gallery name. This gave me the opportunity to try out the new popover API. And yeah, it does exactly what it says on the tin: add the popover attribute to an element and it becomes a working popover (at least in the latest version of Vivaldi). Must say it’s impressive that this is now possible with HTML alone.
The initial version of the modals used a <div> for the popover target. And while that worked, there were some small annoyances. First was that the form within the popover didn’t get focus when the popover was displayed. It would be nice to click “New” and start typing out the gallery name. But this is a small thing that’s easily solvable with JavaScript, so it’s no big deal.
The second, slightly larger one, was that dismissing the popover by clicking outside of it will not eat the input. If you were to click a sidebar link while the New Gallery model is opened, you’ll end up on that newly selected page. I’m not a fan of this. Dismissing the popover feels like its own user gesture, and I fear the user accidentally activating things when all they’re trying to do is dismiss the popover (it’s not in place now, but I am planning to dim the background when the Create Gallery modal is visible).
Fortunately, there’s a simple solution to this. It turns out that replacing the <div> element with a <dialog> element would solves both problems. It works seamlessly with the new popover attributes, yet showing the dialog will give focus to the form, and will eat the click when the user dismisses it.
Perfect. Looks like I’ve delayed the need for JavaScript a little longer (it will come eventually; it always will).
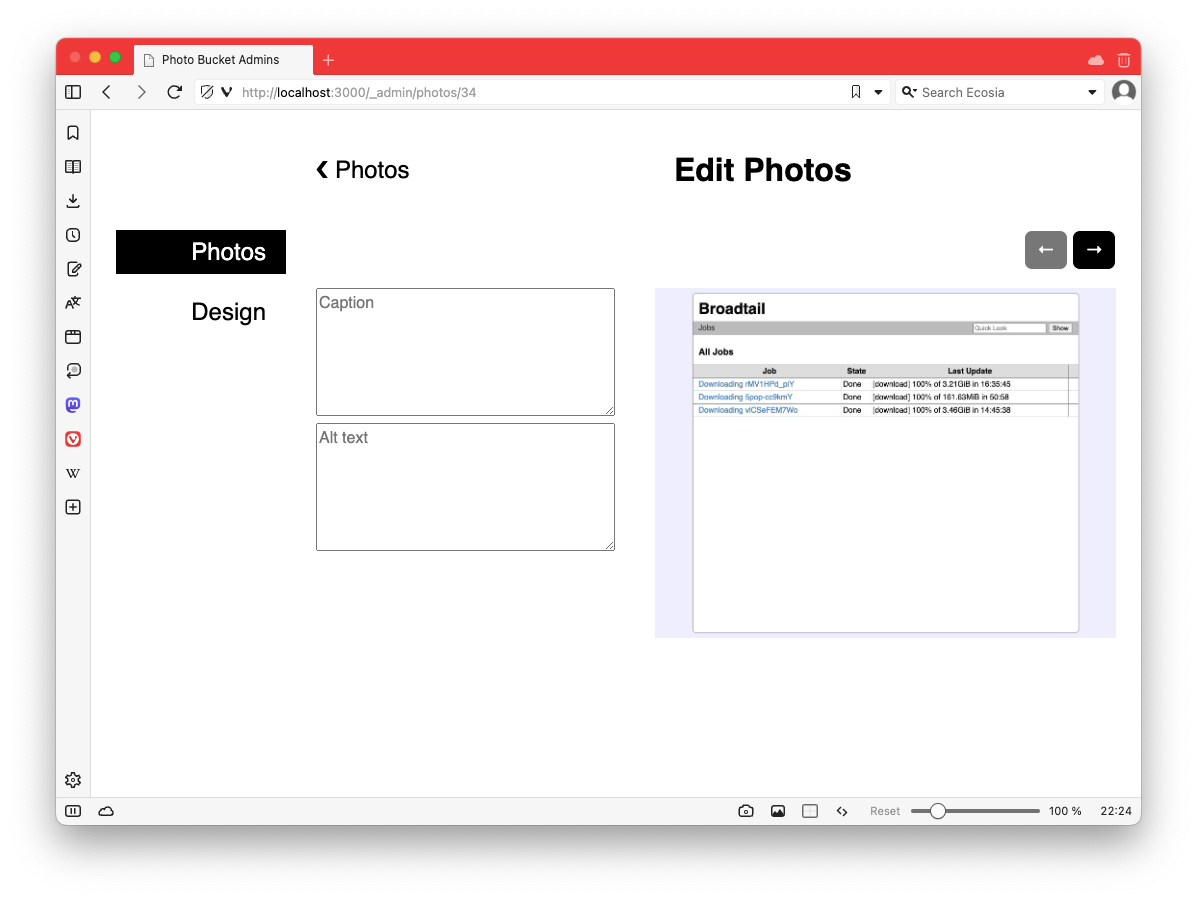
Spent some time this evening working on my image hosting tool. It’s slowly coming along, but wow do I suck at UI design (the “Edit Photo” screen needs some rebalancing).
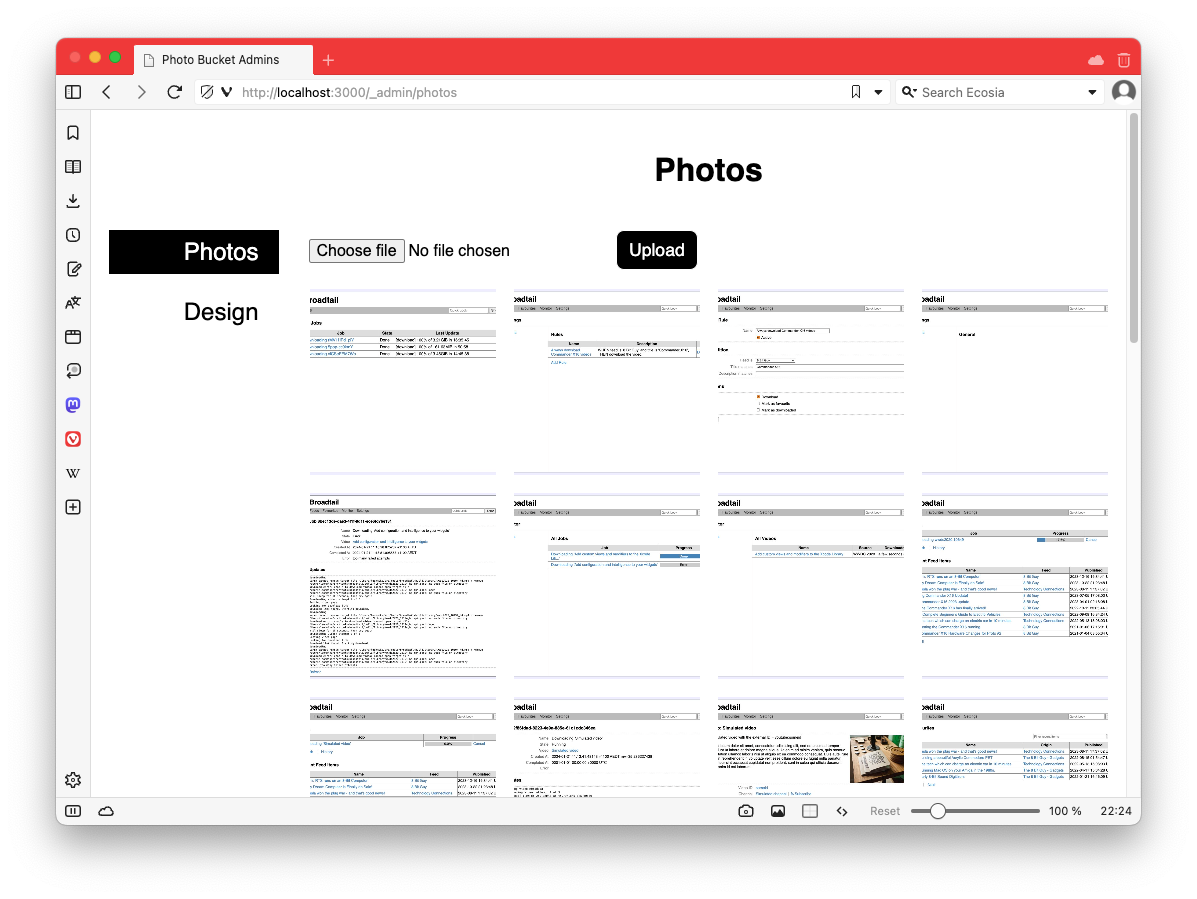
Working on one of the admin sections of the project I was alluding to yesterday. Here’s a screencast of how it’s looking so far.
The styling and layout is not quite final. I’m focusing more on functionality, and getting layout and whitespace looking good always takes time. But compared to how it looked before I started working on it this morning, I think it’s a good start.
In the end it took significantly more time to write about it then to actually do it, but the dot product approach seems to work.
Making some progress in learning Elm for building frontends. Started working on a Connections clone, which I’m calling “Clonections”. This is what I’ve got so far:
It’s been fun using Elm to build this. So far I’m liking the language. Of course, now I’ll have to come up with puzzles for this. 😐
Test Creek: A Test Story With Evergreen.ink
Had a play with Evergreen.ink this afternoon. It was pretty fun. Made myself a test story called Test Creek which you can try out (the story was written by me but all the images were done using DALL-E).
The experience was quite intuitive. I’ve yet to try out the advanced features, like the Sapling scripting engine, but the basics are really approachable for anyone not interested with any of that.
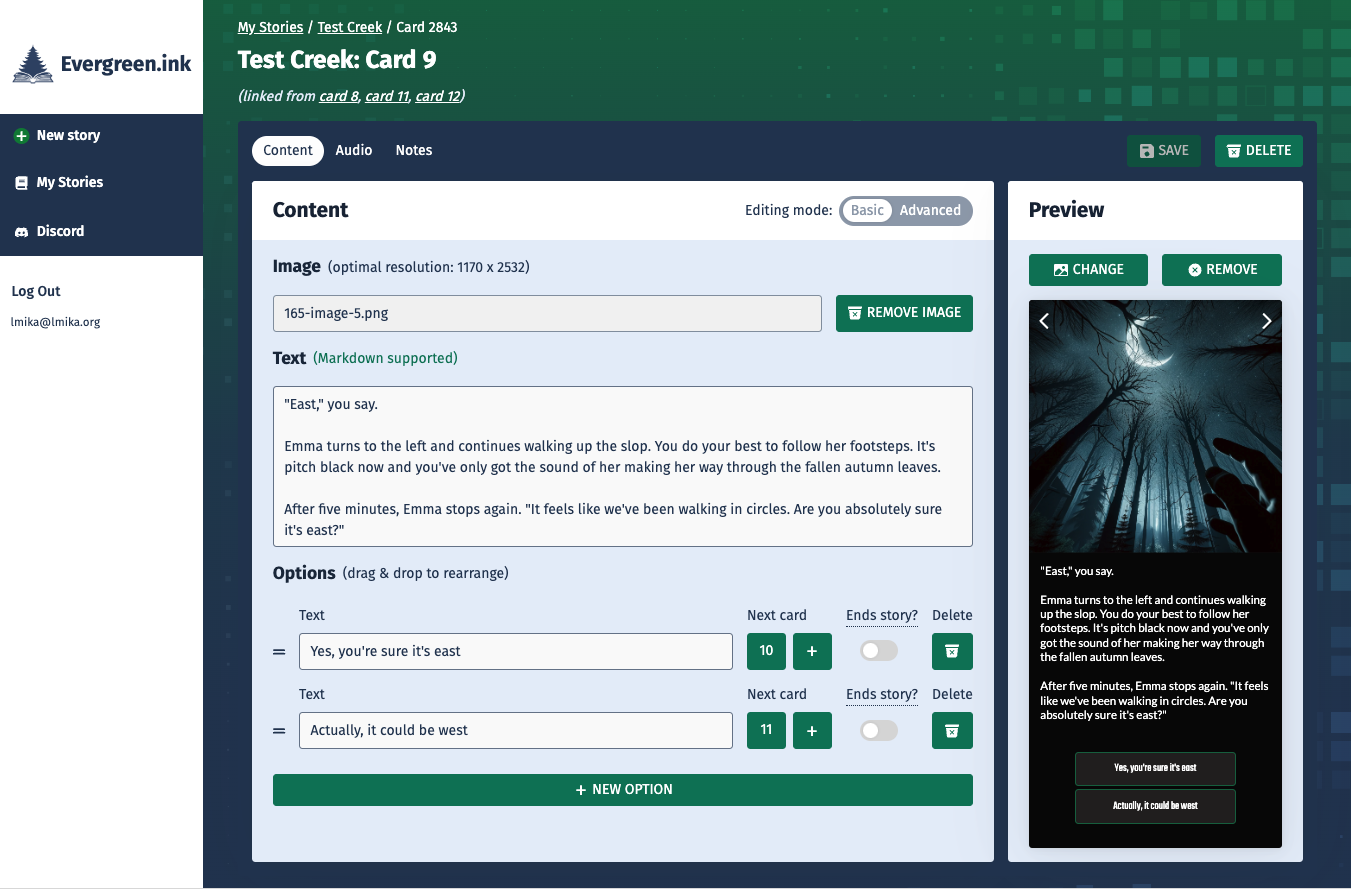
I would recommend not writing too much on a single card. Keep it to maybe two or three paragraphs. Otherwise the text will start to flow over the image, like it does on one of the cards in this story. Evergreen.ink does keep the text legible with a translucent background. But still, it’s just too much text.
I should also say that the preview, to the right of the editor, is interactive, meaning that you can use it to jump to cards backed by the options. While I was playing around, I was wondering why there wasn’t a quick way to do this. It wasn’t until I started writing this post that I actually tried the option in the preview, and it worked.
As for the app itself, if I could make one improvement, it would be something like an image picker which would allow me to reuse images already attached to other cards. I’m not sure how best to use images in these types of stories, but the way I was going for was more to accent the story instead of simply illustrating what’s going on in the prose. So I wanted to reuse images over a series of related cards, and in order to do that I had to upload duplicates.
But really, this is quite a minor quibble. On the whole I was quite impress by how well the experience was. It’s not easy trying to express something as complex as an interactive story, and I think Evergreen.ink did a pretty decent job.
So yeah, give it a try. It was quite fun putting this interactive story together. I haven’t got any other ideas lined up, but it would be good to make another one down the line.
Edit: One other thing to be aware of is that the link given to you when you try to share a story requires a login. So if you want to avoid that, you’ll need to choose the Zip option, which basically bundles the story as a static website. You can deploy it to Netlify quite easily (just check the permissions of the files first, I had to chmod 666 them). Thank-you Robb for letting me know.
Also, thank-you to omg.lol for the Switchboard feature. It saved my tale dealing with the new redirect.
Spent a little more time working on my idea for Dynamo-Browse this week. Managed to get it somewhat feature complete this weekend:
I probably should say a few words on what it actually is. The idea is to make it quick and easy to run pre-canned queries based on the currently selected item and table.
Let’s say you’ve got a table with customer information, and another table with subscription information, and they’re linked with some form of customer ID. If you wanted to see the subscriptions of a customer, up until now, you’d have to copy the customer ID to the paste-board, change the currently viewed table, then run a query to select the subscription with that customer ID. It’s not difficult but it’s extremely tedious.
This change is meant to streamline this. Now, in a script function, you can define a “related item” provider which, if matched against the currently displayed table, will be given the currently selected item, and will return a list of queries that will display items related to the current item (depending on whatever definition of “related” will be). This will be presented to the user as a list. When the user chooses the item, the query will run and the results will be displayed.
Here’s an example of the script used for the screencasts:
ext.related_items("business-addresses", func(item) {
    return [
        {"label": "Customer", "query": `city=$city`, "args": {"city": "Austin"}},
        {"label": "Payment", "query": `address^="3"`},
        {"label": "Thing", "table": "inventory",
            "query": `pk=$pk`, "args": {"pk": "01fca33a-5817-4c27-8a8f-82380584e69c"}},
    ]
})

ext.related_items("inventory", func(item) {
    sk := string(item.attr("sk"))
    return [
        {"label": "SK: " + sk, "table": "business-addresses",
            "query": `pk^=$sk`, "args": {"sk": sk}},
    ]
})
Notice how the last business-addresses item specifies the “inventory” table, and that the “inventory” provider actually uses an attribute of the item. Here’s a screencast of that working:
This feature has been on the idea board for a while. I was trying to work out how best to handle the pre-canned queries, especially considering that they will likely be different for each item and table. Some ideas I had were adding additional UI elements that the user could use to configure these queries. These would go into the workspace file, a sort of an embedded database which is created for each session. This was pretty crappy, especially when you consider that workspaces usually only last until the user exists. It was only a few weeks ago when I considered using the scripting facilities to implement this (which, honestly, shows how much it remains under-utilised).
Anyway, I’ve only just finished development of it. I’d still like to try it for the various related items I tend to use during my day-to-day. We’ll see how well it works out.
Got an idea for a new feature for Dynamo-Browse. Began working on it this evening, starting with the UI:
Recorded using VHS.
Idea For Mainboard Mayhem: A Remote Pickup
Sort of in-between projects at the moment so I’m doing a bit of light stuff on Mainboard Mayhem. I had an idea for a new element: a remote control which, when picked up, will allow the player to toggle walls and tanks using the keyboard, much like the green and blue buttons.
I used ChatGGT to come up with some artwork, and it produced something that was pretty decent.
Only issue was that the image was huge — 1024 x 1024 — and the tiles in Mainboard Mayhem were only 32 x 32.
I tried shrinking it down in Acorn, using various scaling algorithms. The closest that worked was bringing it down slowly to about 128 x 128 using Nearest Neighbour, than trying to go all the way down to 32 x 32 using Lanczos. That worked, but it required true 32 bit colour to be recognisable, and I wanted to preserve the 16 colour palette used by the original Chips Challenge.
So using the original image as a reference, I bit the bullet and drew my own in Acorn. You can see it here in this test level:
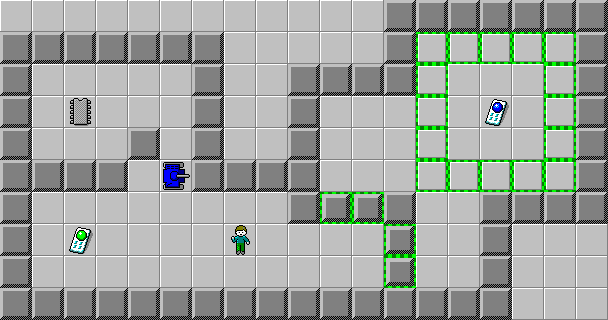
It turn out okay. At least it’s recognisable. Anyway, I coded it up and gave it a bit of a try:
Yeah, it works well. When the player has the appropriate colour remote, they can hit either Z or X to toggle the green walls or blue tanks respectively. I really should add some indicators in the status bar to show which button to press.
Not sure what I’ll do after this. The fun part was coming up with the element. But I guess I’ll have to come up with a few puzzles that use it.
While poking through some old GarageBand projects I came across this track I wrote a few of years ago. I didn’t think much of it of the time, but over the last day or so, it’s started to grow on me.
This conversation with @Gaby got my creative juices flowing so I though I’d put together a small video tutorial for using the GLightbox plugin by @jsonbecker. There have been a few updates with the plugin so how I use it might be slightly out of date. Either way, please enjoy.
More Logic Pro this evening. Here’s a recording of the main theme from Tubular Bells 2. Love how the Steinway Grand Piano sounds.
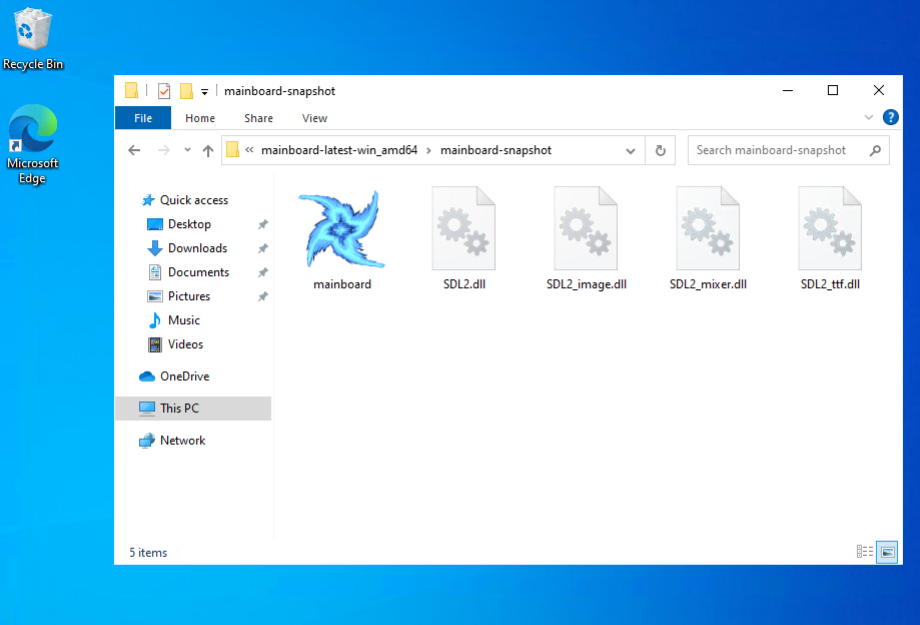
More work on Mainboard Mayhem today. Had a bit more success getting the Windows build into a releasable state.
First thing was the app icon. That blog post I talked about yesterday worked: I was able to set the icon of the executable. I did make a slight adjustment though. The post suggested using ImageMagick to produce the ICO file, but I wasn’t happy with how they looked. There were a lot of artefacts on the smaller icon sizes.
So I looked around for an alternative, and found this package by Lea Anthony. He’s the maintainer of Wails, a cross-platform toolkit for making browser-based GUI apps in Go, sort of like Electron but without bundling Chrome. In fact, most of the build for Mainboard Mayhem was put together by reading the Wails source code, so I trust he knows what his doing. And sure enough, his package produced a nicely scaled ICO file from a source PNG image. Better yet, it was distributed as a Go package, so I could no need to install and shell-out to run it: I could just integrated it directly into the project’s build tool.
Using rsrc to generate the SYSO file with the icon worked as expected: Go did pick it up and embed it into the executable. I did have some trouble getting the Go compiler to pick up these files at first. In short, they need to be in the same directory as the main package. So if you’re running go build ./cmd/thing, make sure the SYSO files are in ./cmd/thing. Other than that, no real issues here.
One last thing I had to deal with was the console window. Running a Go app in Windows shows the console by default. Perfectly fine for command line tools, but less so for games:
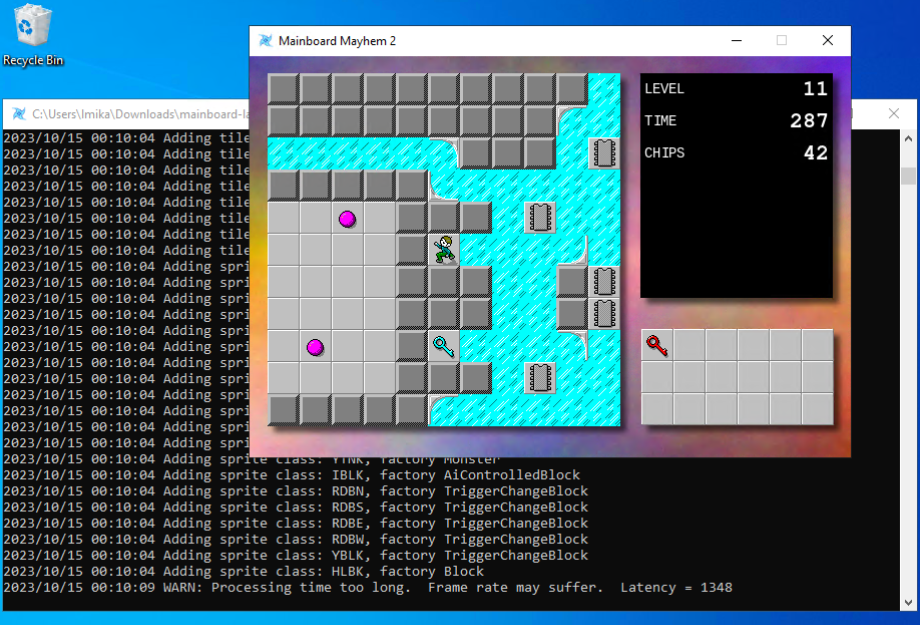
So I had to find a way to hide the console on launch. Since Mainboard Mayhem is using SDL, I’m actually using MinGW to cross-compile the Windows release on an Ubuntu build runner. The documentation for MinGW suggests adding -mwindows as a linker option to hide the console:
# What I was doing before, which didn't work
CGO_ENABLED=1 \
CC="x86_64-w64-mingw32-gcc" \
GOOS="windows" \
CGO_LDFLAGS="-mwindows -L…" \
go build -o dist/cclm/mainboard.exe ./cmd/cclm'
This didn’t actually work when I tried it: launching the app kept bringing up the console. Turns out what I should’ve done was follow the advice of many Stack Overflow answers, and set -ldflags "-H=windowsgui" on the Go command:
# This works
CGO_ENABLED=1 \
CC="x86_64-w64-mingw32-gcc" \
GOOS="windows" \
CGO_LDFLAGS="-L…" \
go build -ldflags "-H=windowsgui" -o dist/cclm/mainboard.exe ./cmd/cclm'
This works even without the -mwindows switch. Not completely sure why though. I guess MinGW is not actually being used for linking? Or maybe -m only works with C header files? Don’t know. 🤷 But doesn’t matter: the console no longer shows up on launch.
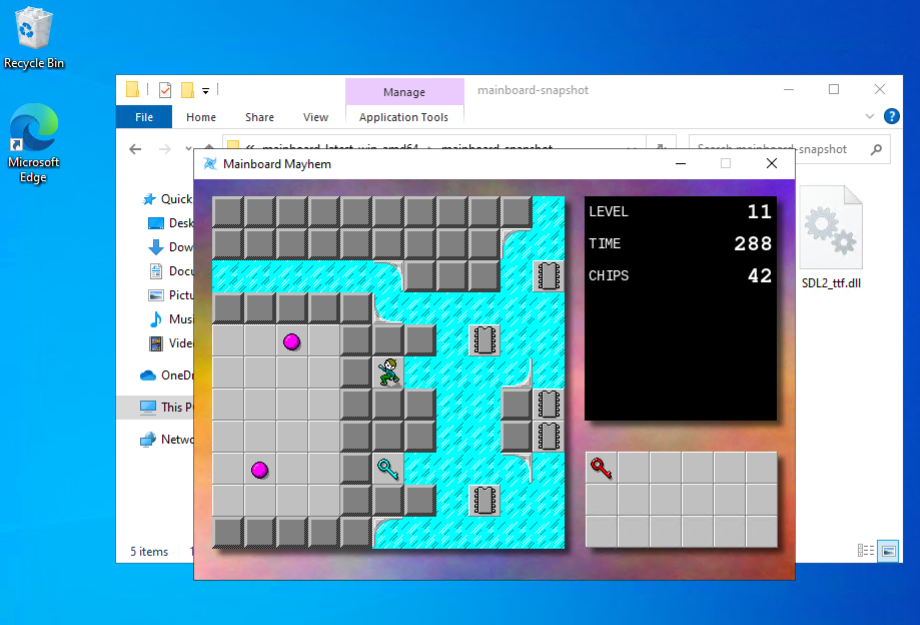
Finally, there was testing it all, and for this I just bit the bullet and set-up a Windows 10 virtual machine in Azure. The rate is something like $0.16 AUD an hour, an easy decision compared to spending time trying to get a VM with Windows 10 running on my machine.
One remaining thing that’s slightly annoying is Windows Defender refusing to launch it after download, doing effectively the same thing as Gatekeeper on MacOS does:
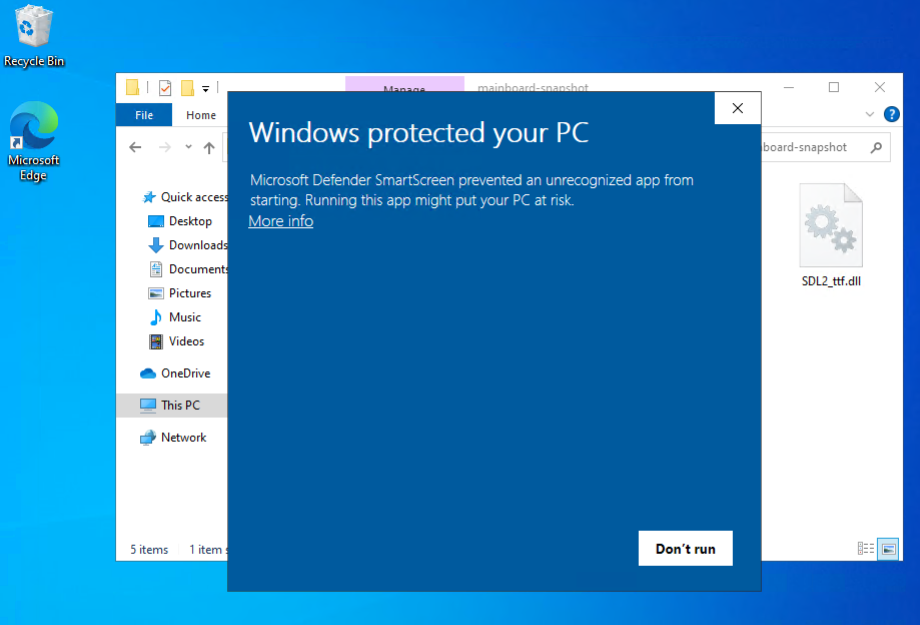
I’m sure there’s a way around it but it’s probably not worth learning about it at this stage. It’s easy enough to dismiss: click “More Info” and the click “Run Anyway”:
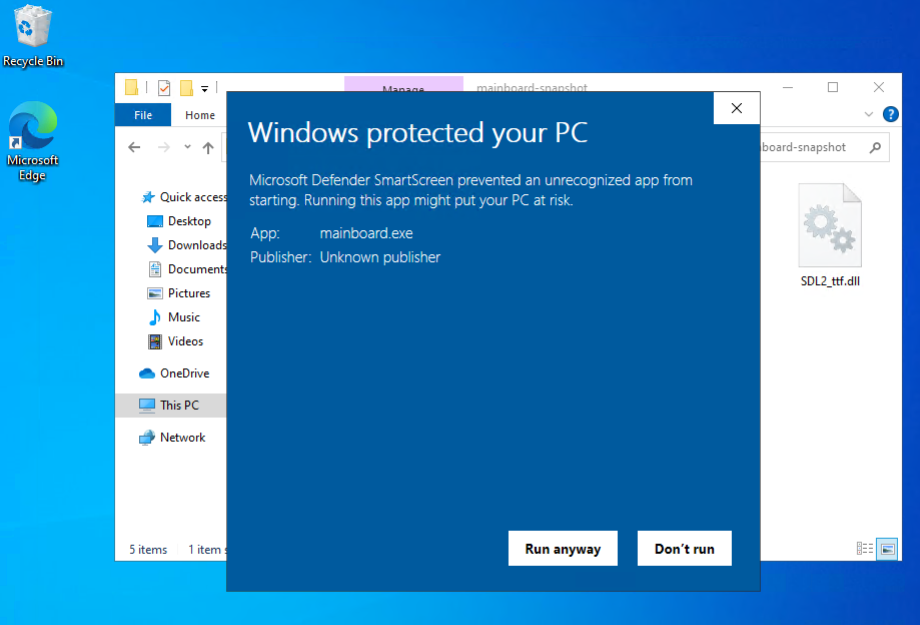
But other than that, I think the Windows version of Mainboard Mayhem is ready. I’ve updated the website to include the Windows archive if anyone’s interested.
Spent some time today on Mainboard Mayhem, trying to finish the Windows build. I’ve actually got Windows version of the game being built for a while now. I just haven’t published them, mainly because I haven’t got the app icon set-up yet.
But this week, Golang Weekly had a link to a blog post by Mahmud Ridwan on how to do so. It looked pretty straightforward, so I thought I’d give it a try.
And yeah, the instructions themselves were easy enough, and I wish I could say if they worked or not. But in order to test it, I need a Windows machine. And I don’t have one, and I wasn’t about to get one just for this.
So I tried setting up Windows in a VM using UTM. I got this far:
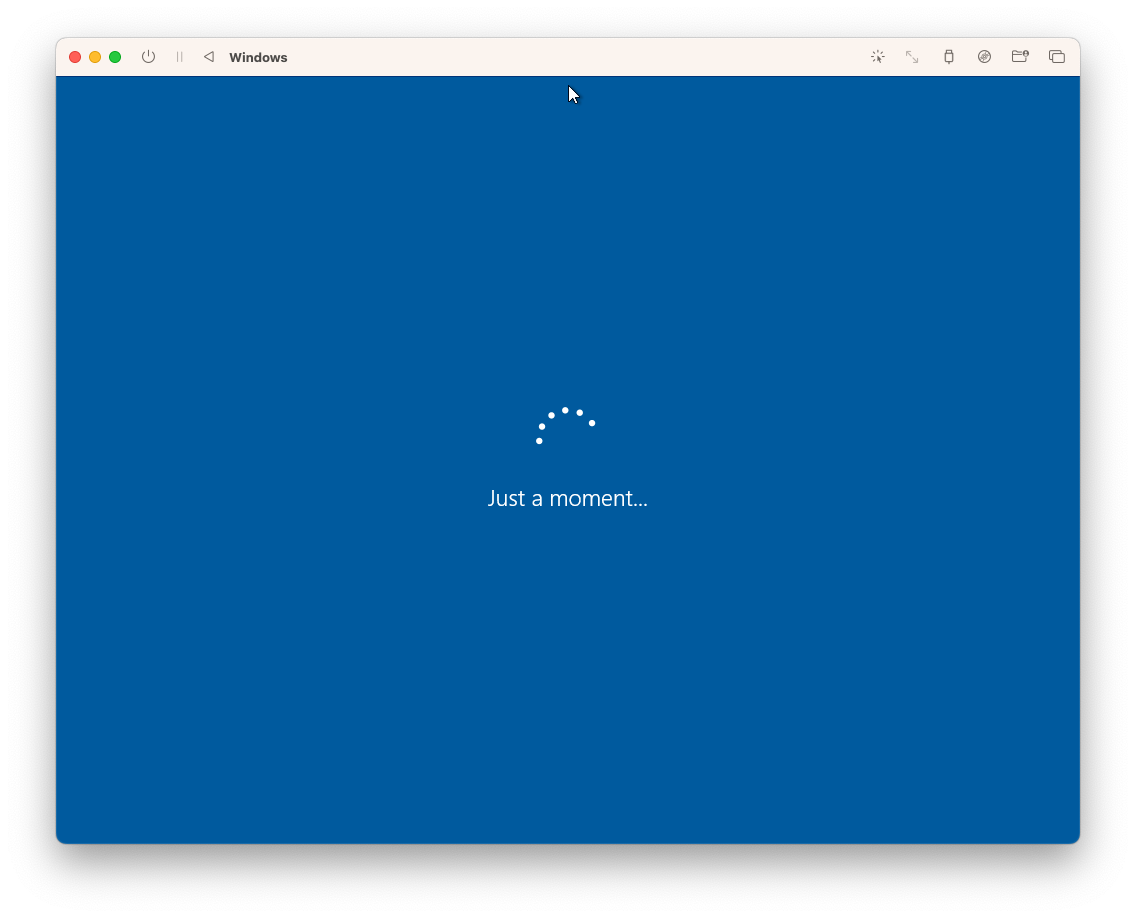
Yeah, this infinite spinner has been staring at me pretty much all day. I got a Windows 10 installer ISO using CrystalFetch, and it seemed to work. But it just doesn’t want to boot up for the first time.
Not actually sure what the problem is. The error message seems to suggest that it’s having trouble connecting to the internet. Might be that? Or maybe the installation didn’t complete properly? Could be anything. 🤷
So no luck getting this tested yet. I’m wondering if it might be easier to forget virtualisation and just launch a Windows instance in the cloud somewhere instead.
Launched Logic Pro and did some MIDI recording this evening. Here’s an except from “Top of the Morning” from Tubular Bells 3.