
Other Artefacts
-
I don’t deny that part of this is procrastination of other things I should be finishing. ↩︎
-
To be honest, I think part of this lengthy workflow was to satisfy the “resistance”: self-imposed roadblocks to stop me from publishing anything at all. ↩︎
- Press a global hot key to show a markdown notepad
- Enter a note, much like this one.
- It will be written to the Obsidian daily notes, under the “Notes” header
-
I am still using that Lisp-based Evans wrapper I mentioned last week. ↩︎
-
I couldn’t find any decent bridging wire at Jaycar either so I used reclaimed wire from a CAT-5 cable. I stripped the insulation completely, twirled the wires, and soldered them onto the contacts. It worked really well. ↩︎
- User authenticates with their website.
- They are presented with a set of file uploads, which they can used to prep their images. They can reorder their images (ideally using drag-and-drop) and write some alt text.
- Once they’re happy with the images, they click “Upload”.
- The server will upload the images and then generate the HTML to produce a gallery (or just a list of images if they so prefer).
- To ship a hosted service for others to use. The goal is to get into the practice of shipping software for other people. This is the principal goal: it must be usable by others. Otherwise, there’s no point doing this.
- To get a working version out the door in two weeks for others to start trying. Two weeks is April 1st, which should be achievable.
- To learn about the Indypub formats, specifically IndieAuth and Micropub.
- I wasn’t using it enough to get excited about it. I mean, I was using to manage my uploaded pictures for workingset.net, but I was only doing so occasionally.
- Apart from not using it, I wasn’t getting much out of the project itself. There wasn’t anything exciting about the project from a purely coding standpoint (apart from doing image resizing in the browser using WASM, which might come in handy for some other projects), and if I was getting nothing from using the project myself, there was no other intrinsic motivation to continue working on it.
- I was planning to move on from Drummer and Old School as a blogging platform. I figured giving write.as a try, which also has image hosting, so there was no real need for it anymore.
- It was hacked together in Go, which is my language of choice.
- The parser was built using Participle, which is an excellent library for building parsers from annotated structs. If you work with Go and ever considered building a DSL, I would highly recommend this library.
- The YAML document is serialised using this YAML library.
- First the “program” is parsed from stdin and translated into an AST.
- This AST is then converted into an internal representation of the Step Function. This is effectively the graph, with all the steps linked together via pointers.
- The graph is then traversed and converted into a series of structs which, when serialised, will produce the YAML document that can be loaded into AWS.
More Logic Pro this evening. Here’s a recording of the main theme from Tubular Bells 2. Love how the Steinway Grand Piano sounds.
Launched Logic Pro and did some MIDI recording this evening. Here’s an except from “Top of the Morning” from Tubular Bells 3.
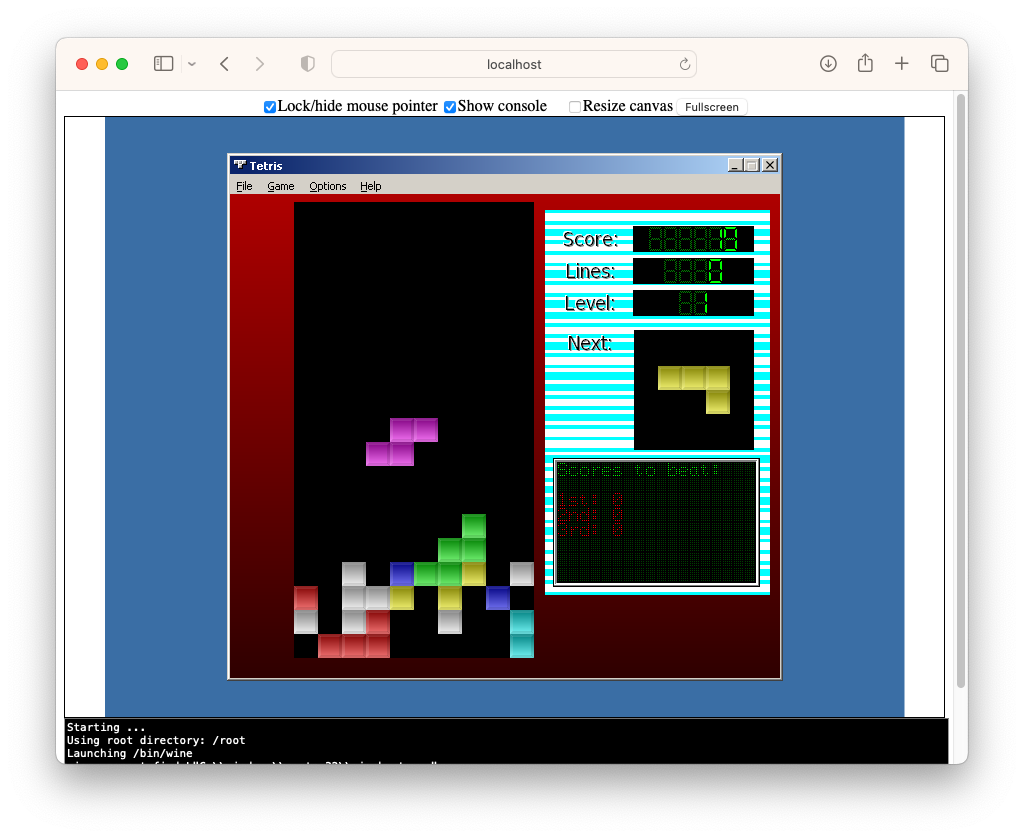
After having some success getting my early QBasic programs running in the browser I had a bit of a look this morning to see if I could do the same for my Delphi apps. I found a project called BoxedWine which looks promising. Seems to be a minified version of Wine that that runs in browser using WASM.
I downloaded the example and had a bit of a play around with a Tetris clone I built. It worked… to a degree. It was a little slow, and some of the colours were off. But it ran, and was actually usable.
I did another test with an app that used OpenGL, which was less successful.
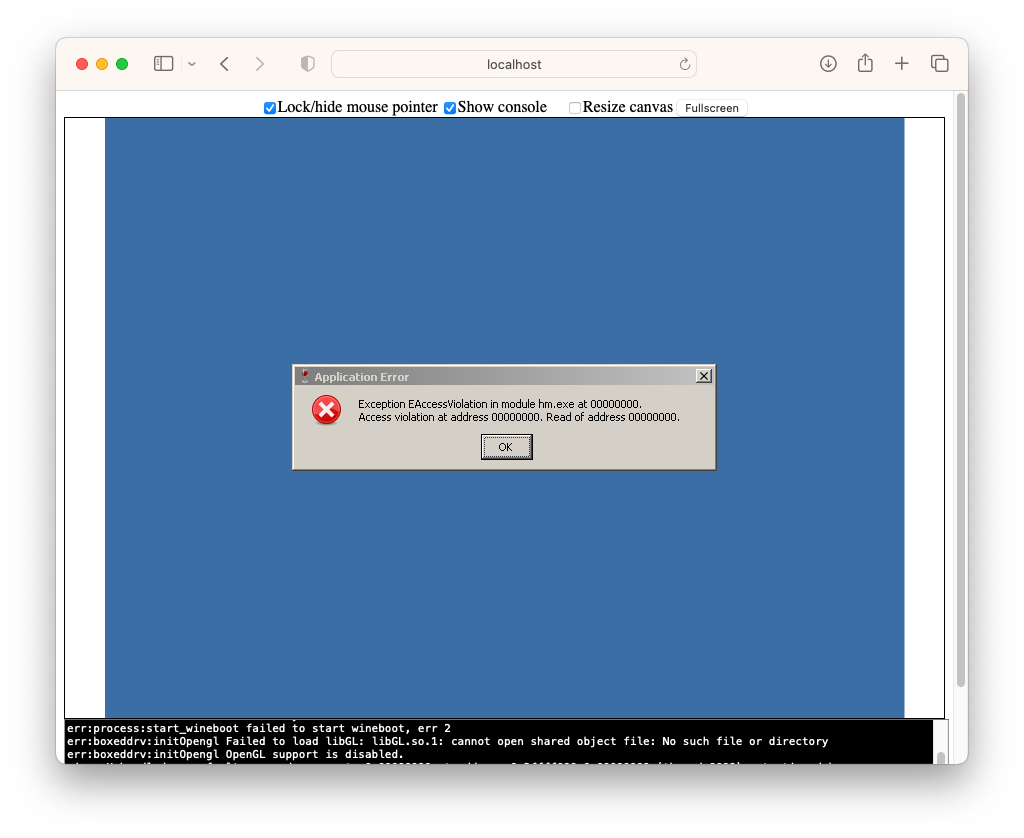
I think some of the OpenGL shared objects are not in the minified Wine distribution it was using. It might be possible to include them: there are instructions, and a few demos, on how to load files from the full Wine distribution on demand.
Anyway, not sure if I’ll pursue this further but it was a fun little exercise nonetheless. I’m pretty impressed that this is even possible at all. The Web stack is pretty freaking awesome.
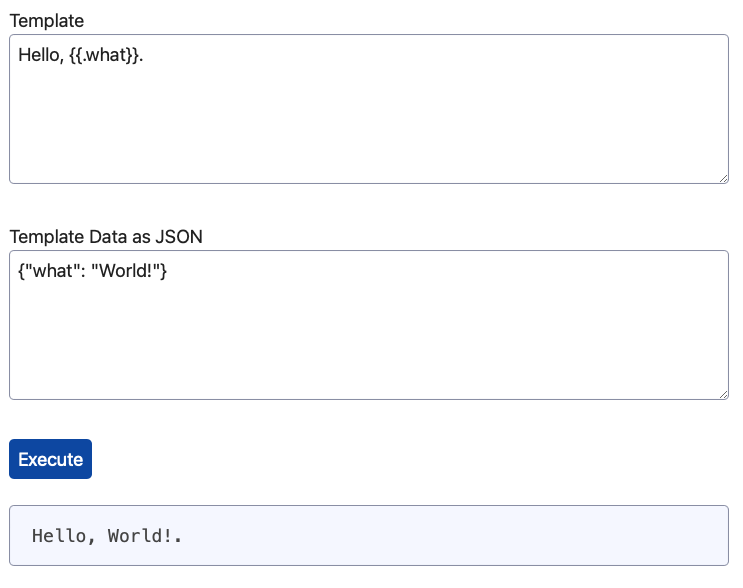
Spent some time today building a site for my Go utility packages. A feature I’ve decided to add is a Go template playground, where you can test out Go templates in the browser. Not something I’ll use everyday but I’ve occasionally wished for something like this before. Could be useful.
Early Version of This Blog
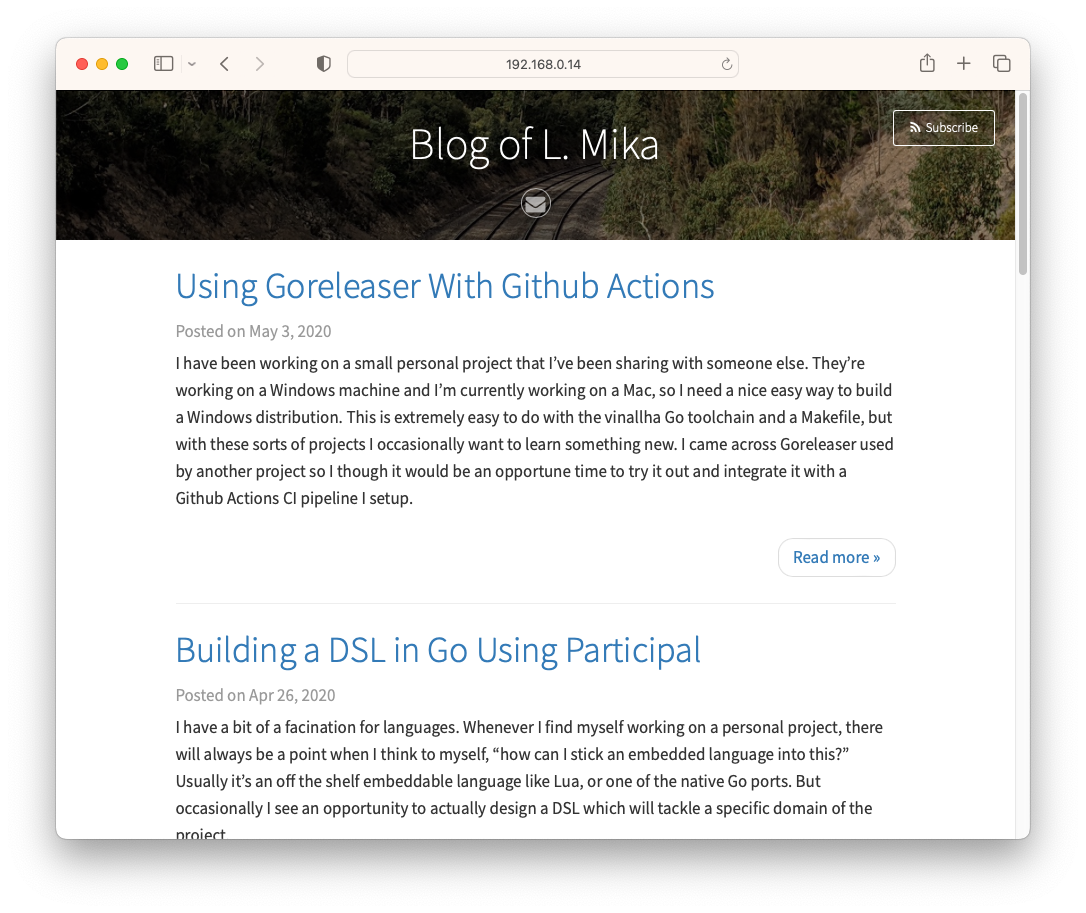
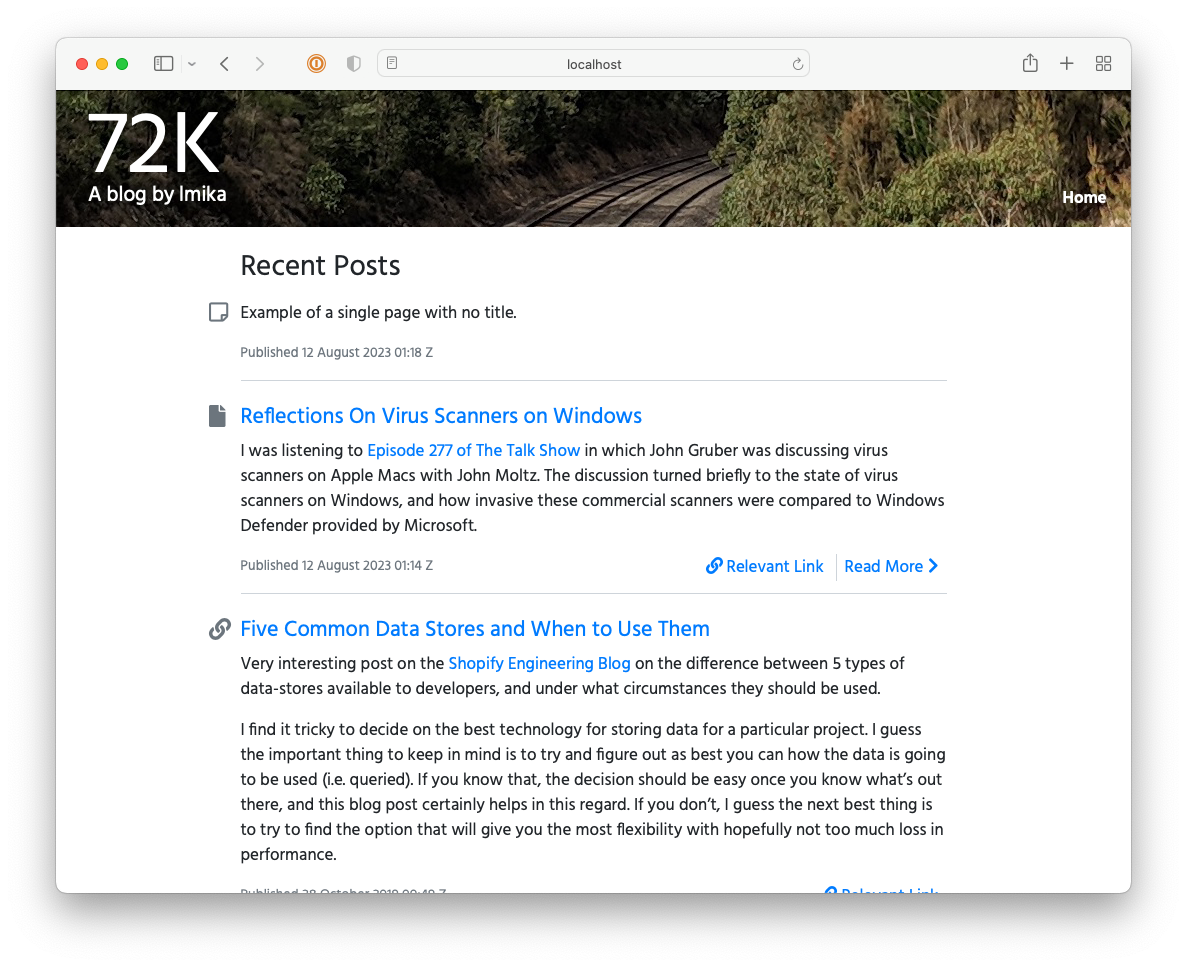
I was looking for something in GitHub the other day when I found the repository for the first iteration of this blog. I was curious as to how it looked and I’d thought that I’d boot it up and post a few screenshots of it.1
It started life as a Hugo site. There a two reasons for that, with the first being that I didn’t have the patients to style a website from scratch, and Hugo came with some pretty nice templates. I chose the Vienna template, which seems to have fallen out date: many of the template variables no longer work with a modern version of Hugo. I’m also please to see that I did end up customising the header image — a photo taken in Macedon of the train line to Bendigo — although that’s pretty much all I customised.
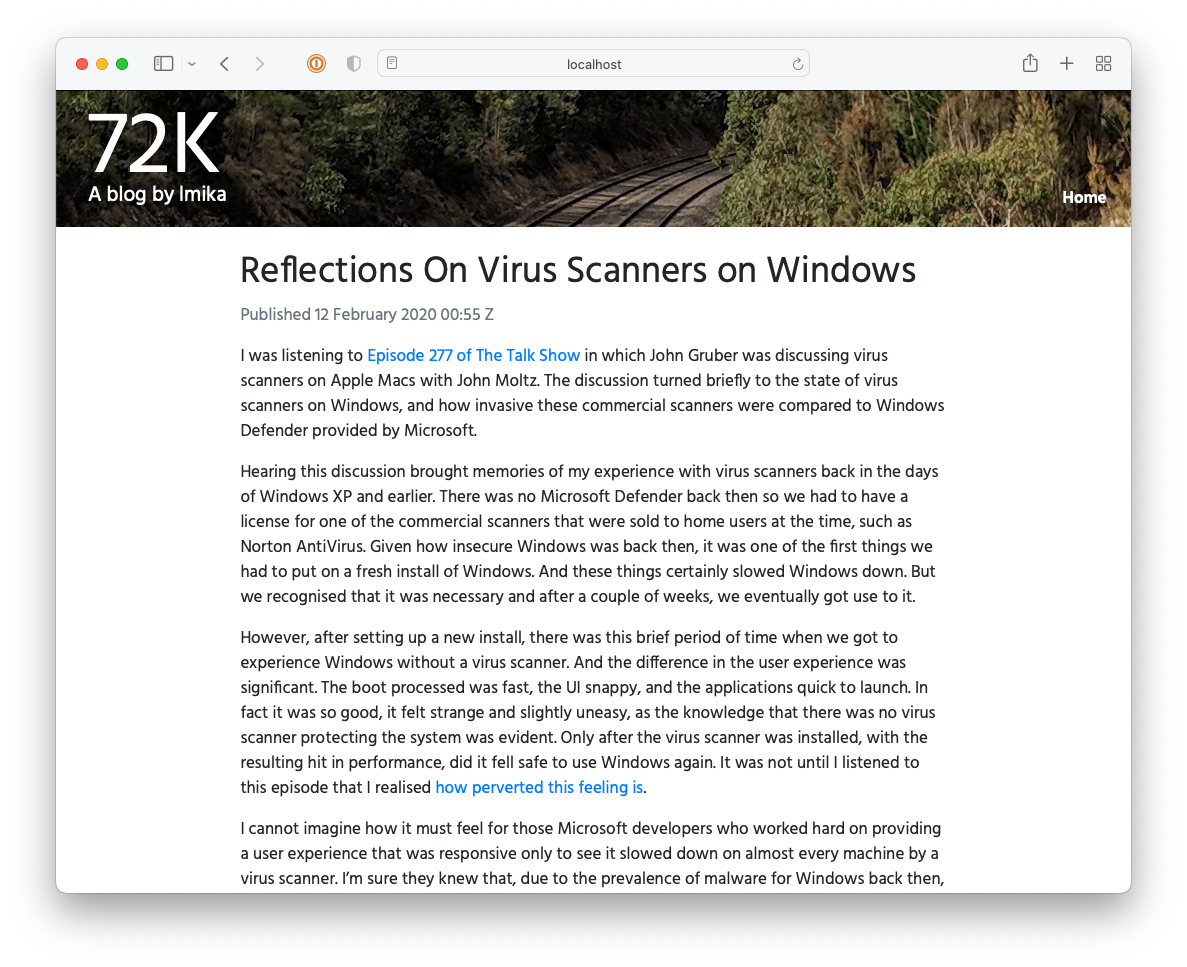
Believe it or not, I feel a little nostelgic for it. Such simple innocence in trying to summon up the courage to write stuff on the internet. Although don’t let the article count fool you: I think there were a total of 10 posts, with half of those being unfinished drafts. I was still trying to work out whether I’d like to write mainly about software technology, or simply talk about my day. But one thing’s for sure, I was under the impression that “real” blogs required posts with a title and at-least 300 words of content. That’s probably why I only had 5 posts finished in 8 months.
The second reason why I went with Hugo was that I’d have no excuse to tinker with a CMS. I’d figure that, given that I wasn’t using one, I’d be force to focus on the content. Well, that level of self-discipline didn’t last long. About in the middle of 2020, I started building a CMS for the blog using Buffalo. I was thinking of launching it with the name “72k” (72k.co), named after the milepost the header photo was taken at.

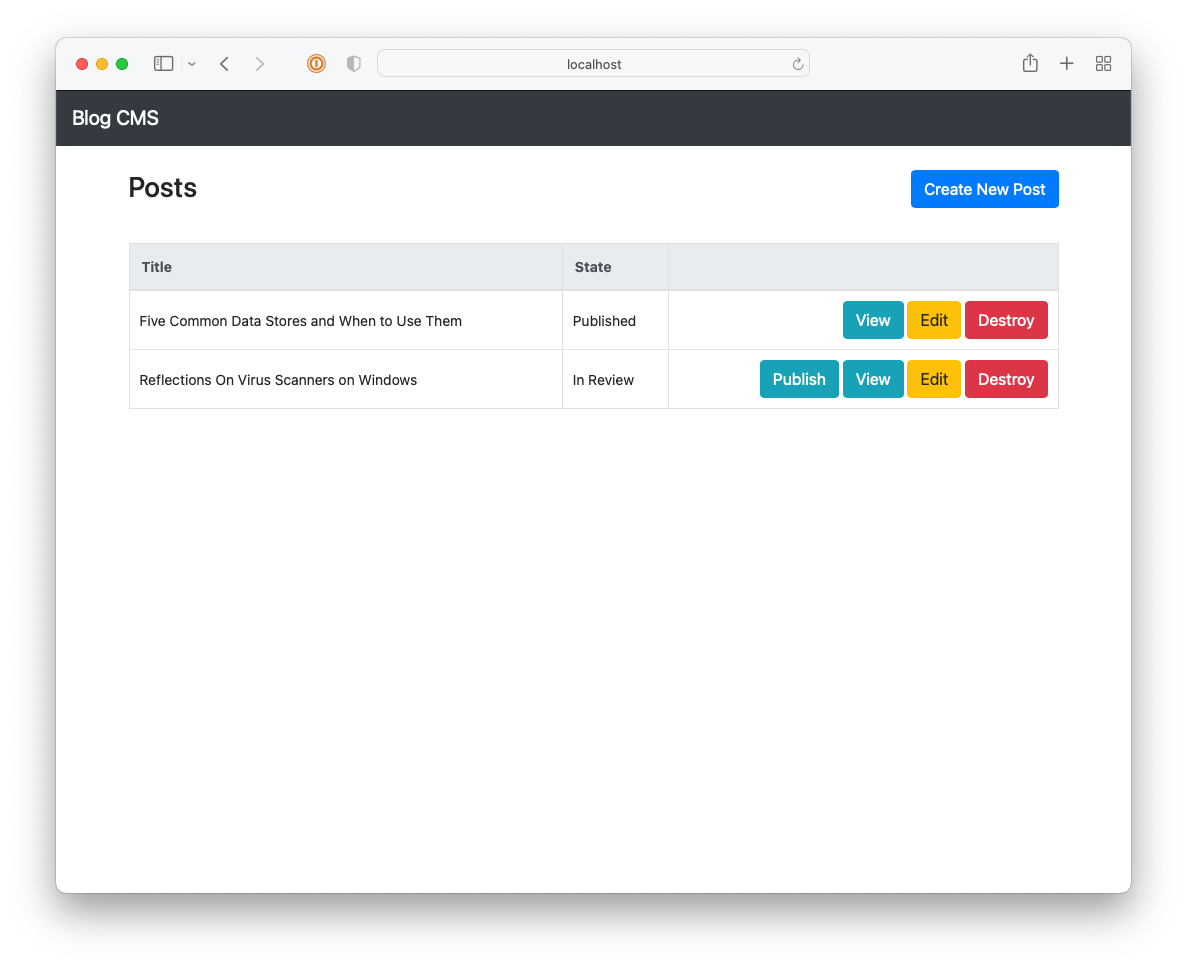
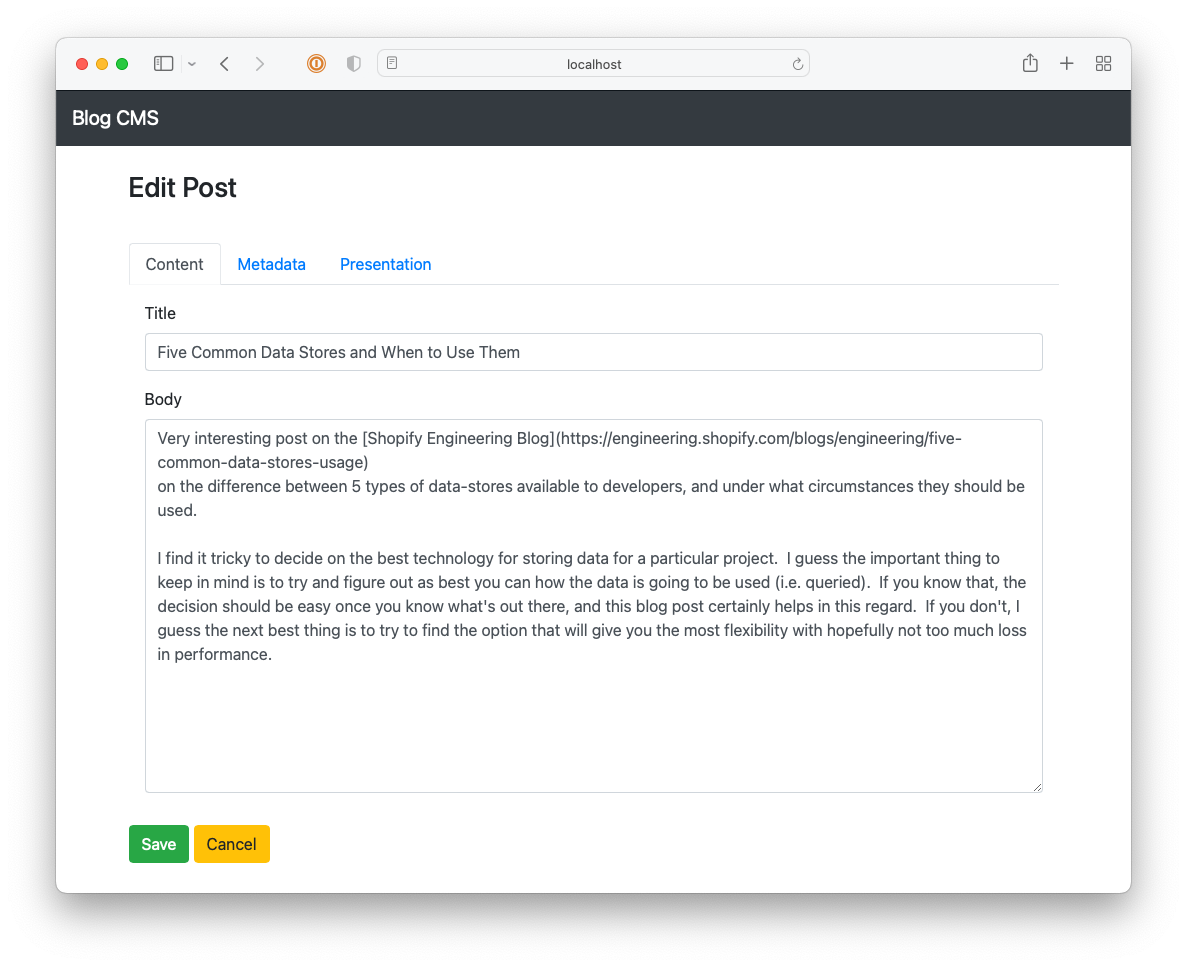
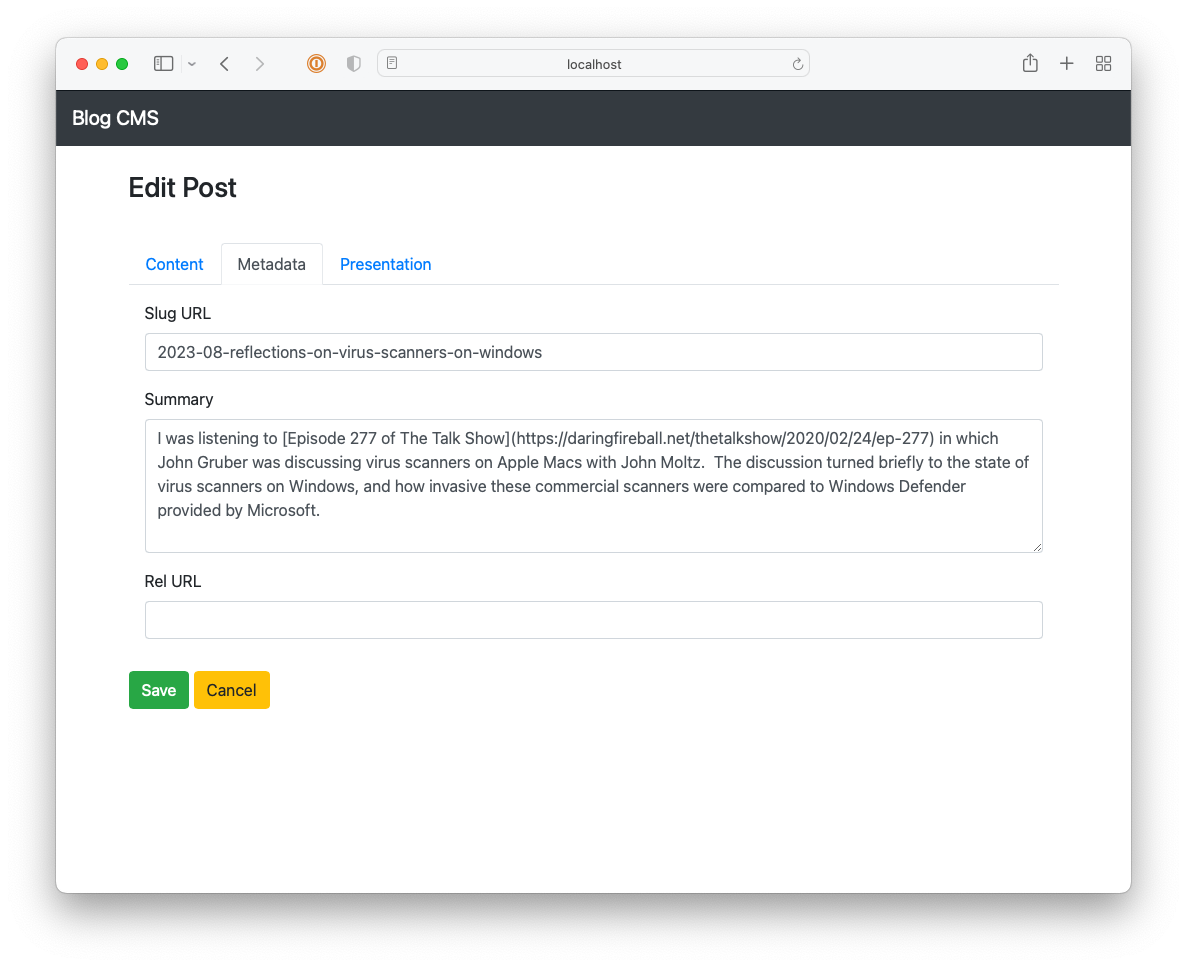
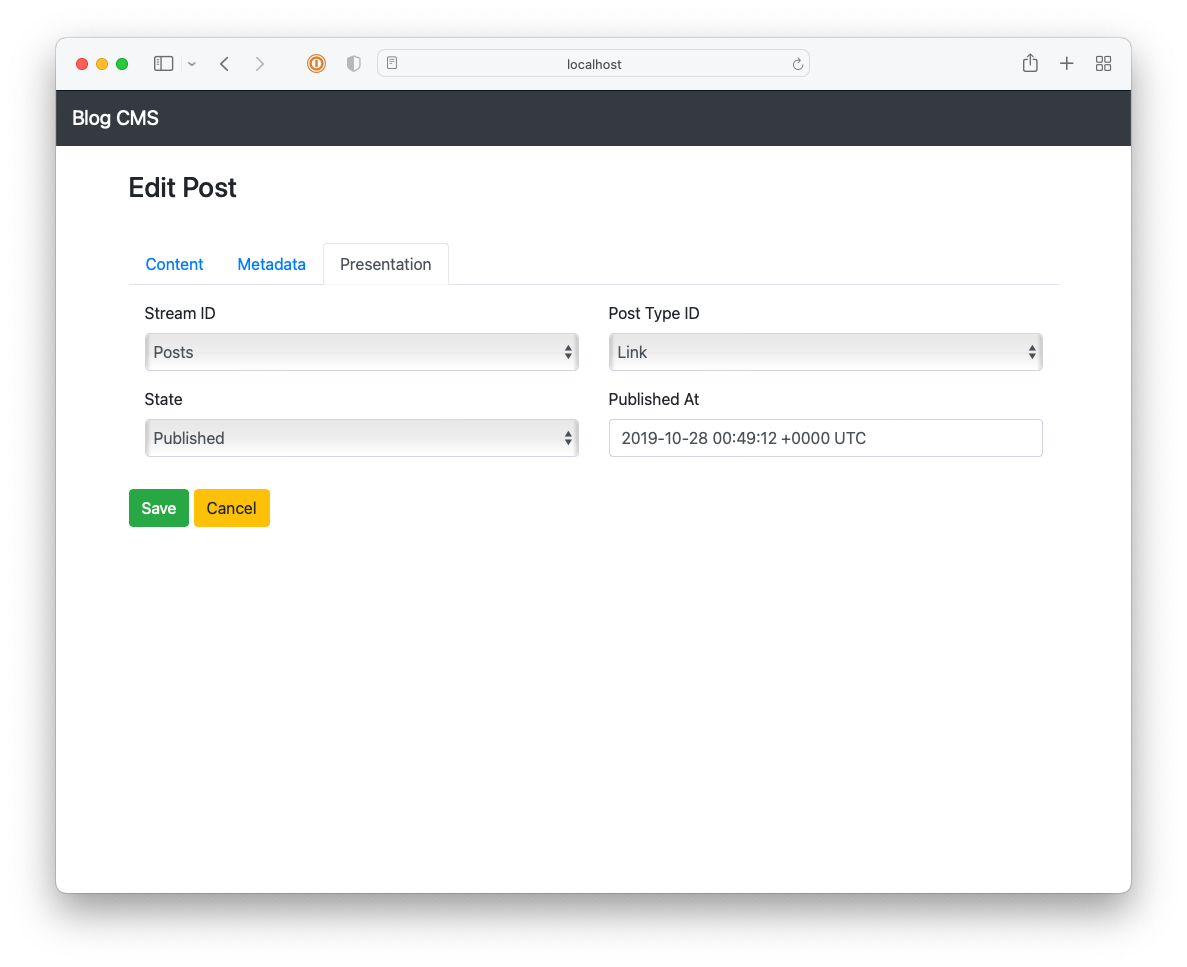
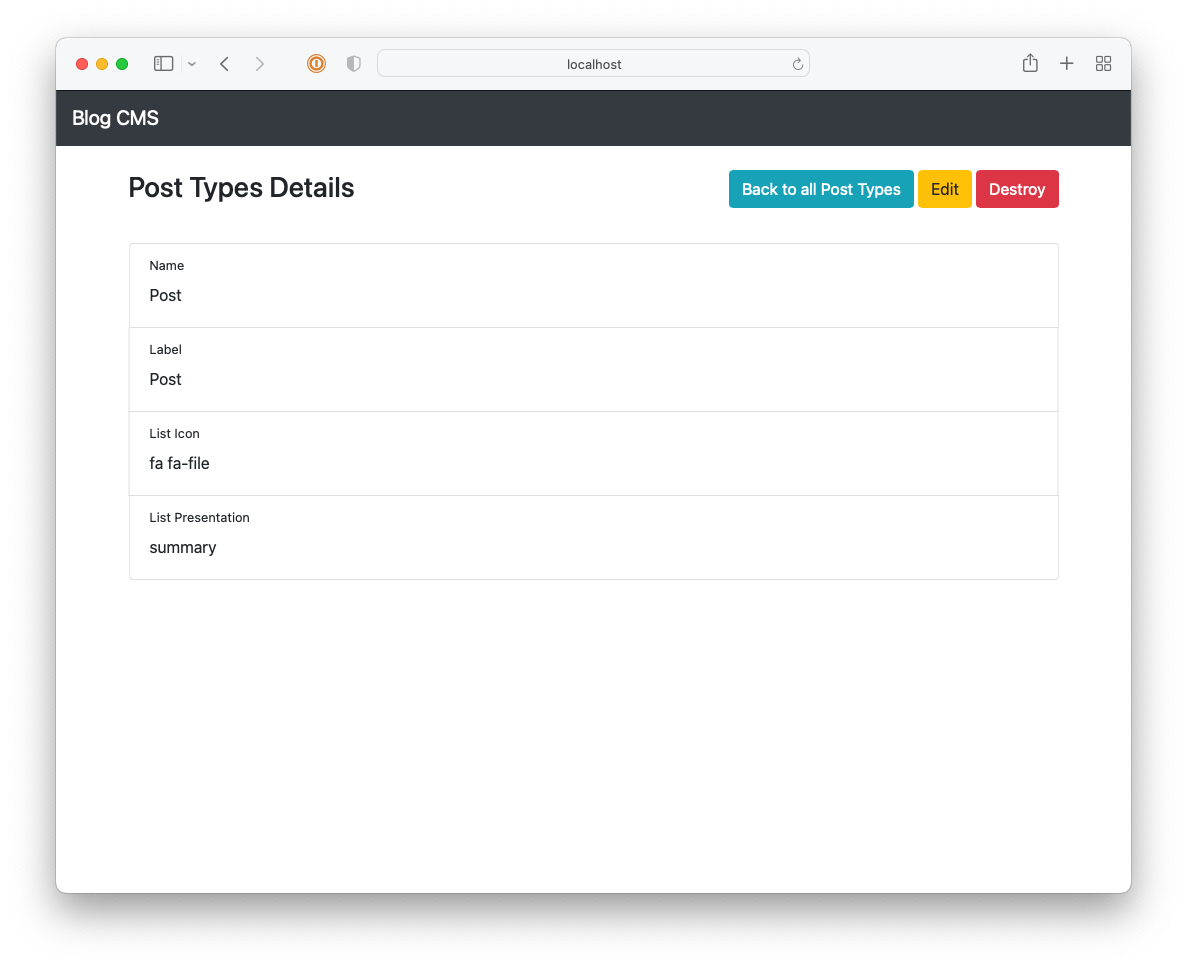
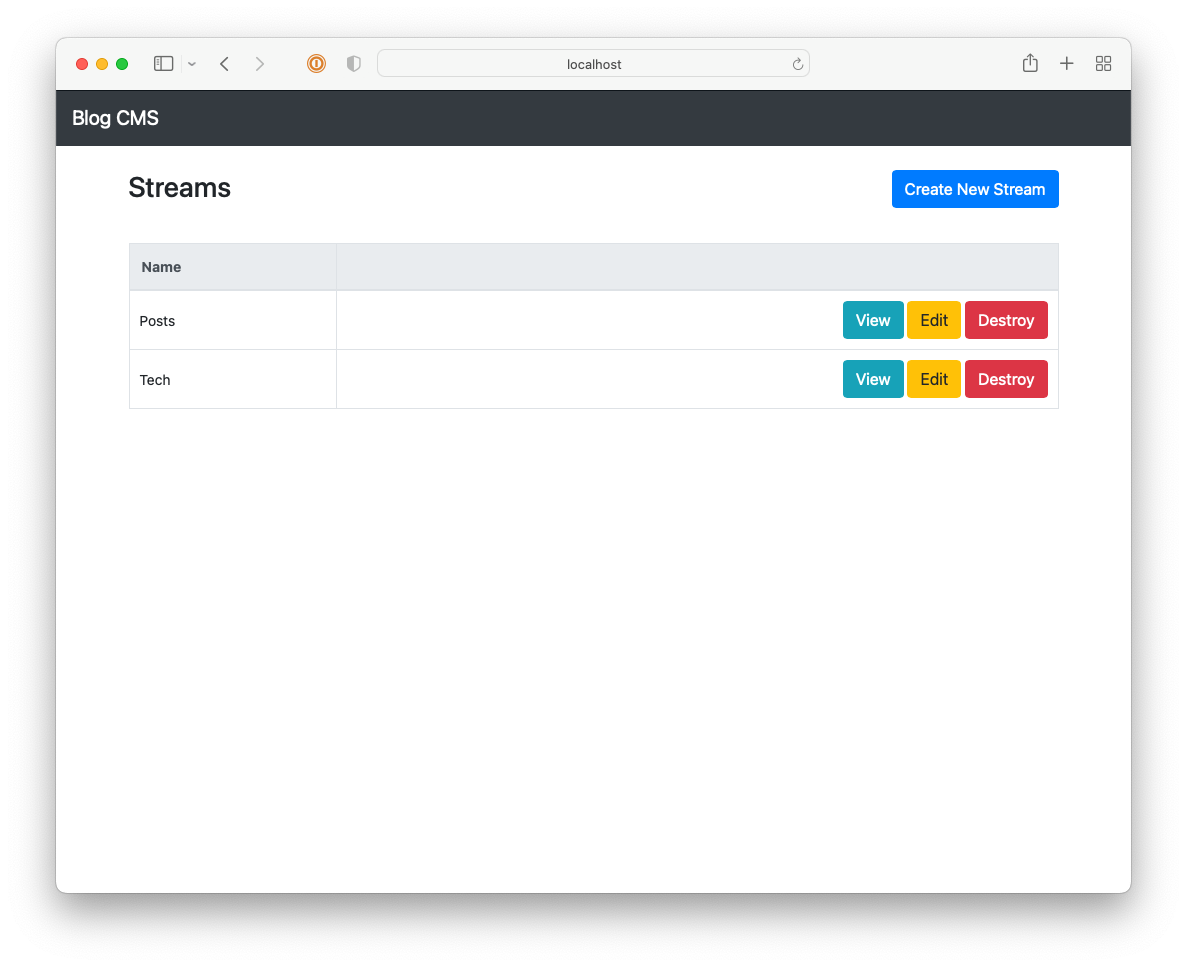
I got reasonably far with building this CMS but it still lacked a lot, like uploads and an RSS feed. It also involved a really annoying workflow: in order to publish something, you needed to choose a “post type” (whether it’s a long-form post; a link post; or a note), the “stream” the post will appear in, write a summary, and then “review” it. Once all that’s good, you’re free to publish it. This was in service of building this up into a popular, wizz-bang blog with a well-engineered navigation and category-specific feeds (I think that’s what “streams” were). Yeah, these grand plans got the better of me and really crippled the usability of the CMS2. I never launched it, opting instead to move to Micro.blog.
So that’s what this blog looked like, back in the day. I probably won’t look at these projects again. It’s only been four years and already bit-rot is settling in: it took me all morning trying to hack these into a state where I can open them in a browser. But it’s good to look back at what it was.
Still really happy I moved it over to Micro.blog.
Lava Stream
Another random hack today, but this one sort of developed over the week.
It all started last Monday. I was doing an exploratory task around single-sign on. I read Scripting News that morning, and I was thinking about the style of writing Dave Winer has adopted for his blog: short notes made across the day, sort of like a running commentary on what he’s working on and what his thinking. I wondered if this would work for my job: having a way to write your thoughts down, even if they’re rough, so you can build atop them. Also works when you need to look back on what you were thinking or working on later on.
I’ve got an Obsidian vault for my work notes, and I do use the Daily Notes feature quite a bit, but it’s not conducive to the type of running-commentary style of journaling I wanted to see. There is this hosted solution, called Memos, which could work. It’s a bit like a Twitter-like blogging platform but with the ability to keep them private.
So that Monday I deployed an instance using Pikapod, and used it for my work. I did the job, in that I had a place to jot notes down as they came to me. But despite how well the app feels, it did have some shortcomings.
The first is the whole split-brain problem with having two places to write notes: where should I put a thought? Really they should go in Obsidian, as that’s where all my other notes are currently. And although I trust Pikapod and Memos to be relatively secure, notes about what I do for work really shouldn’t be on an external server. This became evident on Tuesday, when I wrote this note in Memos:
Something similar to what this is, except each note goes into the daily note of Obsidian. Here’s how it will work:
Nothing happened Wednesday, but Thursday I decided to explore this idea a bit. So I whipped up something in XCode to try it out. Here’s what I’ve got so far:
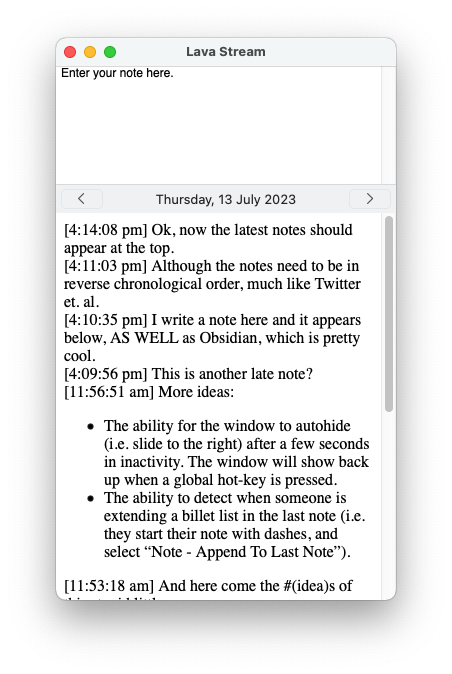
The way it works is you enter a note in the top pane (which is just a plain text editor) and press Cmd+Enter to save it. It will appear in the bottom pane and will be written to the daily note in your Obsidian vault.
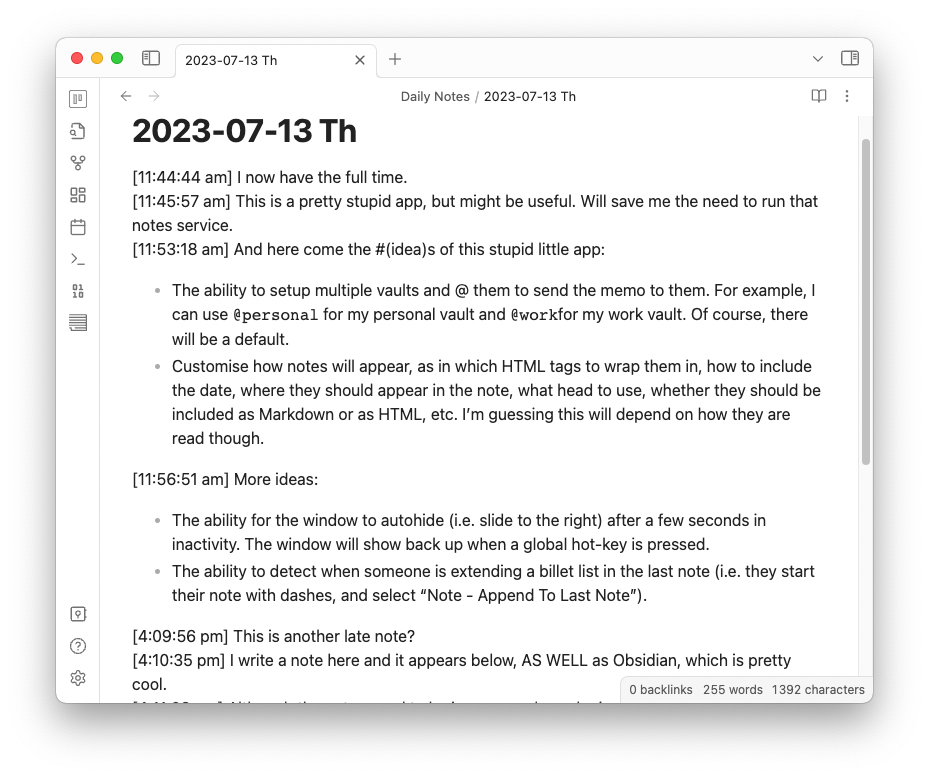
The notes are written to Obsidian in HTML. At the moment you also need to write the notes in HTML, but I’m hoping to support Markdown. It would be nice just to write the notes out as Markdown in Obsidian as well, but I want some way to delineate each note, and HTML seems like the best way to do so. Each note is basically an article tag with a date-stamp:
<article>
  <time datetime="2023-07-13T01:45:57Z">[11:45:57 am]</time>
  This is a pretty stupid app, but might be useful. Will save me the need
  to run that notes service.
</article>
But sadly Obsidian doesn’t parse Markdown content within HTML tags. That’s understandable, I guess, but it would be nice if this changed.
Anyway, we’ll see how this works. I’m calling this little hack Lava Stream at the moment, as an allusion to the geological meaning of Obsidian. And it’s meant to be a way to be an easy way of capturing thoughts, like a stream, of thoughts, into Obsidian… (get it?)
Like most Random Hacks here, I’m not sure how long I’ll use it for1, or whether it’ll go beyond the pile of awful, crappy code it currently is, not to mention the ugly styling. I’ll spend more time working on it if I continue to see value in it. That’s not a given, but I think it shows promise. I’ve been thinking about something like this for a while, but the concern of storing work-related things on another server seemed like the wrong thing to do. Having a means of writing this way, with using Obsidian as the data store, seems like a pretty good way of doing this.
A Lisp-based Evans Wrapper
I wanted an excuse to try out this Lisp-like embedded language Go library that was featured in Golang Weekly. Found one today when I was using Evans to test a gRPC endpoint and I wanted a way to automate it. Hacked up something in 30 minutes which takes a method name and a Lisp structure, converts it to JSON and uses Evans to send it as a gRPC message.
As the afternoon progressed, I added some facilities to send HTTP GET and POST methods with JSON request bodies, plus some facilities to set some global options.
Here’s a sample script:
// Set some global options
(set_opt %grpc_host "www.example.com")
(set_opt %grpc_port "8080")

// Make a gRPC call. This will use evans to perform the call
(call "my.fancy.Grpc.Method" (hash
    example: "body"
    message: "This will be serialised to JSON and sent as the body"))
Another script showing the HTTP methods
// The HTTP methods don't print out the response body by default,
// so add a post-request hook to pretty print out the JSON.
(defn hooks_after_response [resp]
    (print_json resp))

// Make a HTTP GET request to a JSON endpoint.
// The JSON body will be converted to a hash so that the data can be useful
(def user (rget "https://example.com/user/someone"))
(def userName (hget user %name))

// Make a HTTP POST with a JSON body.
(hpost "https://example.com/user/someone" (hash
    new_name: "another"))
It’s a total hack job but already it shows some promise. Evan’s REPL is nice but doesn’t make it easy to retest the same endpoint with the same data multiple times (there’s a lot of copying and pasting involved). For those purposes this is a little more satisfying to use.
Now that I had a chance to try Zygomys out, there are a few things I wish it did.
First, I wish it leaned more into the Lisp aspect of the language. The library supports infix notation for a few things, which I guess makes it easier for those who don’t particularly like Lisp, but I think it compromises some of the Lisp aspect of the languages.
For example, lists can be created using square brackets, but there’s no literal syntax for hashes. Not that there are any in Lisp either, but derivatives Clojure uses square brackets for arrays and curly brackets for hashes. Curly brackets are reserved for inline code blocks in Zygomys, so there’s no way to use them in a more functional context. I suppose something could be added — maybe square brackets with a prefix, #["key" "value"] — but feels like a missed opportunity.
Another is that there’s no way to use dashes in identifiers. This may have just been an oversight, but I’m wondering if the infix notation support complicates things here as well. It would be nice to use them instead of the underscore. I don’t personally like the underscore. I know it’s just a matter of pressing shift, but when writing identifiers in lowercase anyway, using the dash feels a lot more natural.
Finally, on the Go API front, it would be nice to have a way to call functions defined in Zygomys in Go, much like those hook functions in the sample above. I think this is just a matter of documentation or adding a method to the API to do this. I see no reason why the engine itself can’t support this. So I’m happy for this to come down the line.
But in general this library shows promise, and it was fun to build this tool that uses it. Of course, we’ll see if I use this tool a second time when I need to test a gRPC endpoint, and I don’t just hack up yet another one that does essentially the same thing.
I got a little bored today so I added task progress indicators to this Obsidian roadmap thing I built for work.
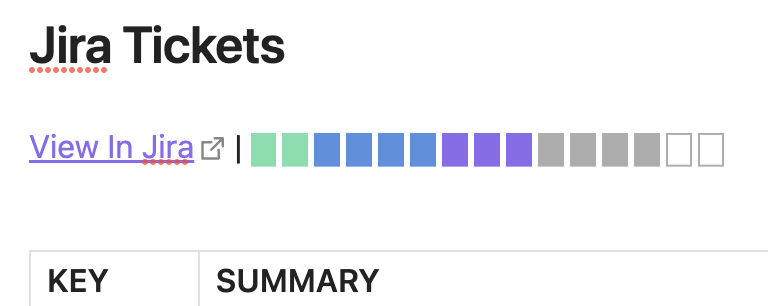
When a task is created, but is not yet scheduled, it appears as an outlined rectangle. It turns into a grey rectangle when it’s added to the sprint. It then changes colour as the task progresses through the software lifecycle; turning purple while it’s being developed, blue while it’s being tested, and finally green when it’s ready for release.
They’re implemented as embedded SVG images, added directly to the note much like the span element used for status labels.
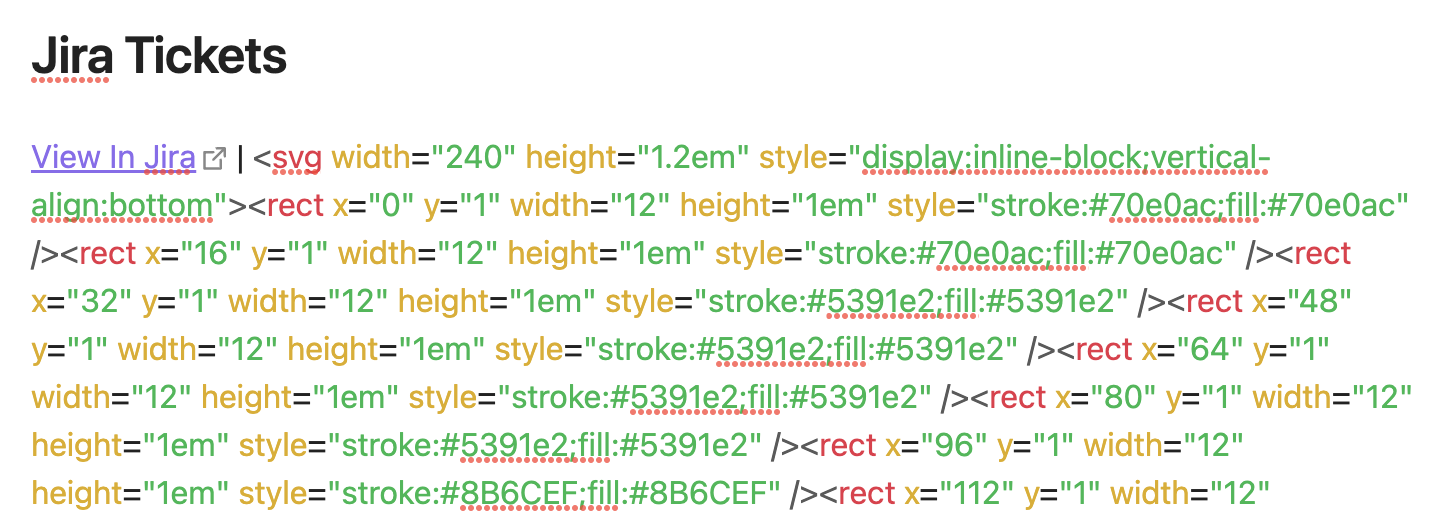
It’s nice being able to add embellishments like this. Obsidian treating notes as regular files on the file-system is a huge advantage for these sorts of automations. No need to learn how to make a plugin; just write a shell script1 that’ll output Markdown, schedule it to run a couple of times a day, and you’re good to go.
Mahjong Score Card Device
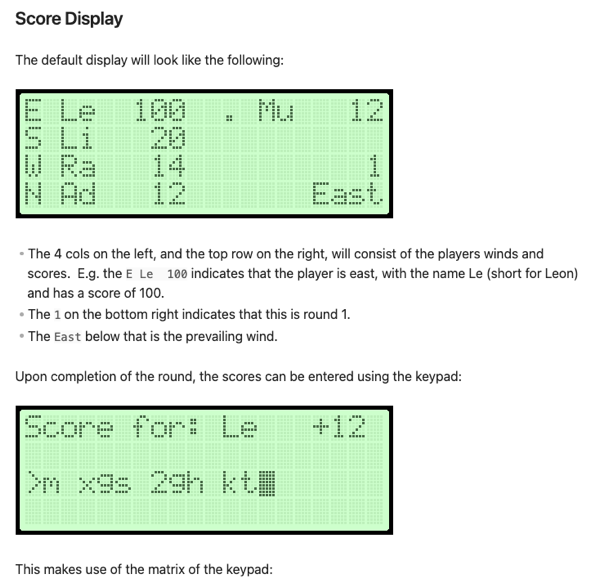
I’ve recently started playing Mahjong with my family. We’ve learnt how to play a couple of years ago and grown to like it a great deal. I’m not sure if you’re familiar with how the game is scored, and while it’s not complicated, there’s a lot of looking things up which can make scoring a little tedious. So my dad put together a Mahjong scoring tool in Excel. You enter what each player got at the end of a round — 2 exposed pungs of twos, 1 hidden kong of eights, and a pair of dragons, for example — and it will determine the scores of the round and add them to the running totals. It also tracks the winds of the players and the prevailing winds, which are mechanics that can affects how much a player can get during a round. The spreadsheet works quite well, but it does mean we need to keep a bulky laptop around whenever we play.
I wondered if the way we calculated and tracked the scores could be improved. I could do something like build a web-style scorecard, like I did for Finska, but it gets a little boring doing the same stuff you know how to do pretty well. No, if I wanted to do this, I wanted to push myself a little.
I was contemplating building something with an Arduino, maybe with a keypad and a LCD display mounted in a case of some sort. I’ve played around with LCD displays using an Arduino before so it wasn’t something that seemed too hard to do. I was concerned about how well I could achieved the fit and finished I wanted this to have to be usable. Ideally this would be something that I can give to others to use, not be something that would just be for me (where’s the fun in that?). Plus, I didn’t have the skills or the equipment to mount it nicely in an enclosed case that is somewhat portable. I started drawing up some designs for it, but it felt like something I wouldn’t actually attempt.
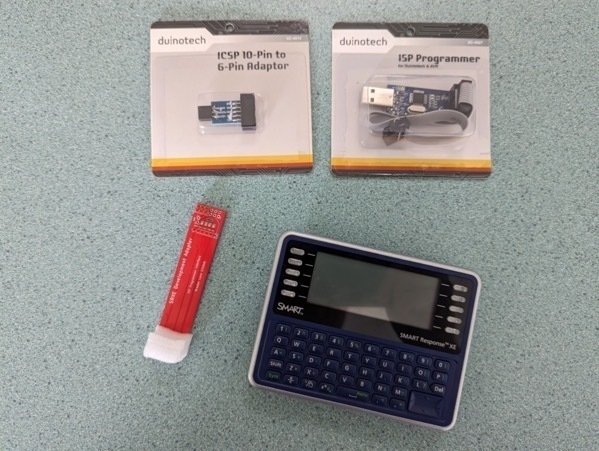
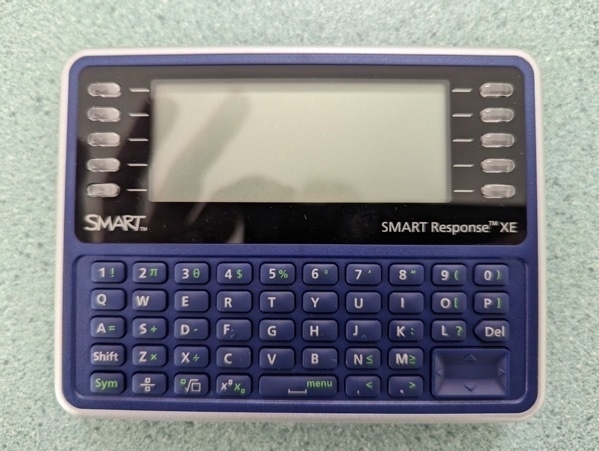
One day I was perusing the web when I came across the SMART Response XE. From what I gathered, it a device that was built for classrooms around the early 2010s. Thanks to the smartphone, it didn’t become super successful. But hobbyist have managed to get their hands on them and reprogram them to do their own thing. It’s battery powered, had a full QUERTY keyboard and LCD display, is well built since it was designed to be used by children at schools, and feels great in the hand. And since it has an Atmel microprobes, it can be reprogrammed using the Arduino toolchain. Such a device would be perfect for this sort of project.
I bought a couple, plus a small development adapter, and set about trying to build it. I’ll write about how I go about doing it here. As the whole “work journal” implies, this won’t be a nice consistent arc from the idea to the finished project. I’m still very much a novice when it comes to electronics, and there will be setbacks, false starts, and probably long periods where I do nothing. So strap in for a bit of bumping around in the dark.
First Connection Attempt
The way to reprogram the board is to open up the back and slot some pins through the holes just above the battery compartment. From my understanding, these holes expose contact pads on the actual device board that are essentially just an ISP programming interface. In theory, if you had an ISP programmer and a 6 pin adapter, you should be able to reprogram the board.

The first attempt of attempting to connect to the SMART Response XE was not as successful as I hoped. For one thing, the SRXE Development Adapter was unable to sit nicely within the board. This is not a huge issue in and of itself, but it did mean that in order to get any contact with the board, I would have to push down on the device with a fair bit of force. And those pogo pins are very fragile. I think I actually broke the tip of one of them, trying to use an elastic band and tape to keep the board onto the . I hope it does not render the board useless.
The other issue I had is that the arrangement of the 6 pin header on the developer board is incompatible with the pins of the ISP programmer itself. The pins on the ISP programmer are arranged to plugin directly to an Arduino, but on the development board, the pins are the the wrong way round. The left pin on both the male pin on the board and female socket from the IVR programmer are both Vcc, when in order to work, one of them will need to be a mirror image of the other. This means that there’s no way to for the two to connect such that they line up. If the pins on the SMART Response XE were on the back side of the board, I would be able to plug them in directly.
I eventually got some jumper wires to plug the ISP programmer into the correct pins. Pushing down on the board I saw the LEDs on the adapter light up, indicating activity. But when I tried to verify the connection using avrdude, I got no response:
$ avrdude -c usbASP -p m128rfa1

avrdude: initialization failed, rc=-1
         Double check the connection and try again, or use -F to override
         this check.


avrdude done.  Thank you.
So something was still wrong with the connection. It might have been that I’ve damaged one of the pins on the dev board while I was trying to push it down. I’m actually a little unhappy with how difficult it is to use the adapter to connect to the device, and I wondered if I could build one of my own.
Device Adapter Mk. 1
I set about trying just that. I wanted to be able to sit the device on top of it such that the contact points on the board itself will sit on the adapter. I was hoping to make the pins slightly longer than the height of the device such that when I rest it on the adapter, the device was slightly balanced on top of the pins and the board will make contact with gravity alone.
This meant that the pins had to be quite long and reasonably sturdy. Jaycar did not have any pogo pins of the length I needed (or of any length) so I wondered if the pins from a LED would work1. I bought a pack of them, plus a prototyping board, and set about building an adapter for myself. Here the design I came up with:
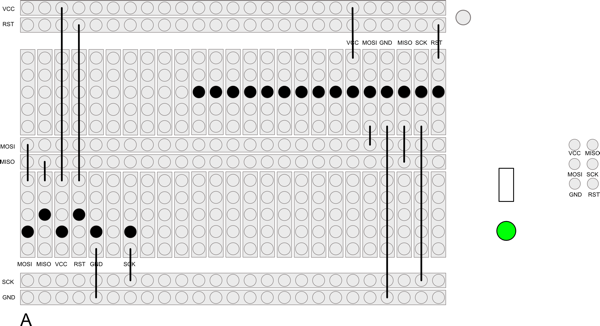
And here is the finished result:
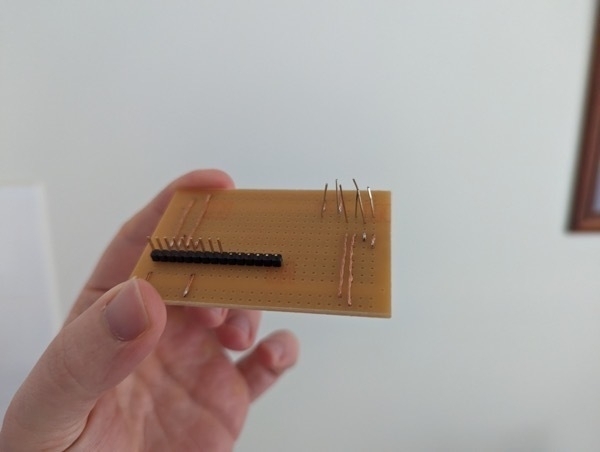
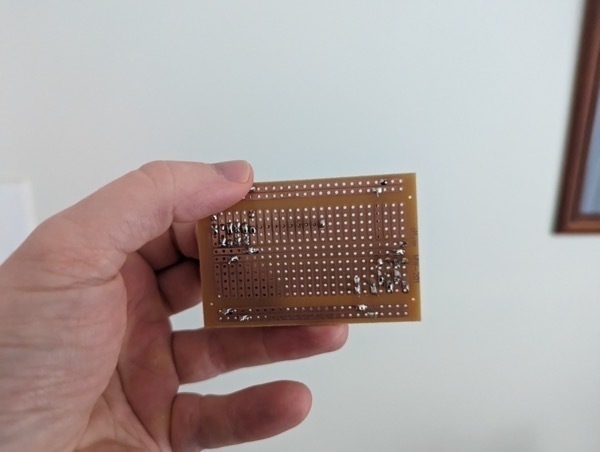
And it’s a dud! The position of the header gets in the way of where the device lines up to rest on the pins. But by far the biggest issue is the pins themselves. I tried placing them in the holes and rested the circuit board on top with a small spacer while I was soldering them. The idea is that after removing the spacer the pins will be higher than the device. I was hoping to cut them down to size a little, but I cut them unevenly, which meant that some of the pins won’t make contact. When I try resting the device on the board I get no rocking, which means that I suspect none of the pins make contact. I’m still not happy with the LED pins either. They don’t seem strong enough to take the weight of the device without bending.
The best thing about it was the soldering, and that’s not great either. I’m not sure I’ll even try this adapter to see if it works.
Next Steps
Before I create a new adapter, I want to try to get avrdude talking with the board first. I think what I’ll try next is resting some nails in the holes and attaching them to alligator clips hooked up to the ISP programmer. If this works, I see if I can set about building another board using the nails. I won’t use the header again as I think it will just get in the way. It might be enough to simply solder some hookup wires directly onto the prototyping board.
Anyway, more to come on this front.
Update 29 Oct 2023: I haven’t revisited this project since this post.

Shutting Down Blogging CMS
Ditching the CMS I was using for this blog is actually quite liberating. It means I don't have to spend any time trying to bridge the feature gap for what I need for a basic blogging CMS, and could focus on other projects. For example, I spent this evening working on "awstools": mainly coming up with a new name for it. I really can't use "awstools" as AWS is a trademark.
So I spent most of the evening trying to come up with a better name for this project. A good contender would be something that suggests it does stuff with AWS without actually using the acronym "AWS" itself. It also needs to be easy to type in the command line, and if all possible (but not a deal breaker) the domain name should be available.
I started with something like "clearskies" or "cleanskies," but it didn't really fit the project that nicely. Felt a little too… consultanty for me. I did try typing in the command `clsk` a lot, and I found that most times I naturally typed in `clks` instead. So the next round was trying to reverse engineer an abbreviation for this. "Crimson Kites?" Nah, same sort of problem as the earlier names. "Chalk?" A little better, but might be a little too generic. "Clock Socks?" Not even sure what that is.
I guess I'll be sticking with "awstools" for the mean time. Maybe I'll come up with something while I'm sleeping.
The Podcast Favourites App
In today’s issue of “useless apps that nobody but me would want to use”, I’ve managed to get a version of the Podcast Favourites app built and deployed. I’ve been using it for the last few weeks and it works quite well.
Here are some screenshots of it, starting with the main screen you see when you log in:
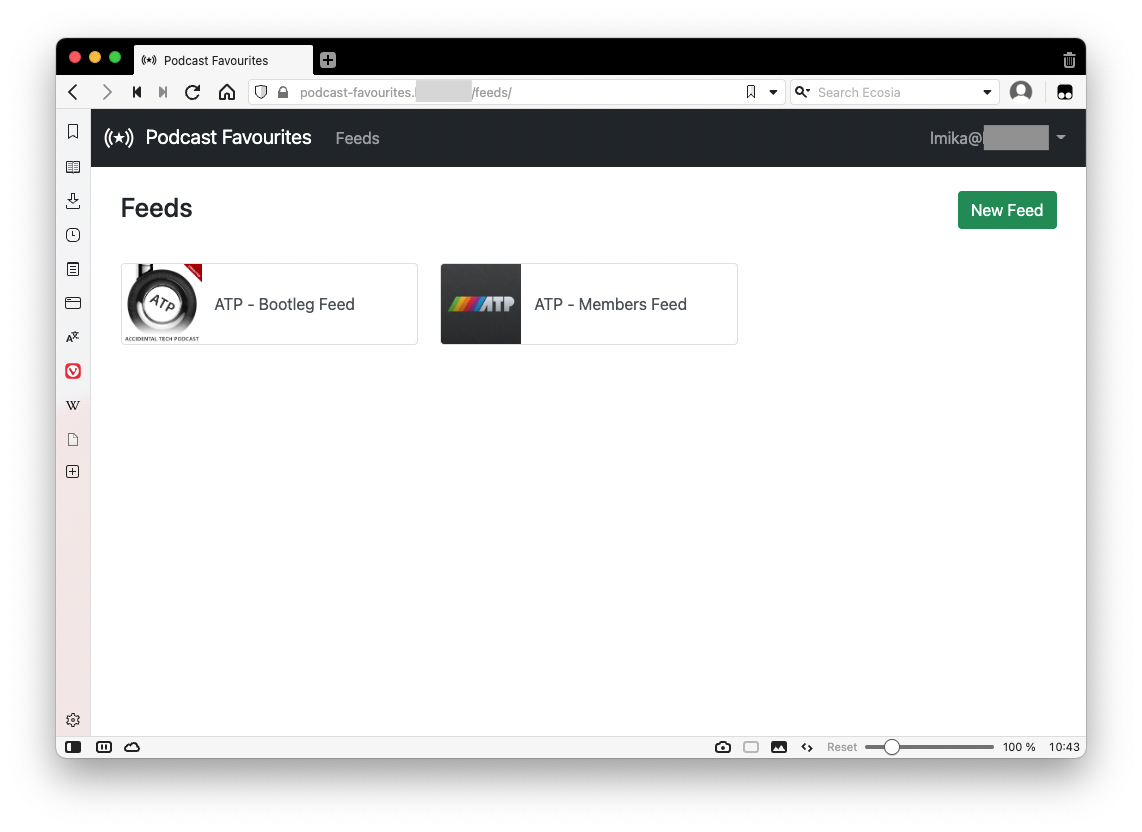
As you can probably guess, I listen to a lot of ATP. 😁
Selecting one of the feeds will bring up the favourites of that feed.
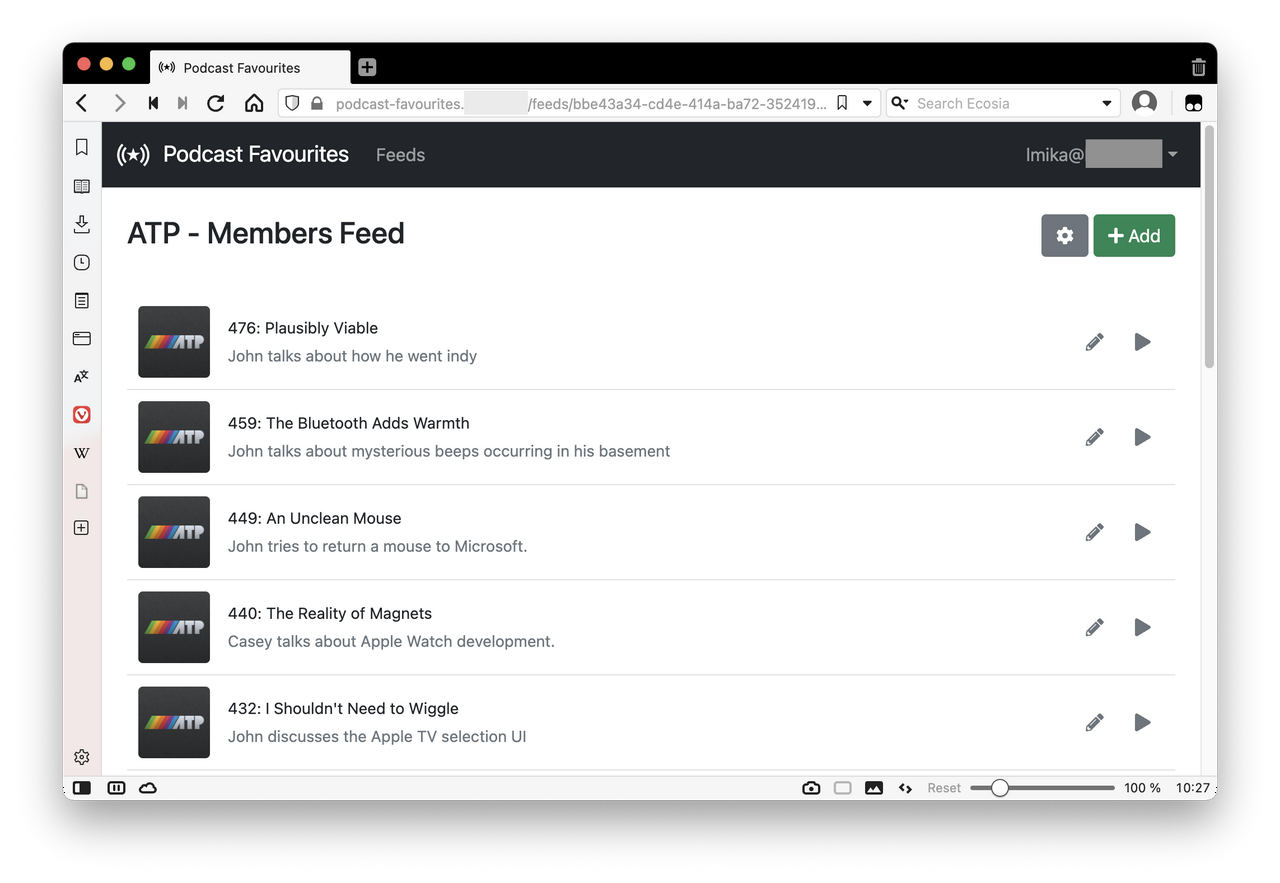
Each favourite has the name of the episode, the start time (which is hidden in the listing but editable when clicking the pencil icon) and a brief description that is usually used to explain what the clip is about. The name and artwork are retrieved from the podcast RSS feed, and the description can be whatever you want.
Clicking the play button will bring up the in-browser player.

There’s no scrubber, but you can go back and forwards 30 seconds by clicking the relevant button, or by pressing < and > on the keyboard. Pressing space will toggle play and pause. Most of this I took straight out of Alto Catalogue, but moved it to the bottom of the page much like the Pocketcast web-player.
So far I’m reasonably pleased with it. Honestly, it’s probably not something that pushed me from a development sense. More like something that I’d like to use myself. And it’s far from perfect: there are a few weird navigation links at the moment, and some ugly UI. But it does the job I need it to do.
I probably won’t spend any more time on it. If I do, it would be to get the mobile version of the web-app styled correctly.
An idea for that micro-bulk-image tool: instead of prioritising uploads, maybe prioritise processing of already uploaded images. Things like cropping, optimising, etc. after the upload, and then re-uploading it.
Hmm, I’m wondering if Broadtail needs a mode for downloading the audio of a video only, and uploading it to a podcasting service like Pocketcasts. I did this twice before, and now wish I can do it again. Third time is when a pattern is emerging.
Also, a bit of a deviation to finish the current work outstanding for Feed Journaler. Much of it is trying to get the Markdown translator working with Write.as post, mainly to deal with posts without titles, and to strip any hashtags that appear in the first and last paragraph. The code is a real mess. I should probably spend some time cleaning it all up.
A snapshot of the indie-web style project mentioned yesterday:
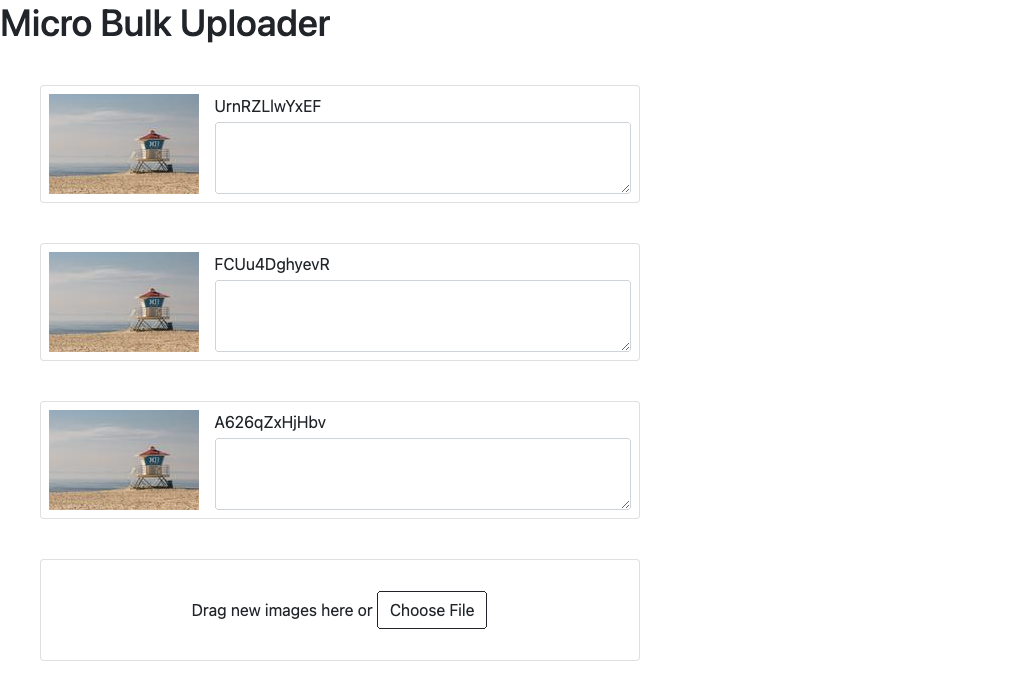
This is just static HTML and JavaScript at the moment. The idea is that each of these “cards” can be rearranged by direct manipulation. So I spent most of this morning trying to get drag and drop working in JavaScript.
After hooking up dragenter and dragleave event listeners to the Stimulus controllers bound to each of the cards, I found that the controllers were getting enter and leave events continuously as the dragged element was moved over them. These enter and leave events occurred almost immediately, making it difficult to indicate a drop-zone just by reacting to the events themselves. Setting a class on enter and then removing that class immediately on leave meant that the class was never shown.
Turns out this is because the events were being sent for all the subelements of the card. Moving the dragged element from the card padding to the text field resulted in an enter event for text field, followed immediately by a leave event on the card element.
This means that in order to do any form of indication, some element tracking is required. I’m currently using a counter to do that, which will increment by one when a dragenter event is received and decrement by 1 on dragleave. It sort of works — I’ve got to fix it when the drop event occurs — but I get super concerned about the counter getting out of sync and the indicator being stuck “on” when the dragged element is completely outside it.
One other thing I could try is having some form of set tracking each of the entered and exited elements and using the set length to determine whether to show the indicator. I trust that the browser will guarantee that a dragleave will always follow a dragenter event sent to the element. 🤔
Revising the micro-bulk-uploader project. I’ve been reading a lot about IndieAuth and Micropub formats and I got really excited about it. I figured this would be a good project to try them.
In short, this is a bulk image uploader. It’s primarily tailored for Micro.blog, but since these formats are standards in a way, there’s no real reason why it couldn’t work for other services.
Basically, the idea is this:
I have a few goals for this project:
I think it’s time to close the “Untitled Summer Project”, the service I was working on to upload files to S3 for publishing on Drummer.
The goal — despite not being entirely public — was to have a service that could be used by others to upload images to S3 for the purpose of publishing them to their blog, particularly blogs published using Drummer and served through Old School. I was hoping to have something that I could share with others by the end of Summer.
Well, now it’s Autumn, and I’ve made very little progress on it since early February. So it’s time to cut my losses and shut it down.
I think there were a number of factors that resulted in the failure of this project:
I think what I need to do for any project that I hope to share with others, I need to share it with others much earlier than when I was originally planning to. I think that feedback from others using it is important for driving the project forward, particularly if I am not getting that drive from using it myself.
A Tool That (Almost) Solved My Step Function Woes
I reached the end of my tether at work today on the task I was working on. The nature of the task involved crafting an AWS Step Function with several steps. Each step on the critical path contained some error handling, and several of them contained some cleanup logic, that had to be called by a bunch of other steps. This cleanup sequence is relatively complicated, and I’ve raised a number of PR’s to my colleagues which have come back with requests for change.
I’ll admit that I may have been a little sloppy with this change. But what’s not helping matters is the representation of Step Functions as a finite state machine written in YAML. I wrote about my issue with YAML used as some weird general purpose programming language, and this applies here as well. But a contributing factor is the level at which I’m defining this Step Function.fearing the sunk cost of the work I’ve done so far, I figured I’d just make the adjustments as they came. But now my patients has run out and I figured it was time to try a different approach.
The way to build an AWS Step Function is to define a finite state machine (FSM), which is basically a set of states linked together to form a graph. Doing this manually with a handful of states is relatively simple, but when you start to consider proper error handling and clean-up logic, such as making changes to DynamoDB records that need to be changed or reversed when something goes wrong, it can get quite complicated. The thing is that this is something that computers are able to do for a long time. A Turing complete program is a subset of a finite state machine, so if it’s possible to represent something that is Turing complete in a regular programming language, it should be possible to do likewise for a FSM with a subset of the language.
So I spent some time today trying to do that. My idea was to build a pre-processor which will take a Step Function definition encoded in the form that looks like a regular programming language, and translate it to the YAML FSM structure that AWS actually uses. Spoiler alert: I only got about half way through, but the seeds for something that could be used down the line are there, so it wasn’t a total waste of time.
The Design
There’s really nothing special about this. At this very early stage, the step function is simply written as if it was a regular programming language. The tool will read this, produce a graph representing the FSM, and generate the YAML file. An example of how this language looks is given below:
pass(name = "Pass1")
pass(name = "Pass2")
Here, we have a simple step function with two states, with one that will run after the other. Running it will produce the following YAML file:
Comment: This is a comment that is actually hard coded
StartAt: Pass1
States:
  Pass1:
    Type: Pass
    Next: Pass2
  Pass2:
    Type: Pass
    End: true
In this scenario, we’re using the Pass state, which will simply succeed, so this step function is pretty useless. But it does give a good demonstration as to what the eventual goal of the preprocessor is, which is to automatically do the wiring between the various states so that you don’t have to. If I were to put Pass2 above Pass1, it will update the generated YAML file to reflect that, so that Pass2 will have Next: Pass1, and Pass1 will have End: true.
The usefulness of the tool comes when we start considering failure modes. These can be expressed as normal “try-catch” blocks, a lot like may languages that exist today:
try {
  pass(name = "DoSomething")
} catch {
  pass(name = "SomethingFailed")
} finally {
  pass(name = "DoAlways")
}
This will produce the following Step Function YAML file:
Comment: This is a comment that is actually hard coded
StartAt: DoSomething
States:
  DoSomething:
    Type: Pass
    Catch:
      - ErrorEquals: ["States.ALL"]
        Next: SomethingFailed
    Next: DoAlways
  SomethingFailed:
    Type: Pass
    Next: DoAlways
  DoAlways:
    Type: Pass
    End: true
Once again, this is a relatively simple graph at this stage. But imagine this growing to several nested try-catch blocks, each one with slightly different error handling and cleanup logic. Manually keeping the various states wired correctly would be quite difficult, and it only makes sense to offload it to a tool to do this for us.
The Implementation
A few notes about how the tool itself was build:
The tool was a complete hack job so I don’t want to go too much into the design. But the general approach is the following:
The tool does not do everything. For example, choices are not supported, and only a few tasks that were specific to my problem were actually built.
So how did it go? Well, OK, I’ll come clean. I got as far as adding support for try-catch statements, but I never actually used it for the task I was working on. The task was nearing it’s completion and even though fixing the issues were annoying, it was less effort than regenerating the whole step function from scratch. But it’s likely that more step functions would be built in the future, most likely in the manner that we’ve been building them now: with error handling and clean-up states. So this tool might actually come in useful yet.
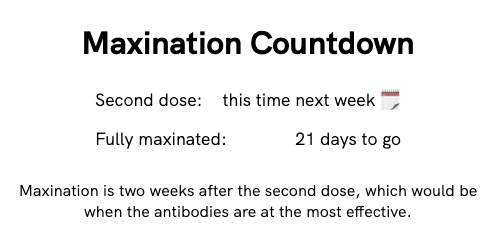
One week to go! 💉💉
Trying my hand at logo design for something I’m working on. I’m aiming for something that looks like a mix between a bookmark, the letter D, and something to suggest synchronising stuff. This is probably the best I’ve got so far.