Workpad
Making some progress in learning Elm for building frontends. Started working on a Connections clone, which I’m calling “Clonections”. This is what I’ve got so far:
It’s been fun using Elm to build this. So far I’m liking the language. Of course, now I’ll have to come up with puzzles for this. 😐
Spent a little more time working on my idea for Dynamo-Browse this week. Managed to get it somewhat feature complete this weekend:
I probably should say a few words on what it actually is. The idea is to make it quick and easy to run pre-canned queries based on the currently selected item and table.
Let’s say you’ve got a table with customer information, and another table with subscription information, and they’re linked with some form of customer ID. If you wanted to see the subscriptions of a customer, up until now, you’d have to copy the customer ID to the paste-board, change the currently viewed table, then run a query to select the subscription with that customer ID. It’s not difficult but it’s extremely tedious.
This change is meant to streamline this. Now, in a script function, you can define a “related item” provider which, if matched against the currently displayed table, will be given the currently selected item, and will return a list of queries that will display items related to the current item (depending on whatever definition of “related” will be). This will be presented to the user as a list. When the user chooses the item, the query will run and the results will be displayed.
Here’s an example of the script used for the screencasts:
ext.related_items("business-addresses", func(item) {
    return [
        {"label": "Customer", "query": `city=$city`, "args": {"city": "Austin"}},
        {"label": "Payment", "query": `address^="3"`},
        {"label": "Thing", "table": "inventory",
            "query": `pk=$pk`, "args": {"pk": "01fca33a-5817-4c27-8a8f-82380584e69c"}},
    ]
})

ext.related_items("inventory", func(item) {
    sk := string(item.attr("sk"))
    return [
        {"label": "SK: " + sk, "table": "business-addresses",
            "query": `pk^=$sk`, "args": {"sk": sk}},
    ]
})
Notice how the last business-addresses item specifies the “inventory” table, and that the “inventory” provider actually uses an attribute of the item. Here’s a screencast of that working:
This feature has been on the idea board for a while. I was trying to work out how best to handle the pre-canned queries, especially considering that they will likely be different for each item and table. Some ideas I had were adding additional UI elements that the user could use to configure these queries. These would go into the workspace file, a sort of an embedded database which is created for each session. This was pretty crappy, especially when you consider that workspaces usually only last until the user exists. It was only a few weeks ago when I considered using the scripting facilities to implement this (which, honestly, shows how much it remains under-utilised).
Anyway, I’ve only just finished development of it. I’d still like to try it for the various related items I tend to use during my day-to-day. We’ll see how well it works out.
Idea For Mainboard Mayhem: A Remote Pickup
Sort of in-between projects at the moment so I’m doing a bit of light stuff on Mainboard Mayhem. I had an idea for a new element: a remote control which, when picked up, will allow the player to toggle walls and tanks using the keyboard, much like the green and blue buttons.
I used ChatGGT to come up with some artwork, and it produced something that was pretty decent.
Only issue was that the image was huge — 1024 x 1024 — and the tiles in Mainboard Mayhem were only 32 x 32.
I tried shrinking it down in Acorn, using various scaling algorithms. The closest that worked was bringing it down slowly to about 128 x 128 using Nearest Neighbour, than trying to go all the way down to 32 x 32 using Lanczos. That worked, but it required true 32 bit colour to be recognisable, and I wanted to preserve the 16 colour palette used by the original Chips Challenge.
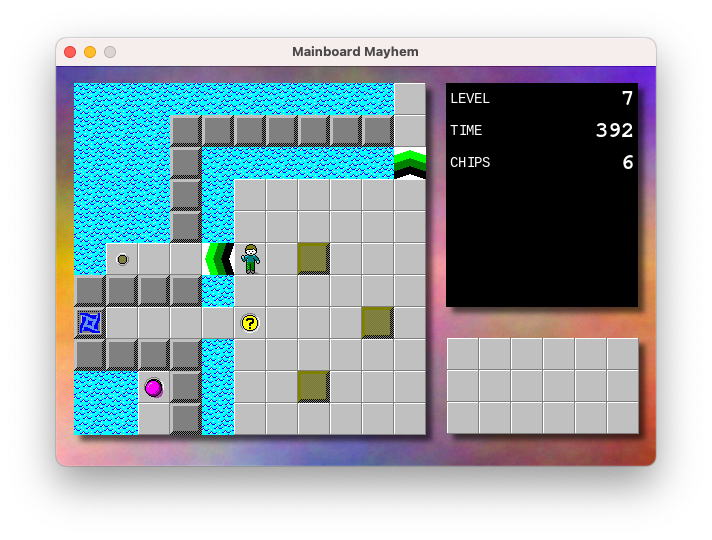
So using the original image as a reference, I bit the bullet and drew my own in Acorn. You can see it here in this test level:
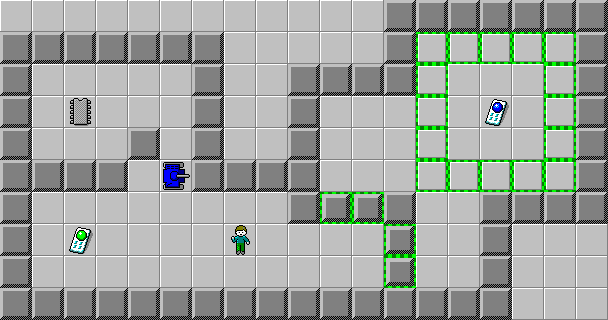
It turn out okay. At least it’s recognisable. Anyway, I coded it up and gave it a bit of a try:
Yeah, it works well. When the player has the appropriate colour remote, they can hit either Z or X to toggle the green walls or blue tanks respectively. I really should add some indicators in the status bar to show which button to press.
Not sure what I’ll do after this. The fun part was coming up with the element. But I guess I’ll have to come up with a few puzzles that use it.
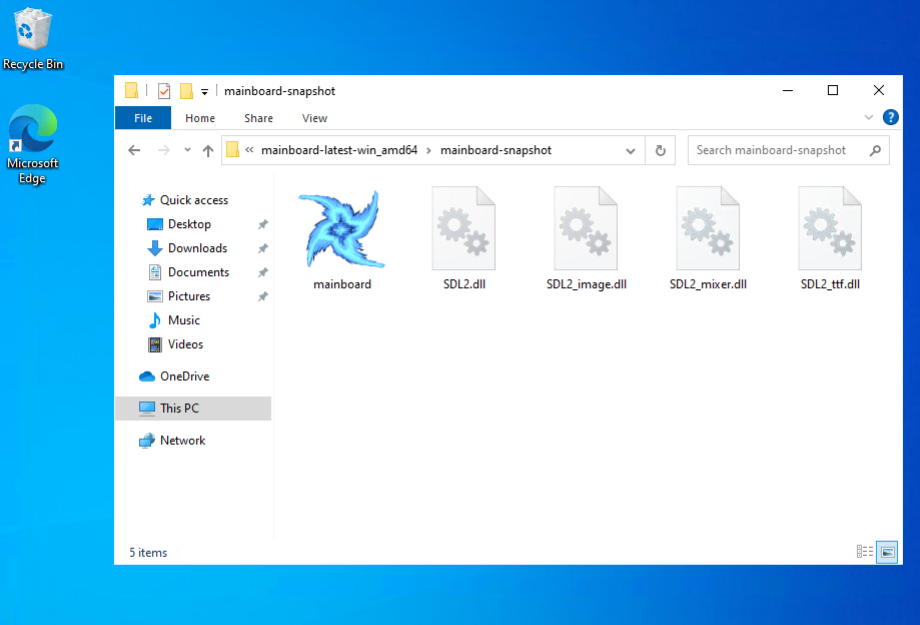
More work on Mainboard Mayhem today. Had a bit more success getting the Windows build into a releasable state.
First thing was the app icon. That blog post I talked about yesterday worked: I was able to set the icon of the executable. I did make a slight adjustment though. The post suggested using ImageMagick to produce the ICO file, but I wasn’t happy with how they looked. There were a lot of artefacts on the smaller icon sizes.
So I looked around for an alternative, and found this package by Lea Anthony. He’s the maintainer of Wails, a cross-platform toolkit for making browser-based GUI apps in Go, sort of like Electron but without bundling Chrome. In fact, most of the build for Mainboard Mayhem was put together by reading the Wails source code, so I trust he knows what his doing. And sure enough, his package produced a nicely scaled ICO file from a source PNG image. Better yet, it was distributed as a Go package, so I could no need to install and shell-out to run it: I could just integrated it directly into the project’s build tool.
Using rsrc to generate the SYSO file with the icon worked as expected: Go did pick it up and embed it into the executable. I did have some trouble getting the Go compiler to pick up these files at first. In short, they need to be in the same directory as the main package. So if you’re running go build ./cmd/thing, make sure the SYSO files are in ./cmd/thing. Other than that, no real issues here.
One last thing I had to deal with was the console window. Running a Go app in Windows shows the console by default. Perfectly fine for command line tools, but less so for games:
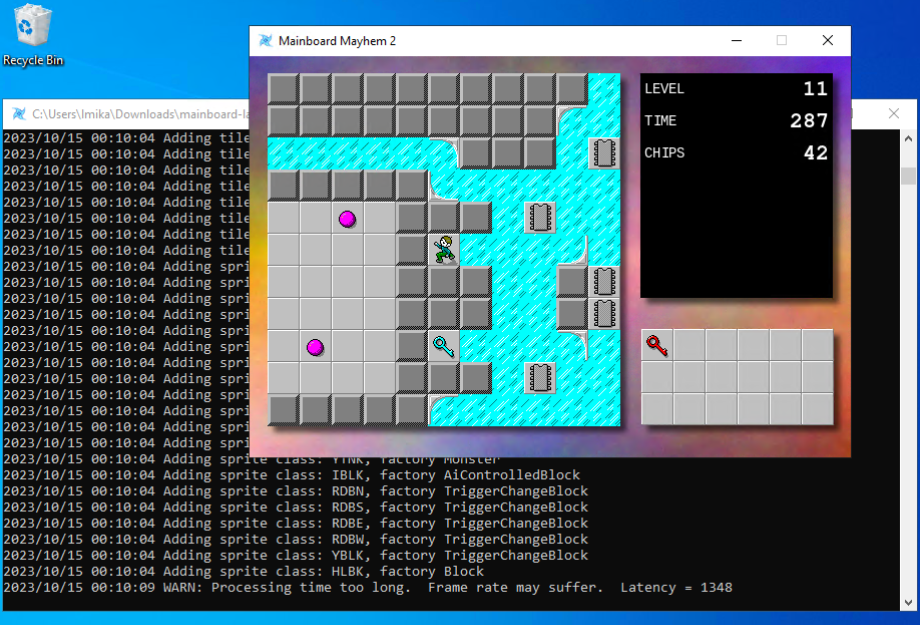
So I had to find a way to hide the console on launch. Since Mainboard Mayhem is using SDL, I’m actually using MinGW to cross-compile the Windows release on an Ubuntu build runner. The documentation for MinGW suggests adding -mwindows as a linker option to hide the console:
# What I was doing before, which didn't work
CGO_ENABLED=1 \
CC="x86_64-w64-mingw32-gcc" \
GOOS="windows" \
CGO_LDFLAGS="-mwindows -L…" \
go build -o dist/cclm/mainboard.exe ./cmd/cclm'
This didn’t actually work when I tried it: launching the app kept bringing up the console. Turns out what I should’ve done was follow the advice of many Stack Overflow answers, and set -ldflags "-H=windowsgui" on the Go command:
# This works
CGO_ENABLED=1 \
CC="x86_64-w64-mingw32-gcc" \
GOOS="windows" \
CGO_LDFLAGS="-L…" \
go build -ldflags "-H=windowsgui" -o dist/cclm/mainboard.exe ./cmd/cclm'
This works even without the -mwindows switch. Not completely sure why though. I guess MinGW is not actually being used for linking? Or maybe -m only works with C header files? Don’t know. 🤷 But doesn’t matter: the console no longer shows up on launch.
Finally, there was testing it all, and for this I just bit the bullet and set-up a Windows 10 virtual machine in Azure. The rate is something like $0.16 AUD an hour, an easy decision compared to spending time trying to get a VM with Windows 10 running on my machine.
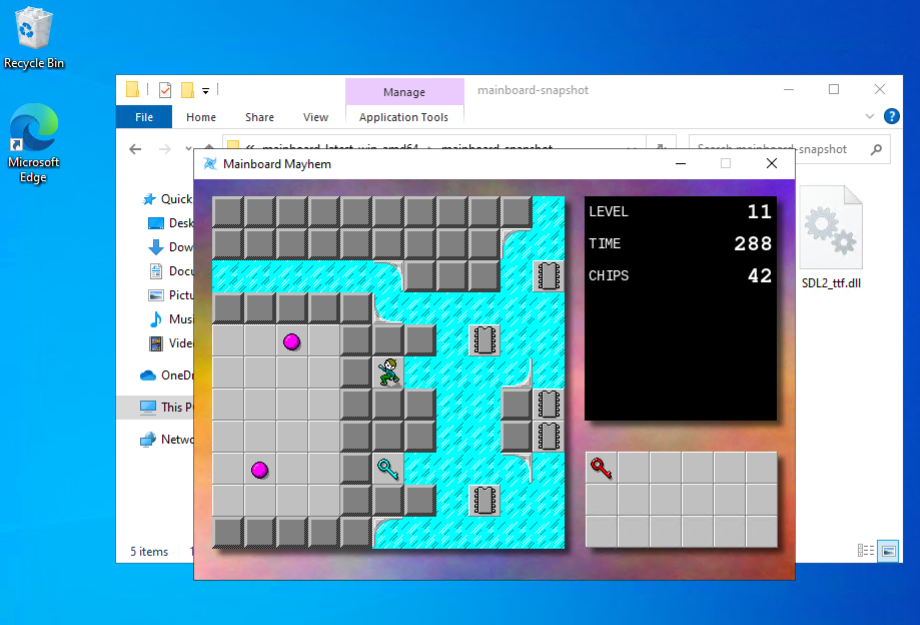
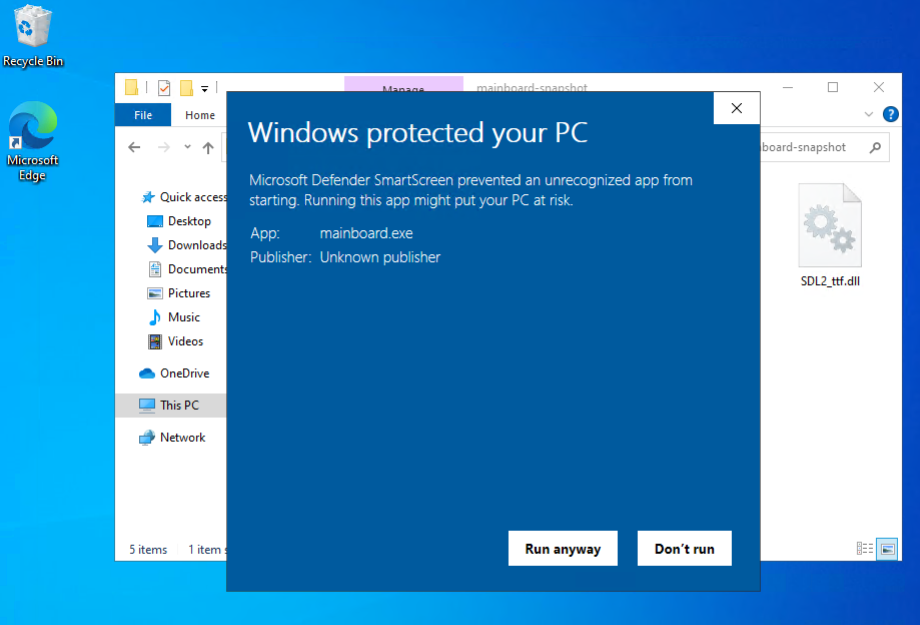
One remaining thing that’s slightly annoying is Windows Defender refusing to launch it after download, doing effectively the same thing as Gatekeeper on MacOS does:
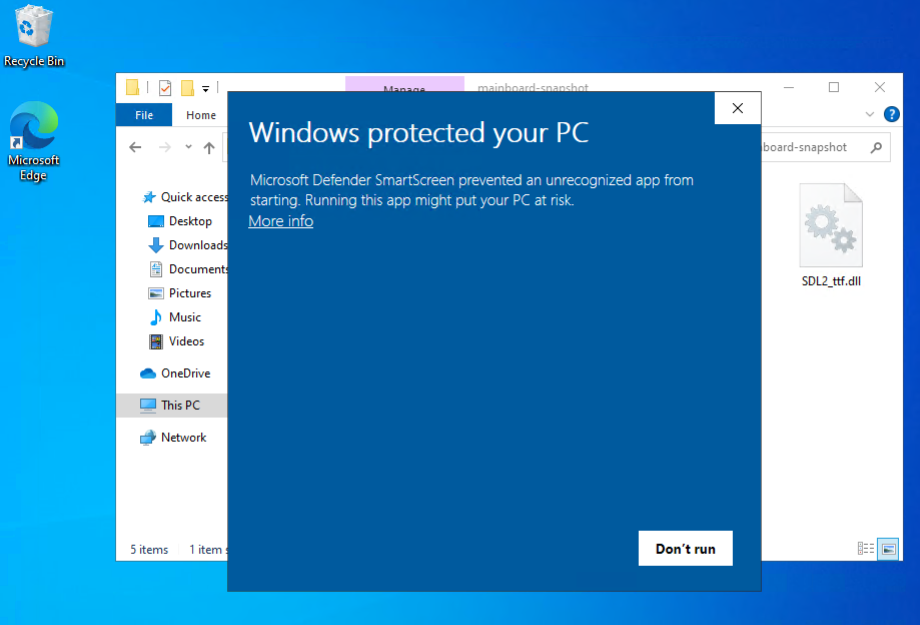
I’m sure there’s a way around it but it’s probably not worth learning about it at this stage. It’s easy enough to dismiss: click “More Info” and the click “Run Anyway”:
But other than that, I think the Windows version of Mainboard Mayhem is ready. I’ve updated the website to include the Windows archive if anyone’s interested.
Spent some time today on Mainboard Mayhem, trying to finish the Windows build. I’ve actually got Windows version of the game being built for a while now. I just haven’t published them, mainly because I haven’t got the app icon set-up yet.
But this week, Golang Weekly had a link to a blog post by Mahmud Ridwan on how to do so. It looked pretty straightforward, so I thought I’d give it a try.
And yeah, the instructions themselves were easy enough, and I wish I could say if they worked or not. But in order to test it, I need a Windows machine. And I don’t have one, and I wasn’t about to get one just for this.
So I tried setting up Windows in a VM using UTM. I got this far:
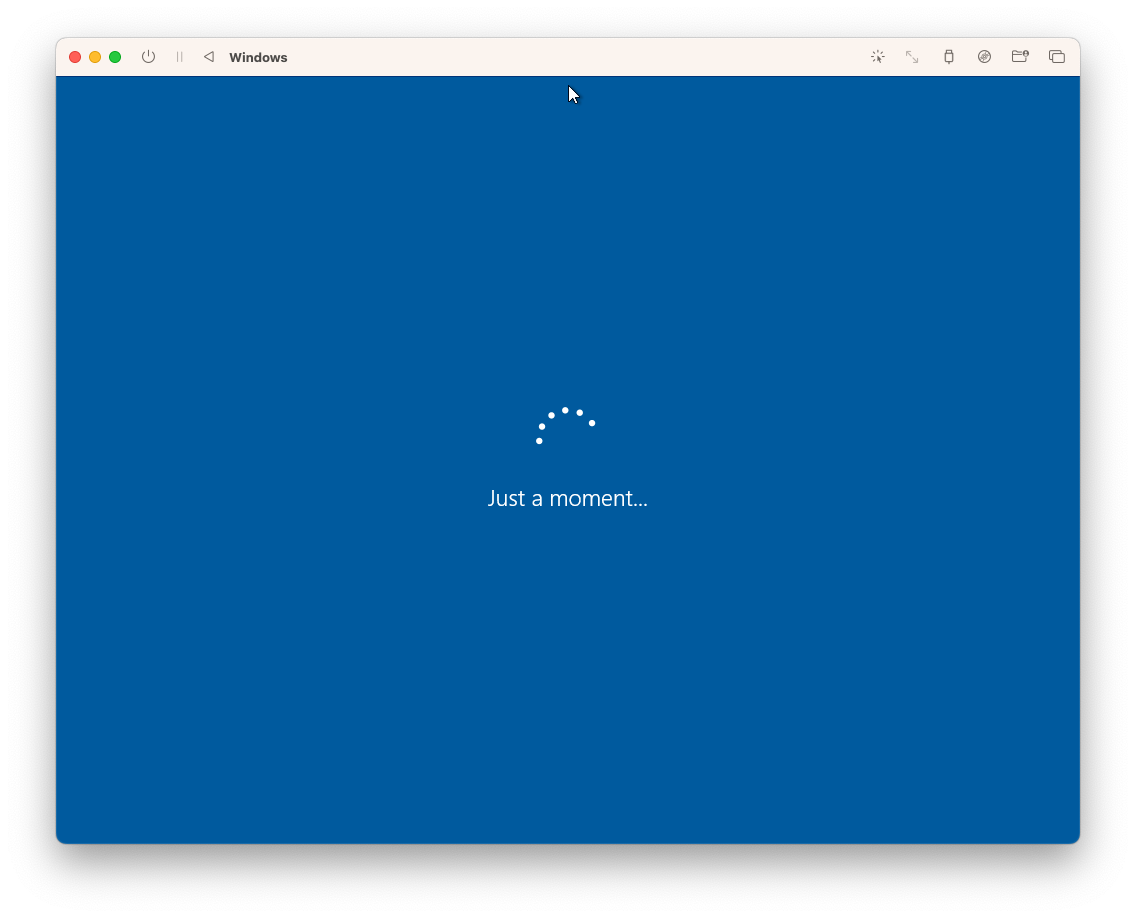
Yeah, this infinite spinner has been staring at me pretty much all day. I got a Windows 10 installer ISO using CrystalFetch, and it seemed to work. But it just doesn’t want to boot up for the first time.
Not actually sure what the problem is. The error message seems to suggest that it’s having trouble connecting to the internet. Might be that? Or maybe the installation didn’t complete properly? Could be anything. 🤷
So no luck getting this tested yet. I’m wondering if it might be easier to forget virtualisation and just launch a Windows instance in the cloud somewhere instead.
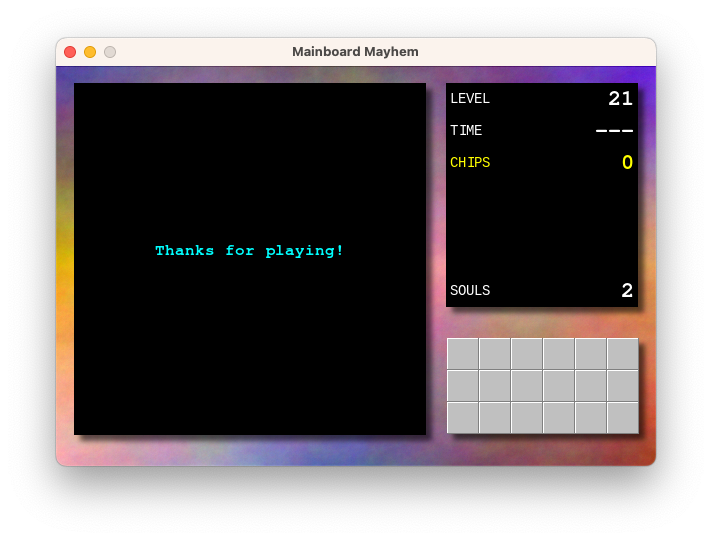
Mainboard Mayhem
Project update on Mainboard Mayhem, my Chip’s Challenge fan game. I didn’t get it finished in time for the release deadline, which was last weekend. I blame work for that. We’re going through a bit of a crunch at the moment, and there was a need to work on the weekend.
The good news is that there wasn’t much left to do, and after a few more evenings, I’m please to say that it’s done. The game is finish, and ready for release.
So here it is: Mainboard Mayhem: A Chip’s Challenge fan game (and yes, that’s its full title).
At the moment it’s only available for MacOS. It should work on both Intel and Apple Silicon Macs, although I’ve only tested on my M2 Mac Mini running Ventura.
It’s good to finally see this project done. It’s been in development for about last ten years, and I spent half of that time wondering whether it was worth getting it finished it at all. Not committing to anything meant any work I did do on it was pretty aimless, and I always felt like I was wasting my time. Giving myself three weeks to either kill it, or release it helped a lot. I’ll start making deadlines for all the other unfinished projects I’m working on.
As to what that next project will be, I not sure at this stage. Part of me wants to wait until this crunch time ends, but I suspect I’ll get antsy before then and start work on something else. I’ll keep you posted one way or the other.
But for now, if you happen to give it a try, thank you and I hope you enjoy it.
Project update for Mainboard Madness. Well, today’s the deadline for getting the thing code complete, and what a surprised, it’s not finished.
To be fair, it’s pretty close. All the levels are more or less done, and the beats of the in-game lore have been added. It all just needs tightening up a little. I spent today working on the end-game phase, which mainly involved coding up the credit sequence, and making sure I include credits for those involved in the original game (and who’s artwork I lifted).
The work remaining is to finish one or two game elements, adding a proper app icon, and finishing off the website. I’m wondering whether to add sound, but I feel bad enough taking the artwork from the original game, I rather not take the sound effects as well. That will mean the game will remain silent for the time being, but I can probably live with that for now.
I think we’re still on track for getting this finished by this time next week. Last dash to the finish line, then I can put this 9 year project to rest for a while.
Small project update on my Chips Challenge fan game.
Started working on the final level. I was dreading this a little, thanks to my awful level design skills, but I made a great start to it this morning and it’s actually coming along pretty well. It’s a good opportunity to use all the elements that I didn’t get a chance to use in any of the other puzzles, and it’s also shaping up to be one that has a bit of climax.
I’ve also started working on the website, which is little more than just a landing page. This meant finally coming up with a name. I’ve chosen “Mainboard Mayhem” which is… okay, but it’s one that’s been rattling around in my head for a while, and I really couldn’t use anything close to “Chips Challenge”. I’m already using the tile-set from the original game, I rather not step on any more intellectual property.
Anyway, one more week of development left to go. Still need to setup the app icon, finish all the levels, and maybe add a menu. Then I think we’re code complete.
Working on my Chips Challenge “fan game” this morning. Added the notion of “lower thirds,” which will show text at the bottom of the play field. I’m hoping to use it for narrative or way-finding, like here in this hub level:
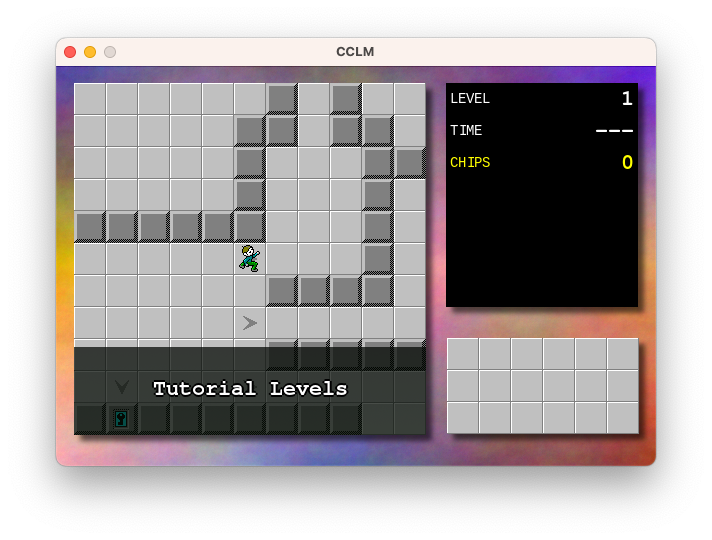
Also working on puzzle design. There’s about 19 or so “real” puzzles but I’m wondering if it’s worth adding a few tutorial ones for those that have never played the original Chip Challenge before. I’ve done about 5 such puzzles and I think I need to add maybe 3 or 4 more to cover everything I’m hoping to demonstrate. I wish I liked puzzle design more than I like tinkering on the engine.
Of course, the big question is why I’m working on this at all. There is, for lack of a better word, a vision for this, in terms of narrative and structure, but this project has been in development on and off for about 9 years or so, and I’m wondering if it’s time to just stop working on it altogether. I really am starting to get sick of it, in a way. And yet, this project has shown remarkable staying power over that time that I feel like if I don’t actually wrap it up, it’ll just continued to be worked on. It feels like the only way to end this project is to finish it, in one way or another.
So I’ll set myself a dead-line: something releasable in two weeks, and actually released a week after that. After that, no more! I’ll work on something else.
Attempting to design an app icon for a Chips Challenge fan game I’m working on. Going for something that looks like the fireball sprite in the original game with a hint more realism and tinted in the colour blue. For reference, here’s the original fireball sprite:
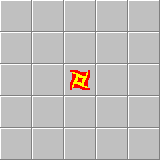
And here’s my attempt:

I started with Stable Diffusion to get the base image:

Then imported into Acorn to rotate it, colourise it, and distort it to look a bit closer to the original sprite.
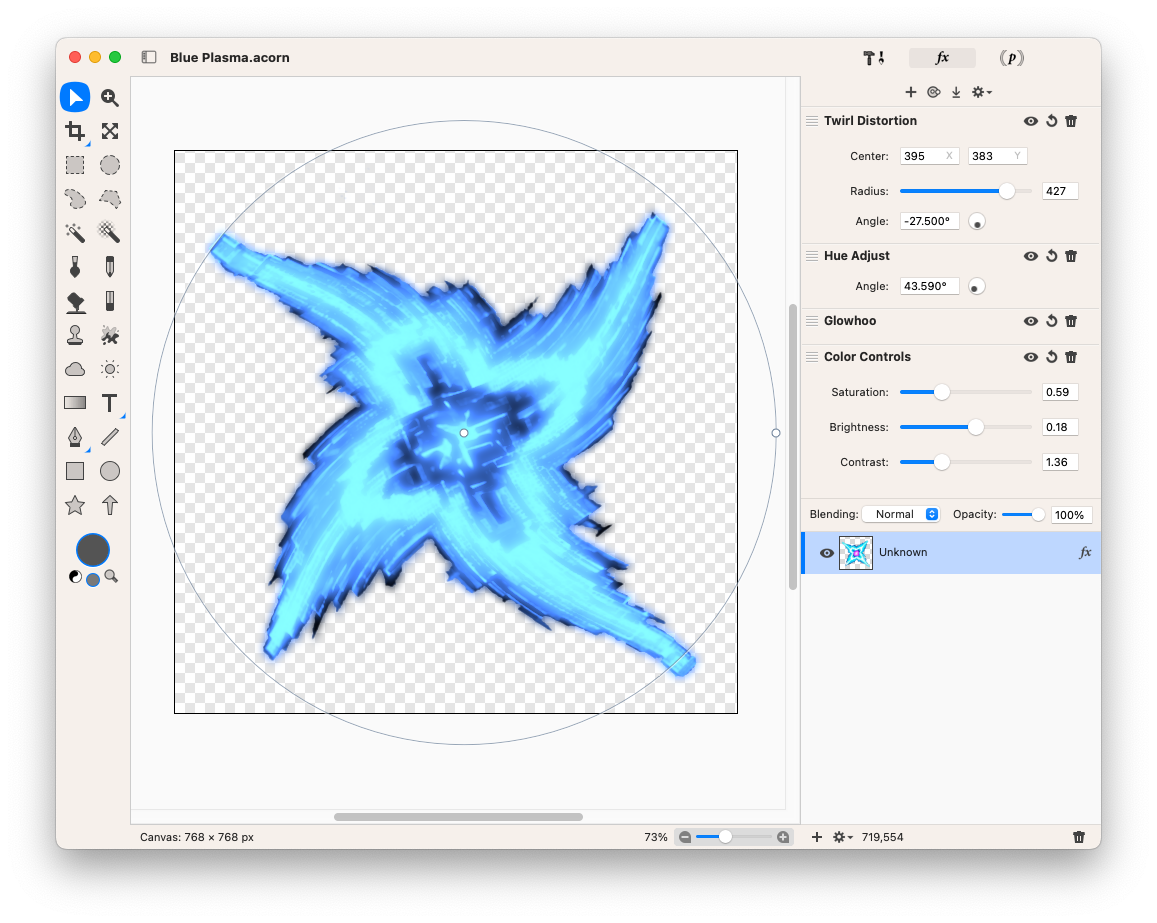
Desaturating the original image got rid of the purple centre, then applying the Glowhoo and Hue Adjust effect recolourised it to the blue I was looking for (I’m not sure what the Glowhoo effect does, but it seems to adjust the colour based on the pixel intensity, so it was good enough for what I wanted). Finally, I added a Twirl Distortion effect to achieve the slight warp in the star.
And yeah, it’s not going to win any design awards, but it’s good enough for now.
Oh, and just for kicks, here was my first attempt of producing the sprite using Affinity Designer.

That’s definitely not going to win any design awards. 😂
Success! Managed to get a Go app built, signed, and notarised all from within a GitHub Action. It even cross-compiles to ARM, which is something considering that it’s using SDL. Here’s the test app being downloaded and launched in a VM (ignore the black window, the interesting part is the title).
Spent most of the weekend going down various rabbit holes to get a Go application signed and notarised as a MacOS app. I’m trying to do this in a way that would make this easy to automate using GitHub Actions. This means things like no implicit access to the system keychain: I want to make a temporary keychain, add my secret stuff to it, then delete it once signing and notarisation is done.
It also means no XCode GUI either: command line stuff only. Not that I had much hope of using XCode here anyway, since this is a Go application.
But that’s fine, preferable even. I’ve never liked all the manual steps needed to get code signing work with XCode. What are you going to do when you change systems? Would you remember all the steps you took several years ago, when you last setup developer certificates?
So this is why I’m trying to get it working with the terminal. But it’s not easy. Lots of esoteric commands that I need to learn and be made aware of. Just hope it’s not a huge waste of time.
I’ve been working on Micropub Checkins over the last week. It’s been a bit of a rush trying to get it into a usable state for an upcoming trip. And by “usable”, I mean a form that I can tolerate, and when it comes to projects like this, I can tolerate quite a lot. It can have a really dodgy UI (which this does) and miss some really important features that are annoying to work around; but if it works, and doesn’t loose data, I’ll be fine with it.
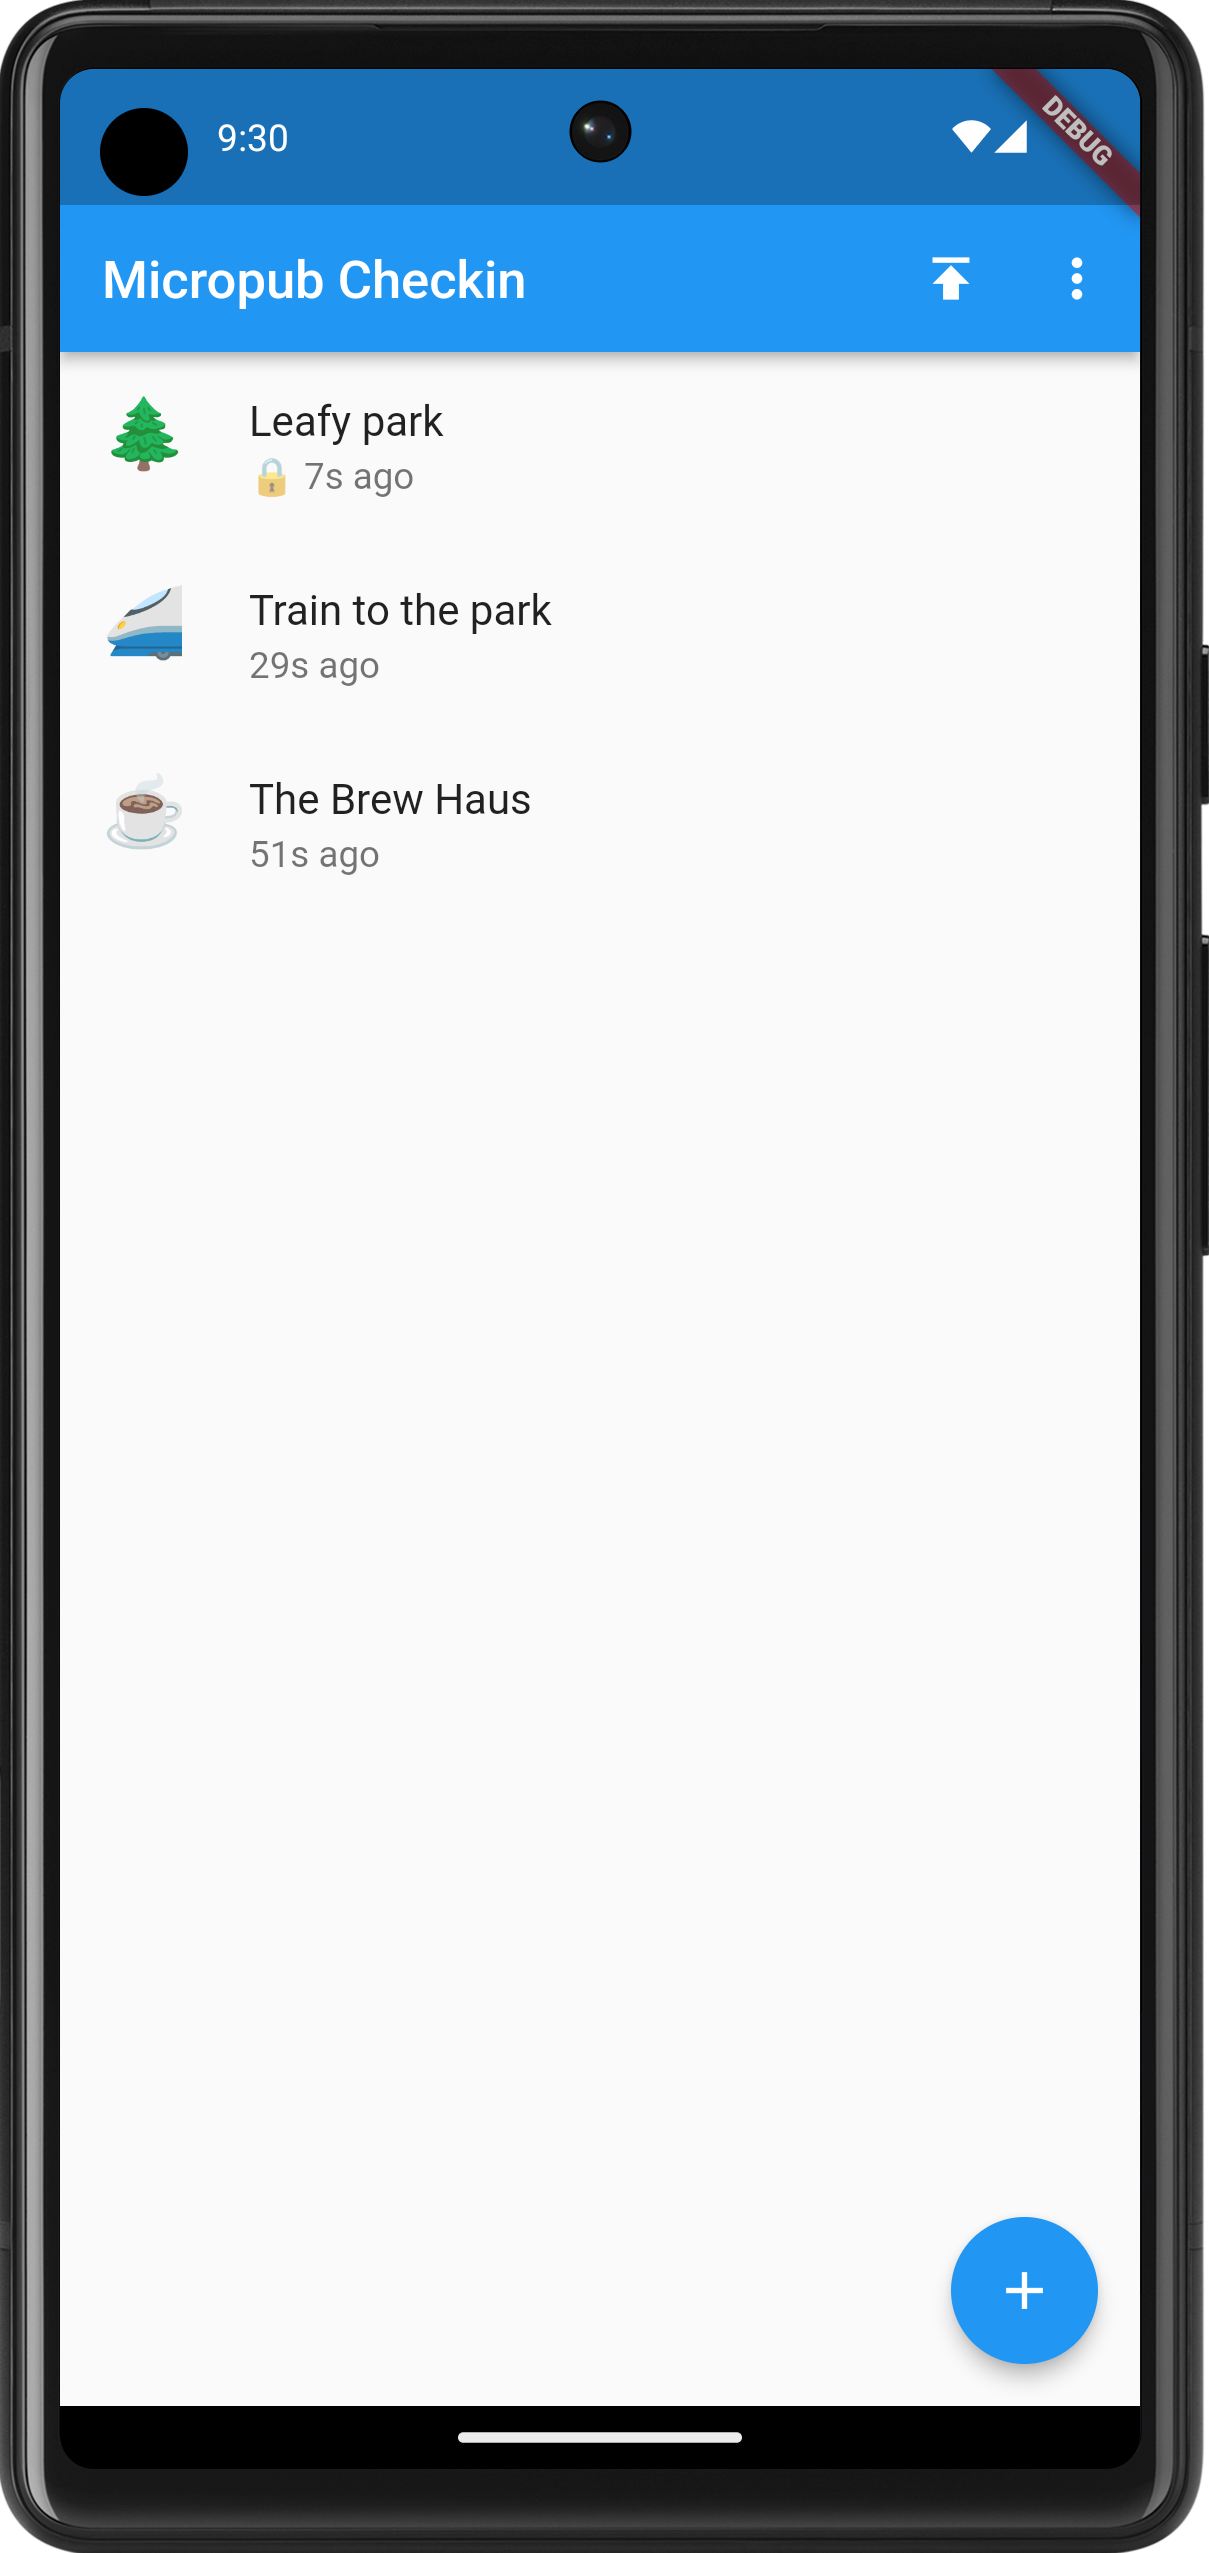
The last week was dedicated to making the act of checking in distinct from publishing it. Until now, check-ins were published the minute they were entered, meaning that you cannot check-in somewhere unless you’re comfortable with people knowing where you are the minute you do. Yes, some people like it that way, but not me. And I’m aware that this’ll only be the case if people are following my check-in blog, which I’m doubtful of.
So pressing the floating action button and choosing a check-in type now starts the flow of a new check-in that will get saved in an SQLite database. You can edit the check-in whenever you like, so long as it’s not published. Currently there’s no real way of deleting a check-in unless it’s been published. This is a bit dodgy, but it’s a good example of how tolerant I am with working around these feature gaps for the moment.
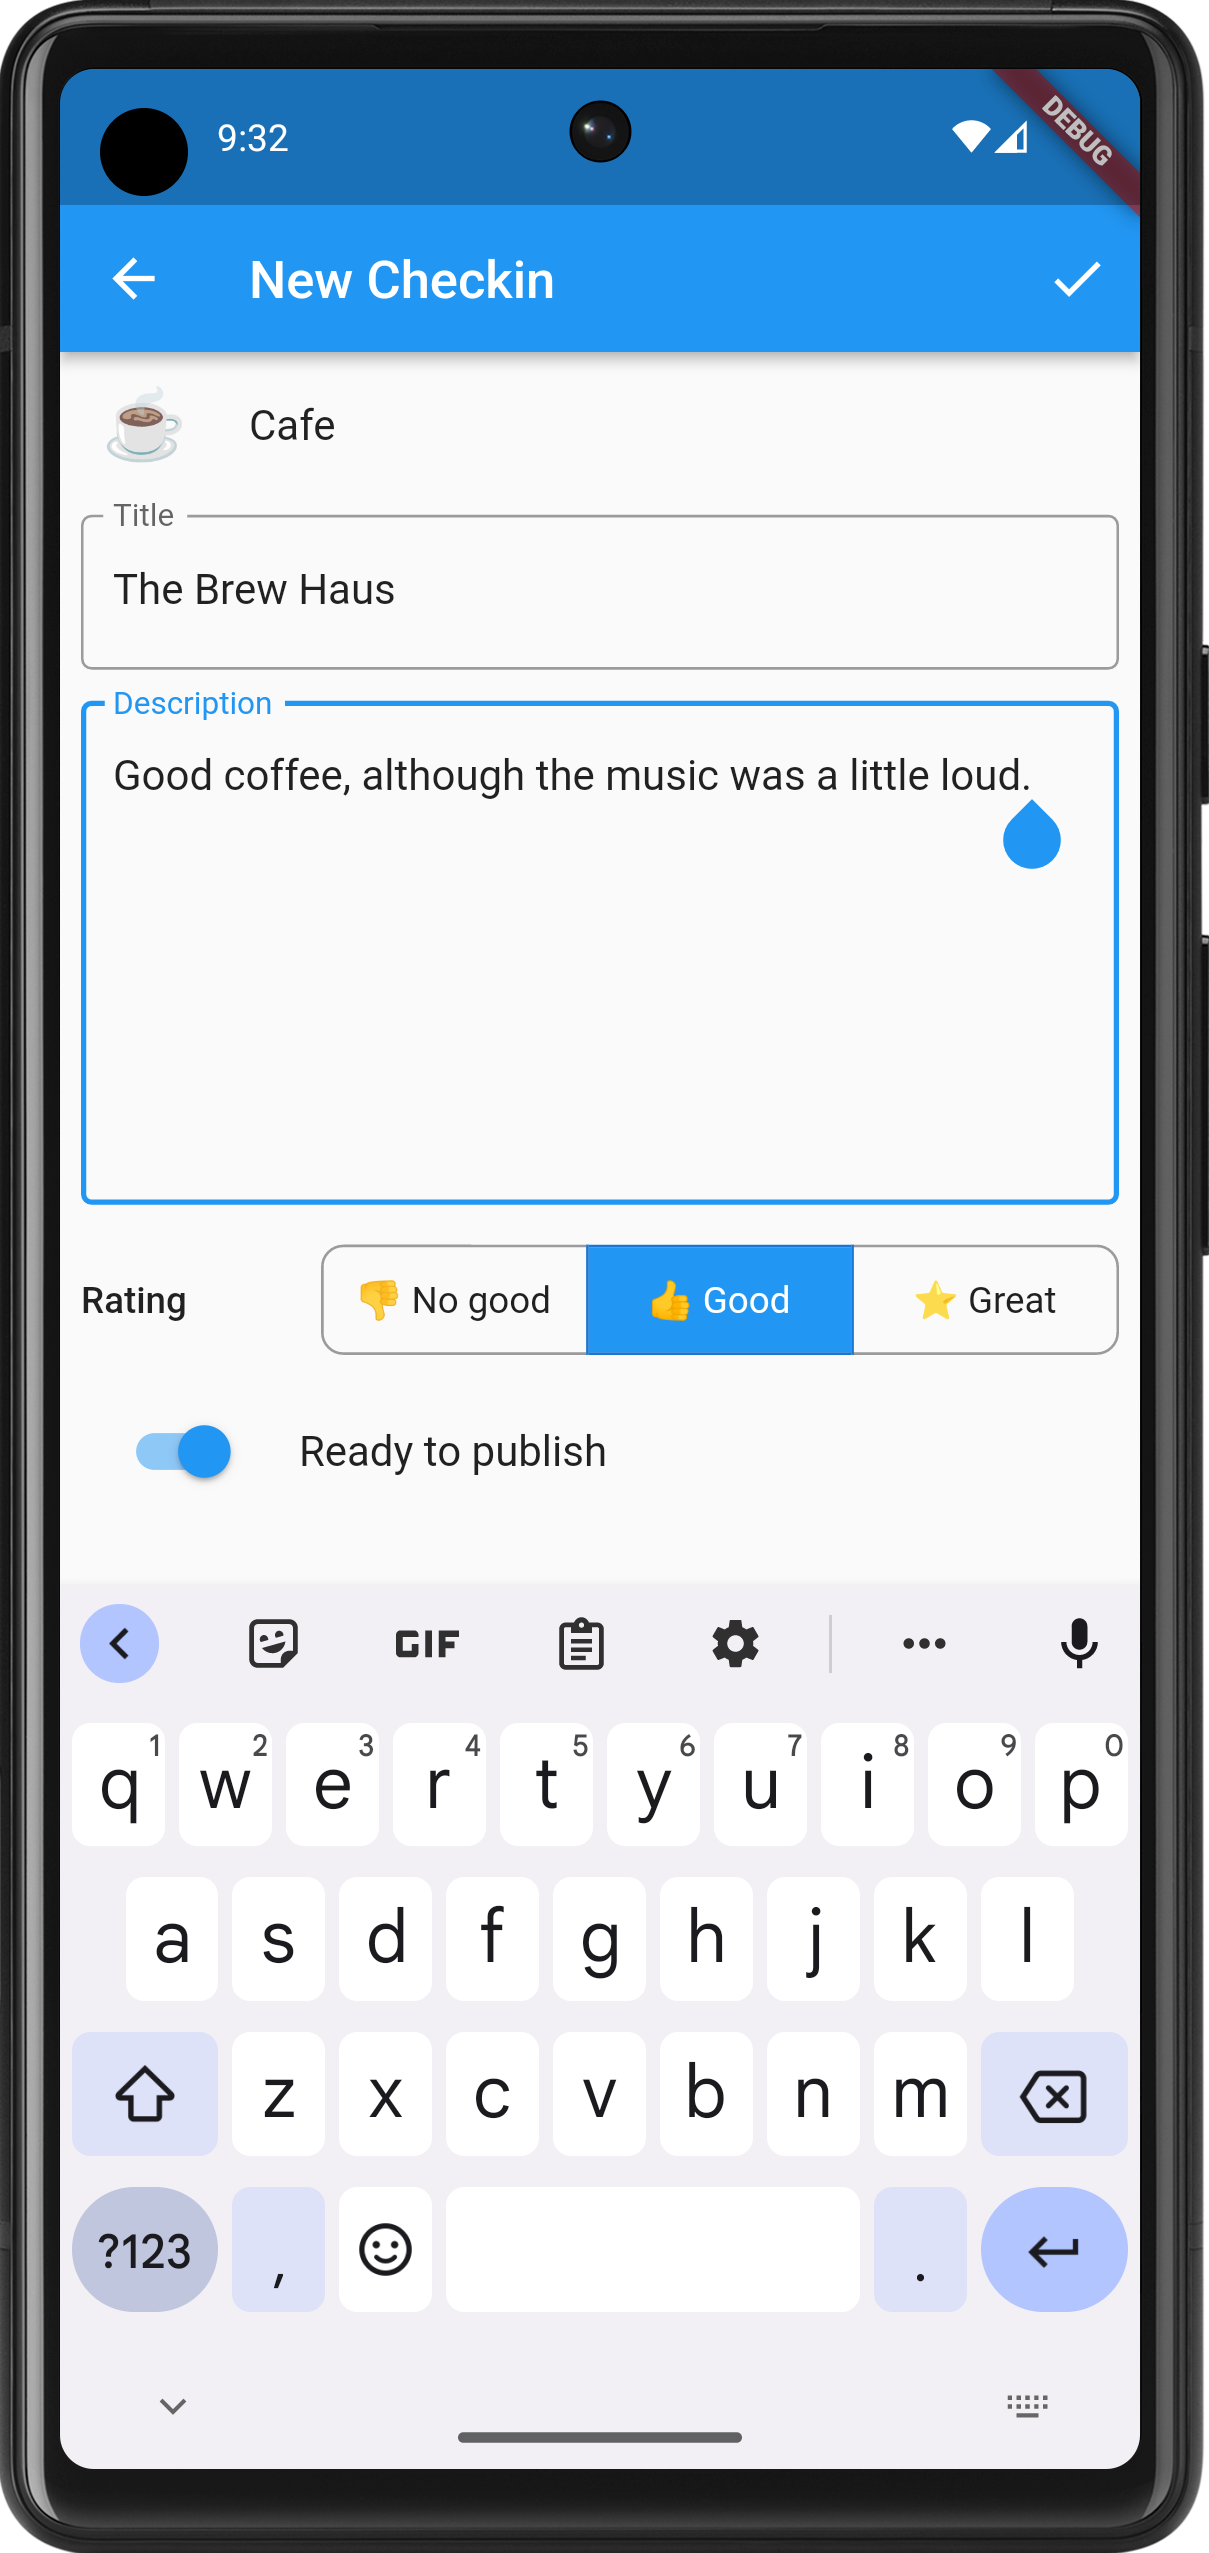
Check-ins can be published by tapping the upward facing button on the main screen. Any check-in with a lock is private and will not be published until you toggle the “Ready to publish” switch in the properties. Doing so will not change the date of the check-in: it will still have the date and time that check-in was created.
On the subject of publishing, I had some issues with Dart’s date and time methods. The method on the DateTime class used to produce an ISO-8501 date-stamp don’t include the time-zone if the date and time is not in UTC. This is important as I want the post date and time to be as close to the check-in time as possible, and in the time-zone of the phone. DateTime knows all this, including what the time-zone we’re in. So why didn’t the developers include it in the ISO-8501 date-time string?
This is really strange. Fortunately, ChatGPT stepped in to help out, writing a function which will add the time-zone offset to the ISO-8501 date-time string:
String formatTimeZoneOffset(Duration offset) {
  String sign = offset.isNegative ? '-' : '+';
  int hours = offset.inHours.abs();
  int minutes = (offset.inMinutes.abs() % 60);

  return '$sign${_padZero(hours)}:${_padZero(minutes)}';
}
Honestly, ChatGPT has been so helpful over the past week with this project, I probably should give it a credit if I get this polished enough to release.
Back working on Micropub Checkin. Re-engineered the home page to now include a list of what would eventually be check-ins — both historical and soon to be published — complete with the check-in type emoji as the icon:

The same list of emoji icons now adorn the check-in type picker as well (except for the airplane one which seems to always be shown as what I can only describe as the “Wingding” representation):
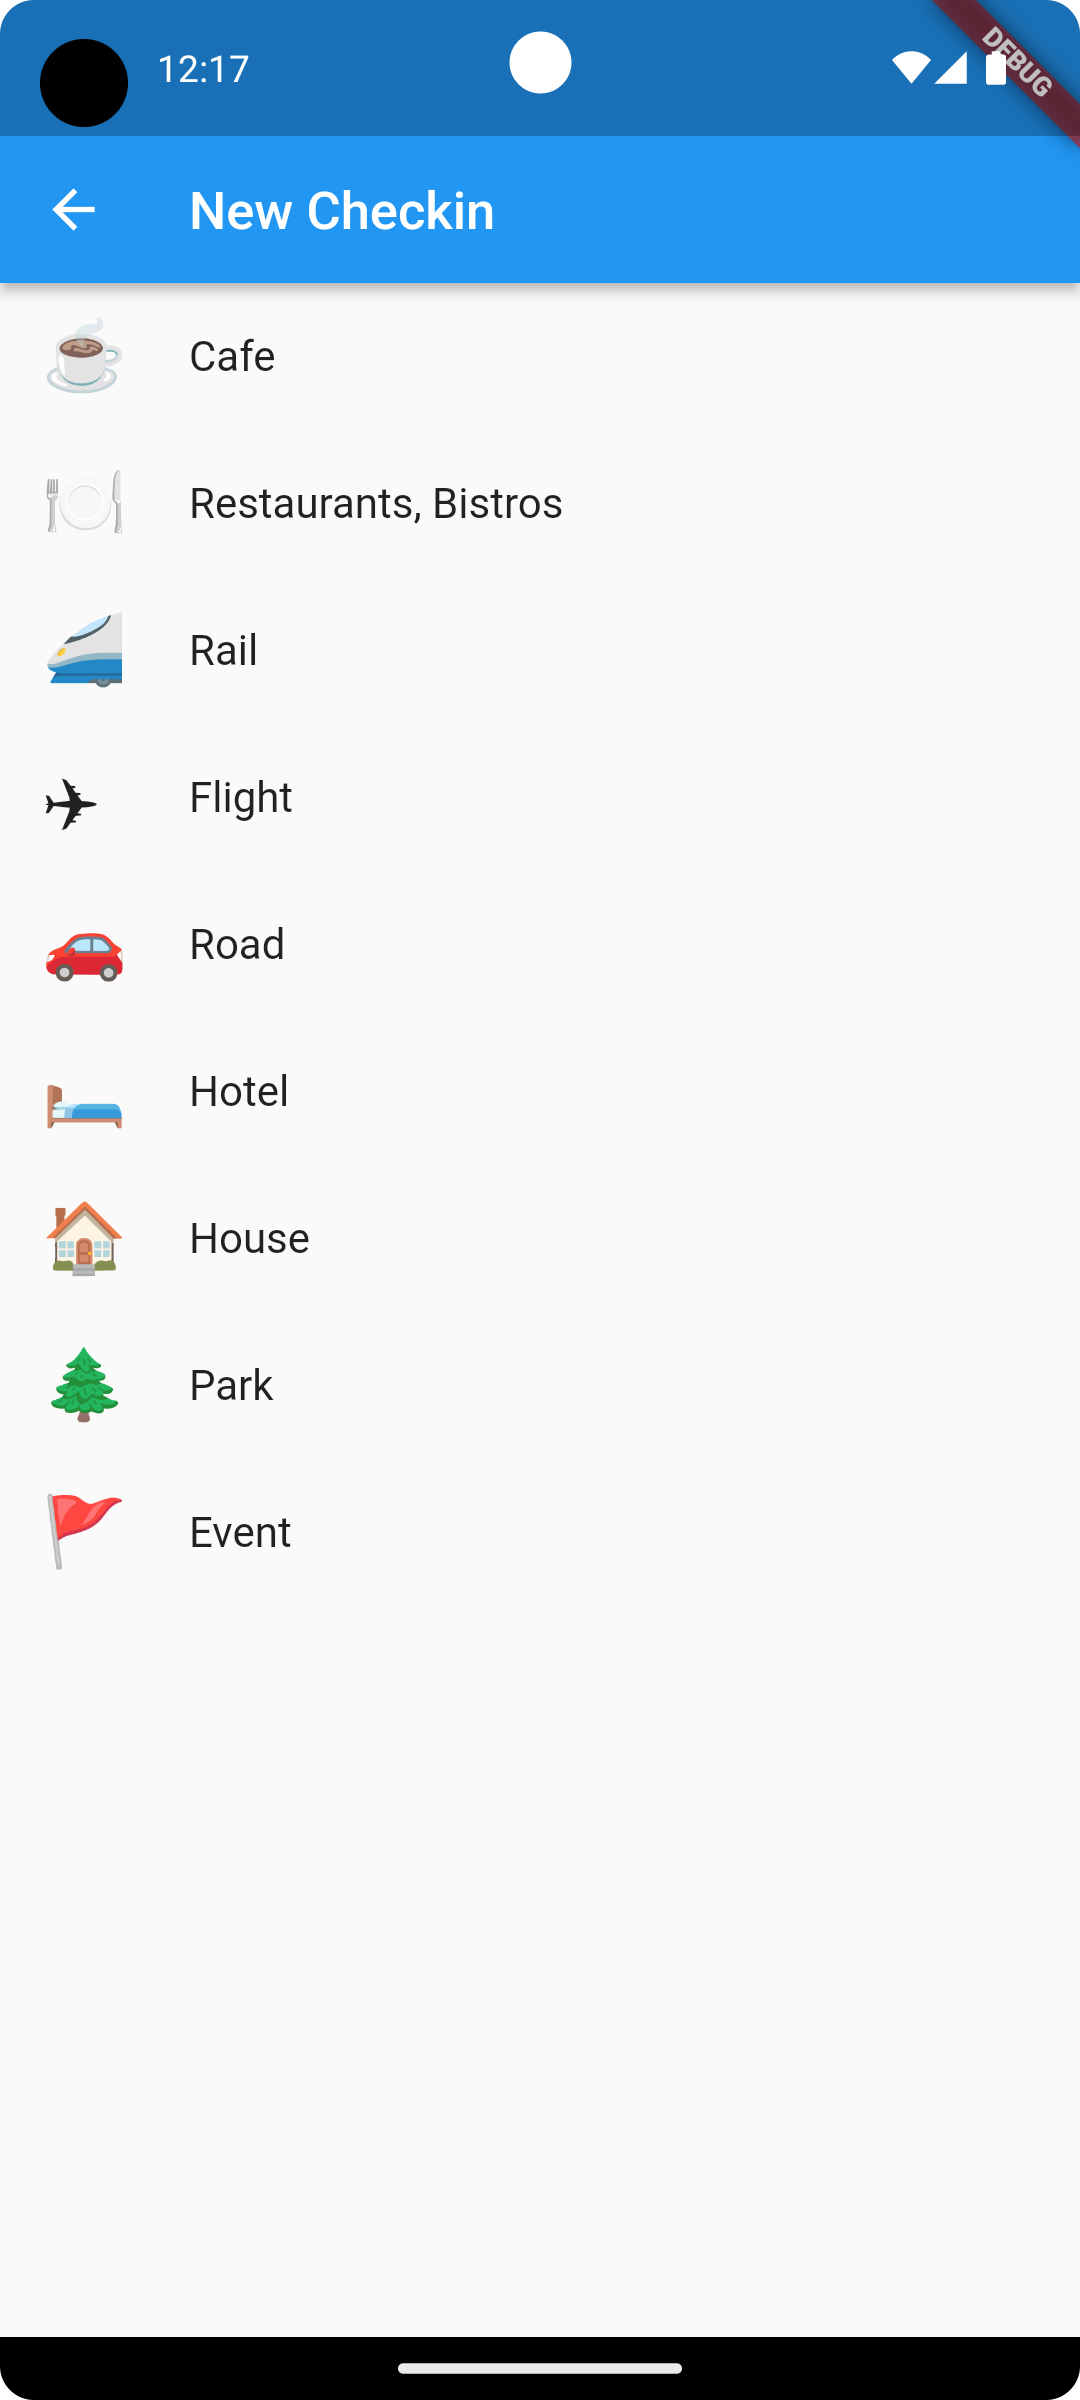
I went around a bit trying to work out how best to use these emojis icons in the leading slot of the ListTile widget. I expored trying to convert them to IconData, but it turns out just using a Text widget with a large font worked well. I wrapped in in a Widget type with a fixed font-size and so far it looks quite good, at least in the emulator:
class EmojiIcon extends StatelessWidget {
  final String emoji;

  const EmojiIcon({super.key, required this.emoji});

  Widget build(BuildContext context) {
    return Text(emoji, style: TextStyle(fontSize: 26.0));
  }
}
Also started working on a Cubit to handle state for the main page. I had a bit of trouble working ont where the soon-to-be database call to get the list of checkins should go in the cubit. After asking ChatGPT, it looks like the initializer is the best place for it:
class CheckinListCubit extends Cubit<CheckinListState> {

  CheckinListCubit(): super(LoadingCheckinListState()) {
    loadCheckinList();
  }

  void loadCheckinList() async {
    var listOfCheckins = await read_database();
    emit(FoundCheckinListState(checkins));
  }
}
I’ve got some scaffolding code in place to simulate this, and so far it seems to work.
I need to start working on the database layer and having the ability to edit and delete check-ins before they’re published. I think I’ll tackle that next.
Building F5 To Run
At the risk of talking about something that I’ve only just started, I’d thought today I write about what I’m working on right now.
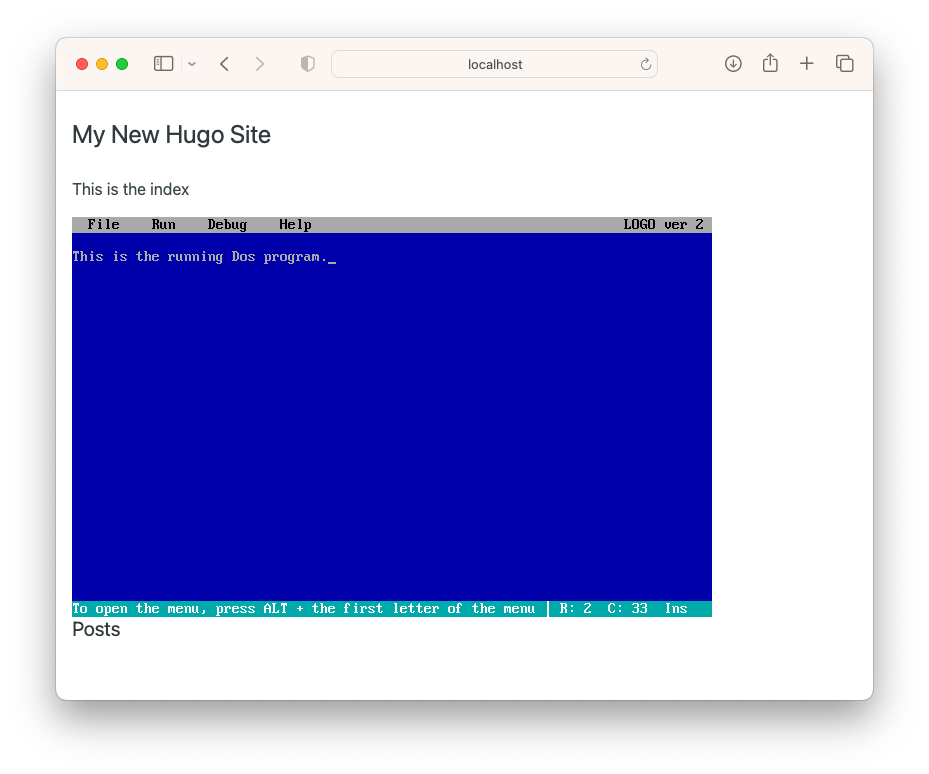
I’ve been going through my digital archives this weekend, trying to get it into something more permenant than the portable USB drives it’s currently stored on. Amongst all that stuff is a bunch of QBasic apps and games I wrote way back when I was a kid. Over the years it’s laid dormant but I do like revising them from time to time.
Is it a form of nostalgia? An attempts to live past glories? Maybe? I was pretty proud of them at the time, much like anyone else that’s proud of their early stuff while they’re leaning to code. And I know about the risk of living in the past at the expense of the present. But I also know that if I get rid of them, I’d regret it. I already regret loosing the things from the archive so far, due to bad disks or just missing things while copying them from portable hard-drive to portable hard-drive. I don’t want to loose any more.
So in an act of posterity, I’d figured it’s time to coat them in amber and put them online. So that’s what I’m doing now.
These apps run without issue in DosBox, and hearing about how the Wayback Machine has managed to make a bunch of DOS games playable within the browser, I wondered if I could do something similar. Anything that deals with virtualisation is always going to be a little bit involved. I guess one thing going for these is that they were written for a pretty slow machine and a pretty thin OS that would be trivial for modern hardware to emulate. The apps themselves, even compiled to an EXE file, are not very taxing on the hardware back then either. But I still expected to do a bit of heavy lifting myself.
How wrong I was! After a tiny bit of research — and by tiny I mean one Ecosia search — I managed to find a JavaScript library called JS-Dos which provides a DosBox emulator that’s runnable from a browser. All I need to do is prepare a bundle on what I want to run (more on that below) and with a bit of JavaScript, I can start a DosBox machine in the browser and mount it to a HTML element. The library does all the work.
How To Use JS-Dos
It’s still early days, but here’s what I learnt about using the library so far.
First, the library comes as a NPM package, or can be loaded from their CDN in the form of a <script> import.
I first tried using the NPM package, but I didn’t know the appropriate import statement to use, and the documentation was not forthcoming on this front.
So I went with the CDN approach. I’m using Hugo Pipes to fetch the remote JavaScript file and make a local bundle so I can host it from the site itself. It comes with some CSS which I also need to get (note, I’m using parenthesis instead of curly braces here as I’m not sure how to include two curly braces in a code-block).
(( $jsDosCSS := resources.GetRemote "https://js-dos.com/v7/build/releases/latest/js-dos/js-dos.css" ))
<link rel="stylesheet" href="(( $jsDosCSS.RelPermalink ))">

(( $jsDosJS := resources.GetRemote "https://js-dos.com/v7/build/releases/latest/js-dos/js-dos.js" ))
<script src="(( $jsDosJS.RelPermalink ))" defer></script>
I also needed to get an appropriate wdosbox emulator. This comes in the form of a WASM file, plus a small JavaScript file which
I assume is some simple bootstrapper. I’ve downloaded these and stored them in the static/emulators directory of my Hugo project.
The JSDos library loads them on demand and I needed to set the URL path prefix for these two files so that JSDos knows where to get them:
emulators.pathPrefix = '/emulators/';
Next, I needed to build a bundle. These are the DOS programs that are launched with DosBox. They’re effectively just Zip files holding some metadata, the DOS executable, and any files needed for the program to run. There’s some basic information about how to make them, and there’s even an online tool which will take on a lot of the tedious work. I’ve used it to make a couple of test bundles and it works quite well. I’d like to eventually make my bundles myself but I’ll stick with the tool for the time being, at least until I’ve got a DosBox configuration that I’m happy with. One thing the tool does is give you the ability to define an overlay so that these DOS apps are usable from within a mobile browsers. I’ll see if I can get away from needing these overlays at this stage. I’m not expecting anyone with a mobile app to try these out.
The contents of .jsdos/dosbox.conf for the test bundle `logo-2.jsdos`
[sdl]
autolock=false

fullscreen=false
fulldouble=false
fullresolution=original
windowresolution=original
output=surface
sensitivity=100
waitonerror=true
priority=higher,normal
mapperfile=mapper-jsdos.map
usescancodes=true
vsync=false
[dosbox]
machine=svga_s3

language=
captures=capture
memsize=16
[cpu]
core=auto
cputype=auto
cycles=max

cycleup=10
cycledown=20
[mixer]
nosound=false
rate=44100

blocksize=1024
prebuffer=20

[render]
# frameskip: How many frames DOSBox skips before drawing one.
#    aspect: Do aspect correction, if your output method doesn't support scaling this can slow things down!.
#    scaler: Scaler used to enlarge/enhance low resolution modes.
#              If 'forced' is appended, then the scaler will be used even if the result might not be desired.
#            Possible values: none, normal2x, normal3x, advmame2x, advmame3x, advinterp2x, advinterp3x, hq2x, hq3x, 2xsai, super2xsai, supereagle, tv2x, tv3x, rgb2x, rgb3x, scan2x, scan3x.

frameskip=0
aspect=false
scaler=none

[midi]
#     mpu401: Type of MPU-401 to emulate.
#             Possible values: intelligent, uart, none.
# mididevice: Device that will receive the MIDI data from MPU-401.
#             Possible values: default, win32, alsa, oss, coreaudio, coremidi, none.
# midiconfig: Special configuration options for the device driver. This is usually the id of the device you want to use.
#               See the README/Manual for more details.

mpu401=intelligent
mididevice=default
midiconfig=

[sblaster]
#  sbtype: Type of Soundblaster to emulate. gb is Gameblaster.
#          Possible values: sb1, sb2, sbpro1, sbpro2, sb16, gb, none.
#  sbbase: The IO address of the soundblaster.
#          Possible values: 220, 240, 260, 280, 2a0, 2c0, 2e0, 300.
#     irq: The IRQ number of the soundblaster.
#          Possible values: 7, 5, 3, 9, 10, 11, 12.
#     dma: The DMA number of the soundblaster.
#          Possible values: 1, 5, 0, 3, 6, 7.
#    hdma: The High DMA number of the soundblaster.
#          Possible values: 1, 5, 0, 3, 6, 7.
# sbmixer: Allow the soundblaster mixer to modify the DOSBox mixer.
# oplmode: Type of OPL emulation. On 'auto' the mode is determined by sblaster type. All OPL modes are Adlib-compatible, except for 'cms'.
#          Possible values: auto, cms, opl2, dualopl2, opl3, none.
#  oplemu: Provider for the OPL emulation. compat might provide better quality (see oplrate as well).
#          Possible values: default, compat, fast.
# oplrate: Sample rate of OPL music emulation. Use 49716 for highest quality (set the mixer rate accordingly).
#          Possible values: 44100, 49716, 48000, 32000, 22050, 16000, 11025, 8000.

sbtype=sb16
sbbase=220
irq=7
dma=1
hdma=5
sbmixer=true
oplmode=auto
oplemu=default
oplrate=44100

[gus]
#      gus: Enable the Gravis Ultrasound emulation.
#  gusrate: Sample rate of Ultrasound emulation.
#           Possible values: 44100, 48000, 32000, 22050, 16000, 11025, 8000, 49716.
#  gusbase: The IO base address of the Gravis Ultrasound.
#           Possible values: 240, 220, 260, 280, 2a0, 2c0, 2e0, 300.
#   gusirq: The IRQ number of the Gravis Ultrasound.
#           Possible values: 5, 3, 7, 9, 10, 11, 12.
#   gusdma: The DMA channel of the Gravis Ultrasound.
#           Possible values: 3, 0, 1, 5, 6, 7.
# ultradir: Path to Ultrasound directory. In this directory
#           there should be a MIDI directory that contains
#           the patch files for GUS playback. Patch sets used
#           with Timidity should work fine.

gus=false
gusrate=44100
gusbase=240
gusirq=5
gusdma=3
ultradir=C:\ULTRASND

[speaker]
# pcspeaker: Enable PC-Speaker emulation.
#    pcrate: Sample rate of the PC-Speaker sound generation.
#            Possible values: 44100, 48000, 32000, 22050, 16000, 11025, 8000, 49716.
#     tandy: Enable Tandy Sound System emulation. For 'auto', emulation is present only if machine is set to 'tandy'.
#            Possible values: auto, on, off.
# tandyrate: Sample rate of the Tandy 3-Voice generation.
#            Possible values: 44100, 48000, 32000, 22050, 16000, 11025, 8000, 49716.
#    disney: Enable Disney Sound Source emulation. (Covox Voice Master and Speech Thing compatible).

pcspeaker=true
pcrate=44100
tandy=auto
tandyrate=44100
disney=true

[joystick]
# joysticktype: Type of joystick to emulate: auto (default), none,
#               2axis (supports two joysticks),
#               4axis (supports one joystick, first joystick used),
#               4axis_2 (supports one joystick, second joystick used),
#               fcs (Thrustmaster), ch (CH Flightstick).
#               none disables joystick emulation.
#               auto chooses emulation depending on real joystick(s).
#               (Remember to reset dosbox's mapperfile if you saved it earlier)
#               Possible values: auto, 2axis, 4axis, 4axis_2, fcs, ch, none.
#        timed: enable timed intervals for axis. Experiment with this option, if your joystick drifts (away).
#     autofire: continuously fires as long as you keep the button pressed.
#       swap34: swap the 3rd and the 4th axis. can be useful for certain joysticks.
#   buttonwrap: enable button wrapping at the number of emulated buttons.

joysticktype=auto
timed=true
autofire=false
swap34=false
buttonwrap=false

[serial]
# serial1: set type of device connected to com port.
#          Can be disabled, dummy, modem, nullmodem, directserial.
#          Additional parameters must be in the same line in the form of
#          parameter:value. Parameter for all types is irq (optional).
#          for directserial: realport (required), rxdelay (optional).
#                           (realport:COM1 realport:ttyS0).
#          for modem: listenport (optional).
#          for nullmodem: server, rxdelay, txdelay, telnet, usedtr,
#                         transparent, port, inhsocket (all optional).
#          Example: serial1=modem listenport:5000
#          Possible values: dummy, disabled, modem, nullmodem, directserial.
# serial2: see serial1
#          Possible values: dummy, disabled, modem, nullmodem, directserial.
# serial3: see serial1
#          Possible values: dummy, disabled, modem, nullmodem, directserial.
# serial4: see serial1
#          Possible values: dummy, disabled, modem, nullmodem, directserial.

serial1=dummy
serial2=dummy
serial3=disabled
serial4=disabled

[dos]
#            xms: Enable XMS support.
#            ems: Enable EMS support.
#            umb: Enable UMB support.
# keyboardlayout: Language code of the keyboard layout (or none).

xms=true
ems=true
umb=true
keyboardlayout=auto

[ipx]
# ipx: Enable ipx over UDP/IP emulation.

ipx=true
[autoexec]
echo off
mount c .
c:

type jsdos~1/readme.txt
echo on

LOGO.EXE
I’m keeping the bundles in the static/bundles directory, which sits alongside the emulator WASM file. They’re not huge binaries but I’m still using git lfs to manage them. Best to keep the the Git repository relatively sane.
Finally, it’s just a matter of adding some JavaScript to start DosBox, load the bundle, and mount it onto a HTML element:
Dos(document.querySelector("#element-to-mount")).run("/bundles/bundle-to-load.jsdos");
And that’s pretty much it.
After a few hours, I’ve managed to get a test version of this working. There are a few things that need working on: the app I’m trying require the Alt key, which is not readily available of Apple keyboards, so I may need to do something about that (JSDos comes with a virtual keyboard with Ctrl and Alt so it’s not a complete show-stopper)1. And I’ll need to get styling and more maintainable JavaScript written for this (I’m using StimulusJS for the JavaScript2). But I’m impressed by how well this works, given the minimal amount of effort from my part. Shoulders of giants and all that.
Updates To Dynamo-Browse
In the off-chance that anyone other than me is reading this, it’s likely that there will be no update next week due to the Easter weekend. It may not be the only weekend without an update either. If I find that I didn’t get much done for a particular week, I probably won’t say anything and leave the well to fill up for the next one (although I do have some topics planned for some of those weekends).
In fact, I was not expecting to say much this week, given that work was going through a bit of a crunch period. But the needs of work finally pushed me to add a few features to Dynamo-Browse that were sorely lacking. So that’s where most of this week’s side-project budget went to.
Dynamo-Browse
A lot of work done to query expressions in Dynamo-Browse this week, some of it touching on a few topics I mentioned in a previous update.
I’ve finally got around to finishing the between keyword, so that it works with the query planner and actually produces a DynamoDB query when used with a range[^sort] key. This means no more falling back on table scans. It’s still in a branch as of this post, but I feel much less embarrassed with merging it now, given that this support has been added.
I’ve also made a decision about how to deal with multiple index candidates. Now, when Dynamo-Browse finds that multiple indices can apply for a specific query expression, it will produce an error, requesting you to specify which index to use. This can be done by adding a using suffix to an expression, which specifies how the query should be evaluated:
color="blue" using index("color-item-index")
This can be used at any time to override the index Dynamo-Browse should use, even if only one index candidate was found. It can also be used to force the query to run as a table scan if you don’t want to use an index at all:
color="blue" using scan
Ideally you shouldn’t need to use this suffix that often. The whole purpose of query expressions was to eliminate the need for specifying details of how the query should be evaluated. But we don’t live in a perfect world, and it makes sense adding this to deal with cases where it helps to be specific.
This is also in a branch, but I’m hoping this would be merged soon as well.
Unified Expression Types and Values
A relatively large change made this week was how how values and types are represented within query expressions.
A query expression, once parsed, can be executed in multiple contexts. It can be used to generate a conditional expression for a DynamoDB query or scan, or it can be evaluated within the app itself to produce a result or alter the fields of a DynamoDB record in memory. Each of these contexts have a different set of types the expression operates on. When interpreting the expression in order to produce a result, the expression operates on types that implement types.AttributeType. This fits nicely with what the expression has to work with, which is usually the raw DynamoDB records returned by the Go client. The context used to produces conditional expressions, however, operate on a sort of hybrid type hieararchy, that supports both AttributeType and Go types. This is because to the client used to build the expression accept native Go values, which are sometimes available — particularly if they show up in the expression as a literal — but sometimes not.
But here’s the problem: I want to be able to add functions to the expression language that can be used in both contexts. I’ll get into what sort of functions I’m thinking of in a minute, but the issue is that with two sets of type hierarchies, I’d have to implement the functions twice.
Another problem is that an evaluation context operating on AttributeTypes feels very inefficient. Numbers are represented as string, and new attribute values are created on the heap. This is probably not too bad in the grand scheme of things, but it would be nice to use native Go values here, even if it’s just to avoid going from strings to numbers constantly.
So I spent most of yesterday trying to fix this. I built a new private Go interface called exprValue and added as implementing subtypes all the types supported by DynamoDB — strings, numbers, booleans, lists, etc. Values of these type implement this new interface, and can be converted to Go values or DynamoDB AttributeType values depending on the need.
Most of the evaluation logic was changed to use these types, including the builtin functions, and already I’m seeing some dramatic improvements of what’s possible now. I can define a function once and it can be evaluated both in the evaluation and query building context (provided that it’s only operating on constant values in the query building context). It also addressed some long standing issues I’ve had with the expression language, such as adding support for using a list with the in keyword; something that was not possible before:
pk in $someList
This could potentially be helpful with the “fan-out” one I mentioned a few weeks ago.
This is still early days, but I think it’s been a huge improvement to what was there before. And it’s super satisfying cleaning out all this tech-debt, especially if it means I can add features easily now.
Date Functions In The Expression Language
Now with the new type hierarchy in place, the time has come to start adding functions. What existed to date were the operators and functions that DynamoDB’s conditional expression language supported, and little else. It’s time to go beyond that. And to be honest, this was always the plan, especially given that operators like “begins with” (^=) have been there since the start.
This first thing I’m pondering now is time and date functions. The immediate issue is one of representation: in that I don’t want to settle on any specific one. I’ve seen dates stored as both string date-stamps, usually in ISO 8601, or as integer seconds from the Unix epoch, and it would be good to operate on both of these, in addition to other possible representations, like milliseconds from the Unix epoch, to some other string encoding scheme.
So what I’m thinking is an abstract date-type, probably something backed by Go’s builtin date.Time type. This will neither be a number or a string, but can be converted to one, maybe by using a keyword like as:
now() as "S"   -- represent date as ISO-8601 timestamp
now() as "N"   -- represent date as Unix timestamp
now()          -- error: need to convert it to something
Or maybe some other mechanism.
The idea is that all the builtin functions will operate on this type, but will prevent the user from assuming a particular representation, and will force them to choose one.
I think this is something that will fit nicely with the new type hierarchy system, but for now (pun unintended), I’ll stick with Unix timestamp, just so that I can use something that is easy to implement. But to make it crystal clear that this is temporary, any such functions will have an annoying prefix.
So two new functions were added this week: the _x_now() function, which returns the current time as seconds from the Unix epoch as a number; and the _x_add(), which returns the sum of two numbers. Much like the time functions, I’d like to eventually add arithmetic operators like + to the expression language, but I needed something now and I didn’t have much time to work on that.
Attribute Commands
Finally, a few random notes about commands dealing with attribute values.
The set-attr command can now accept the switch -to, which can be used to set the attribute to the result of a query expression. No more copying-and-pasting values, and operating on them outside Dynamo-Browse.
The good thing about this is that the previous attribute values are available in the value expression, so you can use this switch to set the value of attribute based on other attributes in a row. This comes in super handy with bulk changes. I’ve used this to adjust the value of TTLs in a table I’m working in. To set the TTL to be 10 minutes into the future, I just marked the rows, entered the command set-attr -to ttl, and use the expression _x_add(_x_now(), 600). Super useful.
Also, I’ve found a bug where the del-attr command does not work with marked items. It’ll only delete attributes from the item that’s selected (i.e. in pink). I haven’t got around to fixing this, but I hope to very soon.
I think that’s all for this week. Until next time.
Updating Bocce Scorecard
I didn’t get to a lot of side-project work this week, but I did have to make a large change to a project we use to track scores for our “bocce club”. So I’d though I’d say a few words about that today.
We had our bocce “grand final” a few weeks ago, and one of the matches resulted in a tie between two players. Unfortunately, the Bocce Scorecard web-app I build could not properly handle these, which meant that I had to fix it.
I’ll be honest in saying that that this was never really well fleshed out in the code, and there was actually a small bug which didn’t handle the ranking of players well. But I was pushing to keep this app as the de-facto source of truth for these matches, and there was a bit riding on this being correct (there’s a $4 trophy involved). So I had to get this fix before our next match, which was today.
Now, I been having trouble coming up with a good description of what the rules should be so I’d figured a simple example would suffice.
Imagine that there are four players: Tom, Dick, Harry, and Sally. They play several bocce matches during a season — which roughly corresponds to one calendar year — plus three “grand final” matches at the end. Each player would be awarded a number of “season points” (we informally call them “cookies”) based on how well they did in the match. The person with the most season points at the end of the last grand final match wins the season, and gets to take home the trophy.
In regular matches, the wining player is awarded one season point, while the remaining players get nothing:
| Player | Score | Season Points |
|---|---|---|
| Tom | 11 | 1 |
| Dick | 8 | 0 |
| Sally | 6 | 0 |
| Harry | 3 | 0 |
In grand final matches, the winning player is awarded 5 points, the one coming in second gets 2, and the one coming in third gets 1:
| Player | Score | Season Points |
|---|---|---|
| Tom | 11 | 5 |
| Dick | 8 | 2 |
| Sally | 6 | 1 |
| Harry | 3 | 0 |
Season points for grand final matches are distributed this way so that a single grand final match is roughly equivalent to an entire season of regular matches. This means that if someone is coming in last during the regular season (fun fact: that person’s usually me) they still has a chance to win the trophy if they do well during the grand final.
Now, let’s say that our four players are playing a grand final match, and Dick and Sally tie for second place. What should happen is that both Dick and Sally should be awarded half the season points they would get for both the second and third rank, given that they are evenly match for these two positions. In other words, they should both get 1.5 season points (1 + 2 = 3 / 2 = 1.5). Harry, who came last, still gets zero.
| Player | Score | Season Points |
|---|---|---|
| Tom | 11 | 5 |
| Dick | 7 | 1.5 |
| Sally | 7 | 1.5 |
| Harry | 3 | 0 |
This was the rule that I needed to change.
What I found when I started working on this is that the rule definitions themselves needed to be closer to how the players are ranked. What was previously done was that the players were sorted based on their match score, and then the rules were applied to each one by checking the win condition and awarding the points if they match it. But this didn’t fit nicely with this new approach to ties.
So instead of the conditions and awards approach, I simplified the rule definitions such that it simply defines the number of season points based on the players rank. This effectively makes it a simple map between rank and points. For normal matches the mapping would look like this:
| Rank | Season Points |
|---|---|
| 1 | 1 |
and for grand final matches, like this:
| Rank | Season Points |
|---|---|
| 1 | 5 |
| 2 | 2 |
| 3 | 1 |
Now, when a match is over, the logic that awards the season points first sorts the players based on their match score, and then groups the players into buckets such that all the players with same match score are lumped together in the same bucket. Ranks are then assigned to the players in descending score order. If two players have the same score, they will be given two ranks (e.g. Dick and Sally would have both rank two and three). Finally, season points are awarded with the rule definition and the following formula:
season_points(player) = sum[over player_ranks](rules.rank_scores[rank]) / no_of_players_in_bucket
This new logic works for ties between any number of players with any ranks.
But the introduction of division now means that the season points can be a decimal, and the database row that holds the season points is an integer type. I didn’t want to make it a floating point, so I took a page from Stripe and simply changed the representation of the season scores such that 1 season point is represented as 100 in the database. This is exposed in the rules configuration, which now looks like this:
{
  "rank_scores": [
    {
      "points": 500,
      "rank": 1
    },
    {
      "points": 200,
      "rank": 2
    },
    {
      "points": 100,
      "rank": 3
    }
  ]
}
although all the non-admin screens properly represents the score as a decimal number.
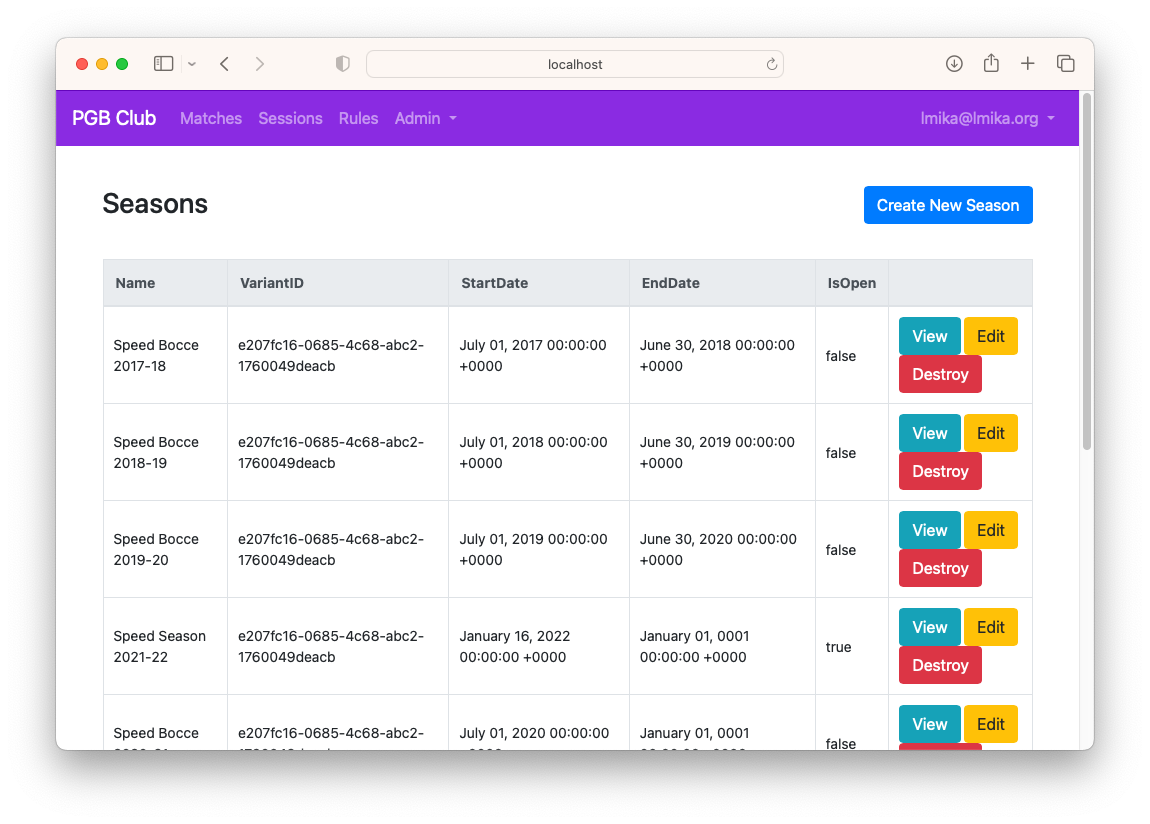
I managed to get all finished and pushed to the server, but there was one other thing I think I’d like to get done down the line. My friends have been asking me about the outcome of previous seasons recently and I’d like to make it easier for them to view it themselves. The data exists, but it’s super hacky to get: you need to “open” a previous season so that the leader board is shown on the home page, then close it again once the info is seen. This can only be done by the admin user (i.e. me) and the screens to do it leave a lot to be desired:
What I’m thinking is adding a “Seasons” section in the web-app. Clicking “Seasons” in the nav will bring up the following screen:
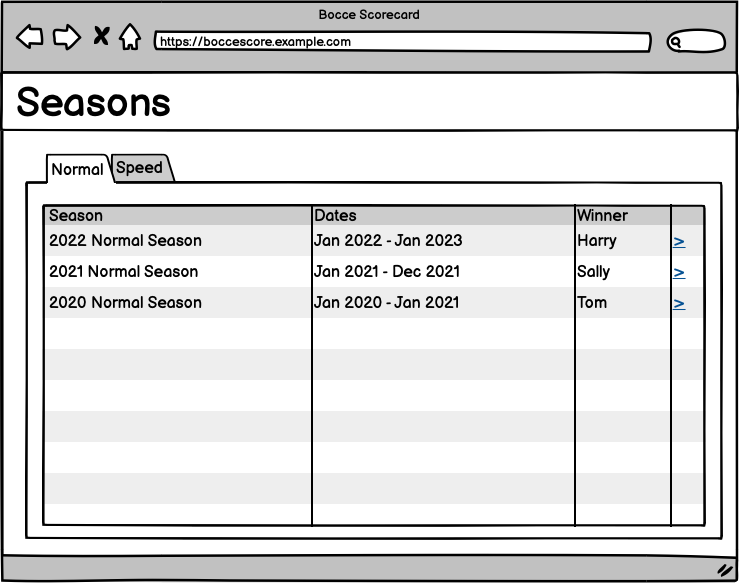
The game variant will appear the top as a tab, and below them are all the current and past seasons arranged in descending chronological order. Clicking the > will bring up the season results display:
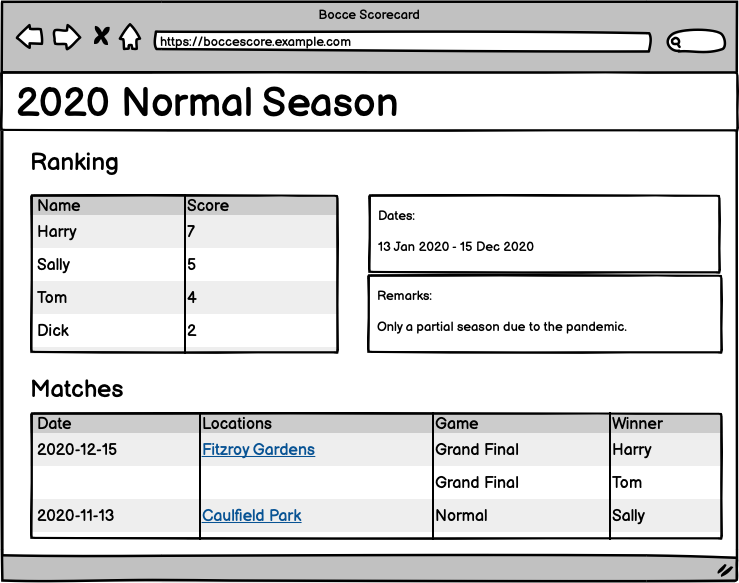
This will show the final outcome of the season, any metadata associated with the season, and the matches of the season, along with the winner. Clicking the location will bring up the particular bocce session so that all the matches played that day can be seen.
We’ll see when I get around to building this. It’s actually been a while since I’ve last touched this project while making such a large feature.
Oh, and since it’s been a while, this usually means I needed to upgrade Buffalo, the framework this app is using. Doing this usually means that you’ll need to change your app in some way to handle the new build process. This time, it’s moving the main.go file, previously in the project directory, into a cmd/app directory. When you see output like this:
leonmika@Stark bocce-scorecard % buffalo build -o /tmp/app
Usage:
  buffalo build [flags]

Aliases:
  build, b, bill, install

Flags:
      --build-flags strings        Additional comma-separated build flags to feed to go build
      --clean-assets               will delete public/assets before calling webpack
      --dry-run                    runs the build 'dry'
      --environment string         set the environment for the binary (default "development")
  -e, --extract-assets             extract the assets and put them in a distinct archive
  -h, --help                       help for build
      --ldflags string             set any ldflags to be passed to the go build
      --mod string                 -mod flag for go build
  -o, --output string              set the name of the binary
  -k, --skip-assets                skip running webpack and building assets
      --skip-build-deps            skip building dependencies
      --skip-template-validation   skip validating templates
  -s, --static                     build a static binary using  --ldflags '-linkmode external -extldflags "-static"'
  -t, --tags string                compile with specific build tags
  -v, --verbose                    print debugging information

ERRO[0000] Error: open cmd/app/main.go: no such file or directory
You’ll need to create a cmd/app directory and move main.go into the cmd/app directory.
This will get the build working again but it will break buffalo dev as it could no longer find the main file in the project directory. To fix that, you’ll need to open up .buffalo.dev.yml and add the following property:
build_target_path: "./cmd/app"
This will get the dev build working again.
I don’t know why the dev command honours this config, yet the build command chooses to look at a hard coded path. Wouldn’t it have been easier to express this in a single configuration file?
And let’s not leave Node out of the cold. If you’re trying to run buffalo build and you’re getting this error:
#21 12.21 node:internal/crypto/hash:71
#21 12.21   this[kHandle] = new _Hash(algorithm, xofLen);
#21 12.21                   ^
#21 12.21
#21 12.21 Error: error:0308010C:digital envelope routines::unsupported
#21 12.21     at new Hash (node:internal/crypto/hash:71:19)
#21 12.21     at Object.createHash (node:crypto:133:10)
#21 12.21     at BulkUpdateDecorator.hashFactory (/src/bocce_scorecard/node_modules/webpack/lib/util/createHash.js:145:18)
#21 12.21     at BulkUpdateDecorator.update (/src/bocce_scorecard/node_modules/webpack/lib/util/createHash.js:46:50)
#21 12.21     at RawSource.updateHash (/src/bocce_scorecard/node_modules/webpack/node_modules/webpack-sources/lib/RawSource.js:77:8)
#21 12.21     at NormalModule._initBuildHash (/src/bocce_scorecard/node_modules/webpack/lib/NormalModule.js:888:17)
#21 12.21     at handleParseResult (/src/bocce_scorecard/node_modules/webpack/lib/NormalModule.js:954:10)
#21 12.21     at /src/bocce_scorecard/node_modules/webpack/lib/NormalModule.js:1048:4
#21 12.21     at processResult (/src/bocce_scorecard/node_modules/webpack/lib/NormalModule.js:763:11)
#21 12.21     at /src/bocce_scorecard/node_modules/webpack/lib/NormalModule.js:827:5 {
#21 12.21   opensslErrorStack: [ 'error:03000086:digital envelope routines::initialization error' ],
#21 12.21   library: 'digital envelope routines',
#21 12.21   reason: 'unsupported',
#21 12.21   code: 'ERR_OSSL_EVP_UNSUPPORTED'
#21 12.21 }
You’ll need to enable the legacy OpenSSL provider using a Node option:
export NODE_OPTIONS=--openssl-legacy-provider
Yeah, building to a framework is always fun. 😏
So that’s it for this weeks update. I spent some time on Dynamo-Browse this week as well, but I haven’t actually finished that work and this log entry is long enough, so I might say more about that next week.
Updates To Dynamo-Browse And CCLM
I started this week fearing that I’d have very little to write today. I actually organised some time off over the weekend where I wouldn’t be spending a lot of time on side projects. But the week started with a public holiday, which I guess acted like a bit of a time offset, so some things did get worked on.
That said, most of the work done was starting or continuing things in progress, which is not super interesting at this stage. I’ll hold off on talking about those until there’s a little more there. But there were a few things that are worth mentioning.
Dynamo-Browse
I found a bug in the query planner. It had to do with which index it chose when planning a query with only a single attribute. If a table has multiple GSIs that have that same attribute as the partition key (with different attributes for sort keys), the index the planner choose became effectively random. Because each index may have different records, running that query could give incomplete results.
I think the query planner needs to be fixed such that any ambiguity in which index to be use would result in an error. I try to avoid putting an unnecessary need for the user to know that a particular query required a particular index. But I don’t think there’s any getting around this: the user would have to specify.
But how to allow the user to specify the index to use?
The fix for the script API was reasonably simple: just allow the script author to specify the index to use in the form of an option. That’s effectively what I’ve done by adding an optional index field to the session.query() method. When set, the specific index would be used regardless of which index the query planner would choose.
I’m not certain how best to solve this when the user is running a query interactively. My current idea is that a menu should appear, allowing the user to select the index to use from a list. This could also include a “scan” option if no index is needed. Ideally this information will be stored alongside the query expression so that pressing R would rerun the query without throwing up the prompt again.
Another option is allowing the user to specify the index within the expression in some way. Maybe in the form of a hint, as in having the user explicitly specify the sort key in a way that does’t affect the output. This is a little hacky though — sort of like those optimisations you need to do in SQL queries to nudge the planner in a particular execution plan.
Another option is having the user specify the index specifically in the query. Maybe as an annotation:
color="blue" @index('color-item-index')
or as a suffix:
color="blue" using index('color-item-index')
Anyway, this will be an ongoing thing I’m sure.
One other thing I started working on in Dynamo-Browse is finally working on support for the between keyword:
age between 12 and 24
This maps directly to the between statement in DynamoDB’s query expression language, so getting scan support for this was relatively easy. I do need to make the query planner know of this though, as this operation is supported in queries if it’s used with the sort key. So this is still on a branch at the moment.
Finally, I’ve found myself using this tool a lot this last week and I desperately need something akin to what I’ve been calling a “fanout” command. This is a way to take the results of one query and use them in someway in another query — almost like sub-queries in regular SQL. What I’ve been finding myself wishing I could use this for is getting the IDs of the row from a query run over the index, and just running a query for rows with those ID over the main table. At the moment I’m left with copying the ID from the first result set, and just making a large pk in (…) expression, which is far from ideal.
I’m not sure whether I’d like to do this as a command, or extend the query expression in some way. Both approaches have advantages and disadvantages. That’s probably why I haven’t made any movement on this front yet.
CCLM
I did spend the Monday working on CCLM. I coded up a small script which took some of the ideas from the blog post on puzzle design I mention last week that I could run to get some ideas. So far it’s only producing suggestions with two game elements, but it’s enough of a starting point for making puzzles:
leonmika@Stark cclm % go run ./cmd/puzzleidea
bear trap
directional walls
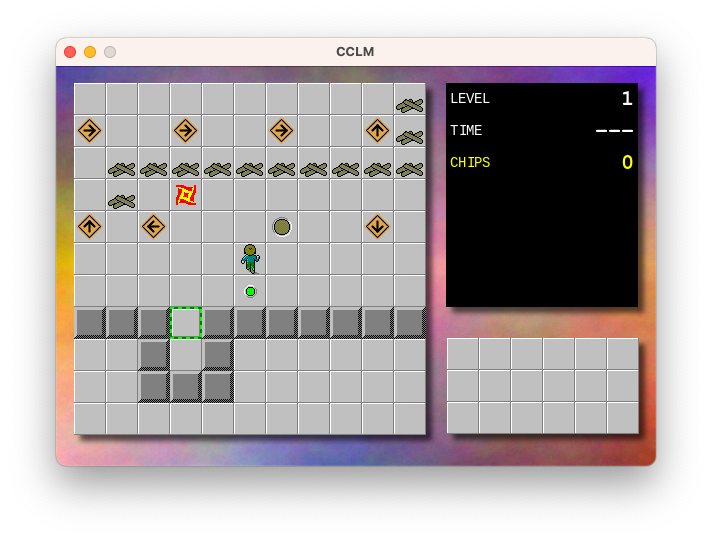
After running it on Monday I had a go at starting work on a new level. It became clear reasonably soon after I started that I needed a new game element. So I added one, which I’ve called “kindling”. By default it looks like a pile of wood, and is perfectively safe to walk on:
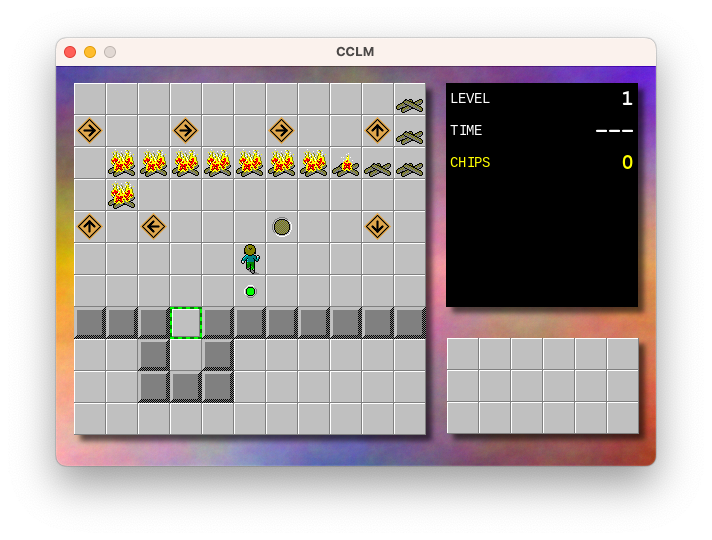
But if a fireball runs into it, it catches alight and spreads to any adjacent kindling tiles, turning them into fire tiles.
I had an idea for this for a while. I even went to the extend of producing the graphics for this element. But needing it for this puzzle finally bought me around to finishing the work. I actually manage to make most of the changes without any changes to the Go code at all: the existing tile definition configuration was almost powerful enough to represent this tile.
One other minor thing I fixed was the alignment of the info panels on the right side of the screen. Dealing with the unaligned numbers got a bit much eventually. The cursor position, marker position, and tag numbers are properly aligned now.
Anyway, that’s all for this week.
Dev Log - 2023-03-12
Preamble
When I moved Working Set over to Micro.blog, I’d thought I’d be constantly writing micro-posts about what I’m working on, as a form of working in public. I found that didn’t really work for me, for a few reasons.
I’ve got a strange relationship with this blog. I wanted a place online to write about the projects I’ve been working on, but every time I publish something here, I always get the feeling that I’m “showing off” in some way: ooh, look what I’ve done, aren’t I cleaver? And okay, I’d be lying if there’s not a part of me that wants others to see how I spend my time. If I didn’t want that, I’d be content with these posts existing in a private journal.
And maybe this is a form of self-justification but I’d like to think that there’s a bit of that feeling in every developer that keeps a public blog on what they do. Maybe not exactly “showing off”, but I’m sure they feel proud on what they work on and they want to talk about it. And there’s really nothing wrong with that. In fact, the posts I tend to enjoy the most are those from other devs talking about the projects they’re working on.
So yeah, I admit that having others see what I’m working on would be nice. They say write what you want to read, and this is my attempt at doing just that.
But that only explains why I write about it on a public blog instead of a private journal. Why I should want to write these posts at all is that I’d like to keep a record of the the projects I work on. Nostalgia is one reason: seeing a project progress over time or remembering projects long since abandoned. But another might be a way to track where I’m spending my time. This is theoretical at the moment, but if there ever came a time when I wanted to find this out, I have to have the record written somewhere.
But not as micro-posts. I think a fixed weekly cadence is more appropriate. I tried this a couple of years ago, and although it worked for a while, I fell out of the habit. But after seeing the weekly entries by Jonathan Hays, I’ve been inspired to try it again.
So that’s why I’m trying these weekly update. They’ll be frequent enough to be useful to act like diary entries, but not so frequent that they will bother people who aren’t interested. They’ll be long enough to warrant a title, making it easy for people to skip it. And they’ll be any anything related to a side project I’m working on: either current or abandoned, public or completely private. And I’m giving myself permission not to feel bad about it.
Anyway, we’ll see how we go.
Update 6th July: I’ve gone back to just making posts when I have something to write about.
Dynamo-Browse
Big week for Dynamo-Browse: I finally got v0.2.0 out the door. This is the release with scripting support (yes, it finally shipped). The scripting implementation has been finished for a while. The thing that was blocking it’s release was all the documentation I had to write: both the section in the manual and the API reference.
The build was also a bit of an issue. The release builds are built using GitHub actions. To get them published as Homebrew casks, the actions need to push them to another repository. The secret token used to access this repository expired, and I had to create another one. Not difficult, but the fact that I had to create a whole new secret instead of rotate the existing one was a little annoying. Getting the permissions right, and being forced to choose a different name (“Deploy Homebrew formulas v2”) didn’t help matters either.
But got there in the end. The v0.2.0 release is now available on dynamobrowse.app and GitHub.
I’ll reduce the time I spend on this for a little while. We’ll see how long that lasts. I use this tool for work so often and I’ve got a whole list of features I’d like to see added to it.
CCLM
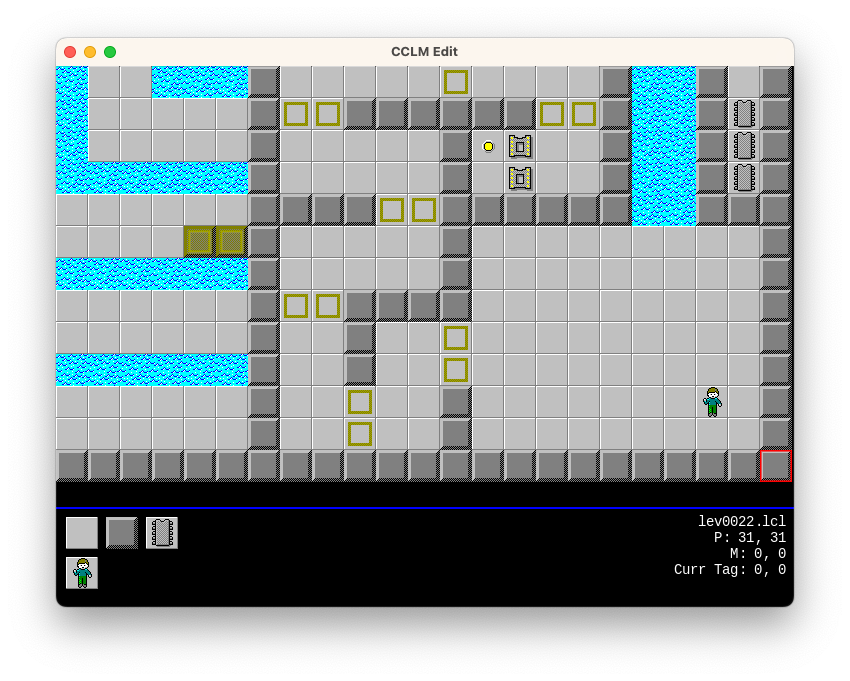
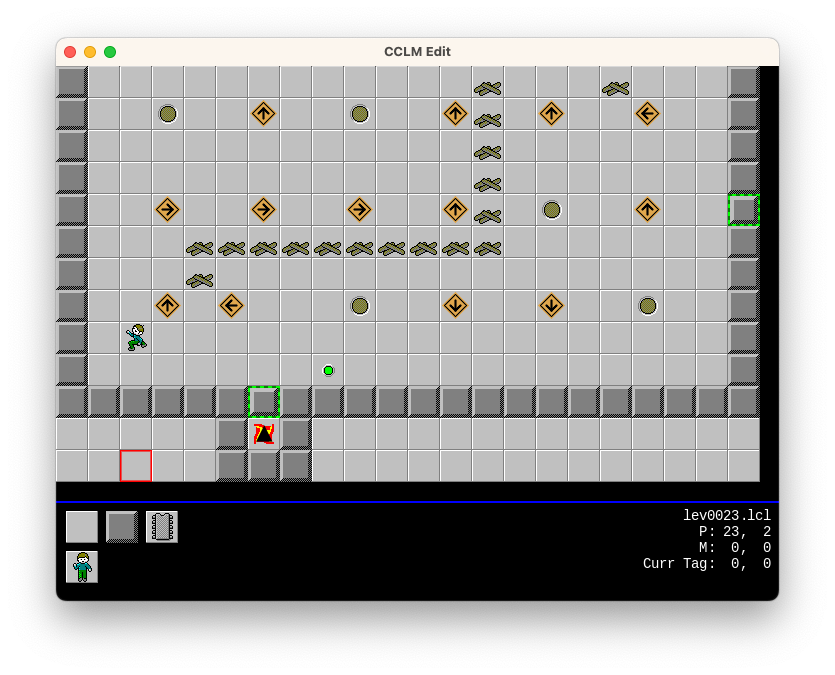
I got the editor up and running again last week and I spent Saturday designing a level with the working name “The Beach”. I’m a huge fan of the Developing series on the Game Makers Toolkit YouTube channel, and the latest video was about how difficult it was for Mark to design levels for his video game. I found I had the exact same problem for designing levels for mine (although I think the lack of effort I put into it doesn’t help). He pointed to a blog post by an indie game designer that had some useful tips to help with puzzle design. The one about using two elements that interact with it.
The one I worked on was for a custom element that will change boxes with a square indicator to blank tiles when pressing the yellow button. I’ve had this element around for a while but I haven’t actually used it in a level yet. I’d thought I’ll be time to do so, but the level I came up with seems a little simple. Not sure what I’d do about it. I could either rearrange it so that it appears earlier in the level set, or I can make it a little more difficult in some way.
Client Project
One thing that releasing Dynamo-Browse has given me is the opportunity to do a small client project. I’ve talked about this on lmika.org and the latest update is that I think I’ve convinced him to consider a static site, seeing that it would be easier for him to run (don’t need to worry about plugins) and would be easier for me to build (I don’t know how to use Wordpress, especially not their new block editor).
This week was basically coming up with a site layout. I had the opportunity to use Figma for the first time. Works reasonably well, but I’m wondering if Balsamiq Mockups was probably a better choice for a rough outline of what the site is to look like. But that’s all moot: a layout was put together and sent to the client for him to get some feedback.
Anyway, still early days here. I’m looking at possible Hugo templates to build the site in and possible hosting solutions that would work with the client. I’m not aware of options for static hosting other than the AWS, Cloudflare or Azures of the world. Not sure it will work for the client, although it’s totally possible that I’m just not looking in the right places.
So that’s it. Update one done. Although next week I’ll be taking some leave so update two might be slightly shorter (at least there’ll be no preamble) so it may be less about current updates. I guess we’ll find out together.
Completed the release of Dynamo-Browse 0.2.0. Most of the work in the last week was updating the manual, especially the scripting API. Some more updates need to be made for the query expressions as well, but I’ll publish what I have now and update that over time.